


Floral Hoop Wreath

7 Materials
$50
1 Hour
Easy
Today, here in New York, it is gorgeous, sunny and 62 degrees outside. Yes, there is still snow on the ground from our big snow storm we had a week or so ago, but spring is definitely just around the bend and I couldn't be more excited! Spring for me means sunshine (yeah yeah, I know, there will be "April showers" but I'm just thinking sunshine right now), birds chirping, the fresh smell of the air, beautiful blooms and a new baby girl for me and Rob. This project is the perfect addition to my spring decor and I hope y'all love it as much as I do! It was easy to make and can be changed up to match whatever season we're in and whatever style you may have.
We want to help you DIY, so some of the materials in this post are linked to sellers. Just so you know, Hometalk may collect a small share of sales from the links on this page.
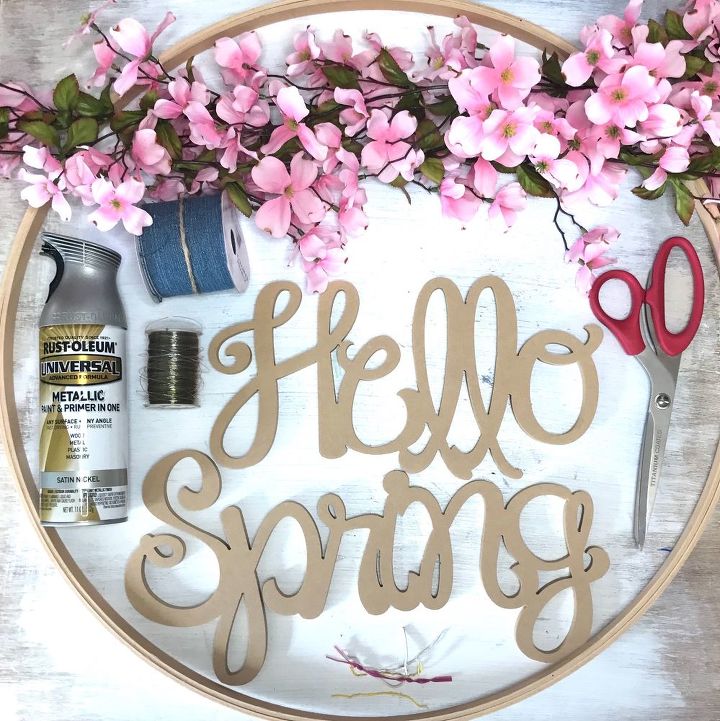
SUPPLIES:
-23" quilting hoop (I got mine off of Amazon)
-wooden words (I ordered mine on a website called build-a-cross.com, but you can find similar ones here on Amazon.)
-pink dogwood garland
-Rustoleum Universal Metallic spray paint (Satin Nickel)
-ribbon
-fishing line
-fabric scissors

STEP 1: Take hoop apart
First, I separated the quilting hoop by unscrewing it. You can keep the hoop together if you wish, but I figured I could potentially make two of these wreaths so I decided to separate them.
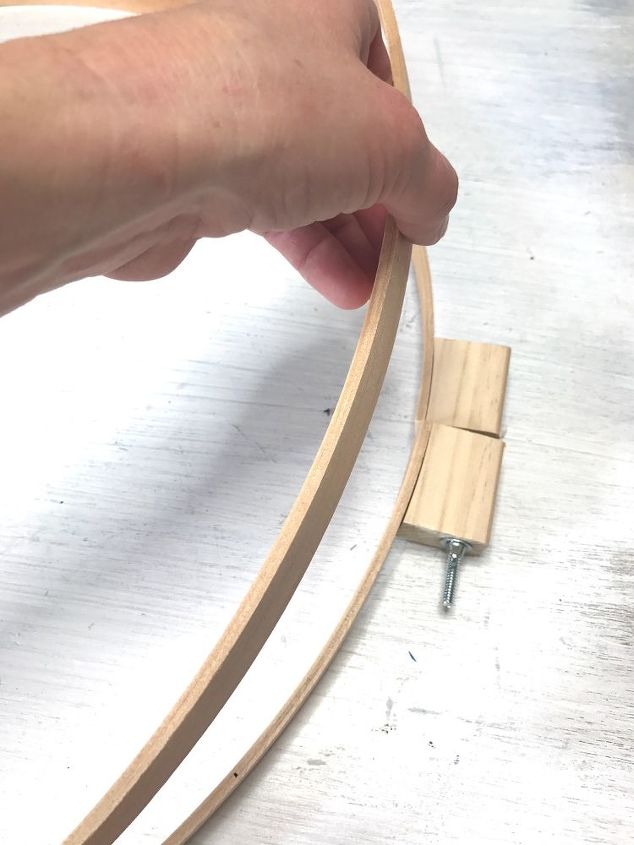
I chose to use the inner hoop to create my wreath with. You can use any wreath for this project, but I used the one I got from Amazon.)
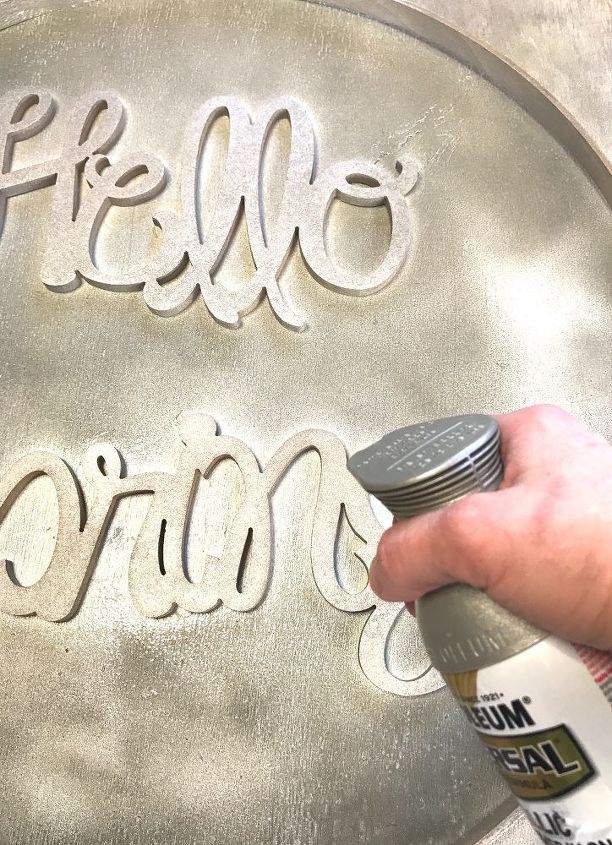
STEP 2: Spray words
Next, I spray painted my wooden words, "Hello Spring". These words were made with MDF so they held the spray nicely; all-in-all I applied 2 thin coats to each side. It's hard to find the phrase you want, but I did see a bunch of them on Amazon.
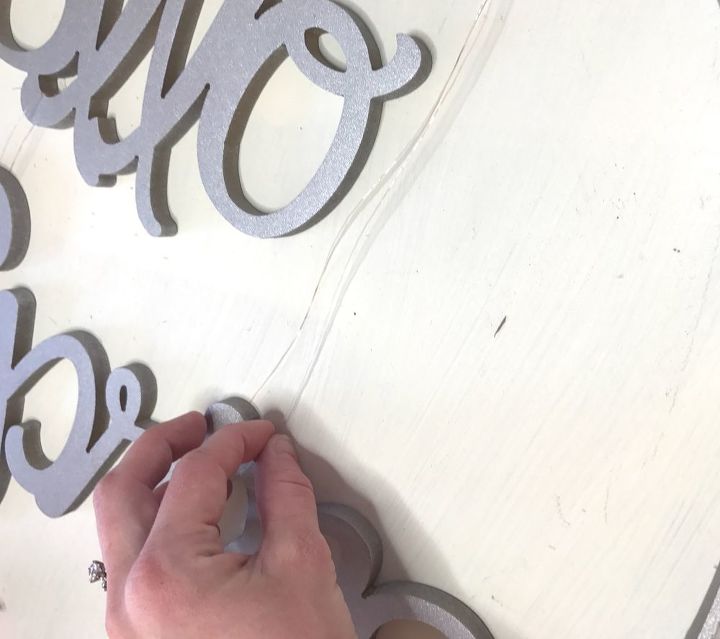
STEP 3: String up words
After my words were completely dry, I used fishing line to hang them from the inside of the hoop. You'll have to play with alignment and techniques for tying a secure knot so that the fishing line doesn't come loose. For my words, I didn't want them centered so I hung "Hello" from the hoop itself, a little more to the left of the hoop, then connected the first "l" of "Hello" and the "S" in "Spring" together, and finally tied a long piece of fishing line from the top of the hoop to the "n" in "Spring" so that the word was aligned a little closer to the right of the hoop. Again, this will change and vary depending on the size of your hoop and the words that you use.
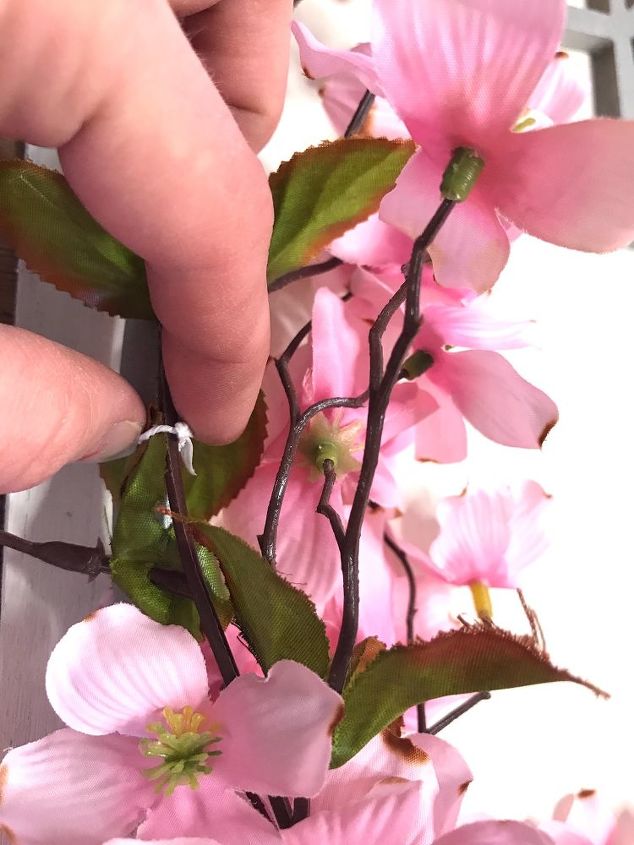
STEP 4: Attach garland/flowers/greenery
After my words were attached to the inside of the hoop, I laid out my garland along the hoop and secured it with bread ties. I'm a big of a hoarder when it comes to random things like bread ties--ya never know when you may need them! :)
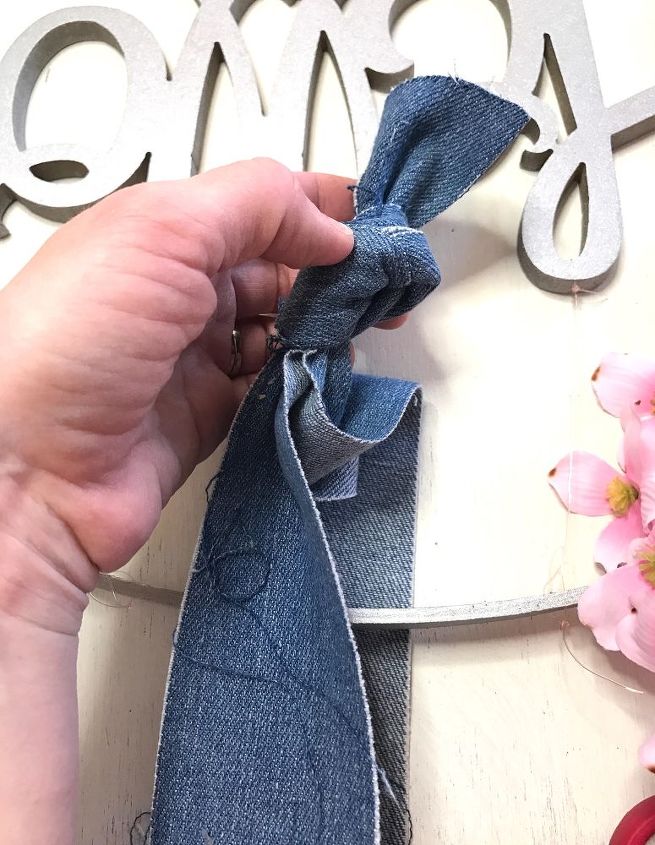
STEP 5: Add ribbon
I had some denim ribbon on hand from last spring, so I decided to tone down my hoop a little by adding it for hanging the hoop itself. I thought instead of making it super classy with a white or silver ribbon, the denim would add a flair of casual, keeping the overall look springy and fun. I simply tied the end in a knot and looped it through the hoop.
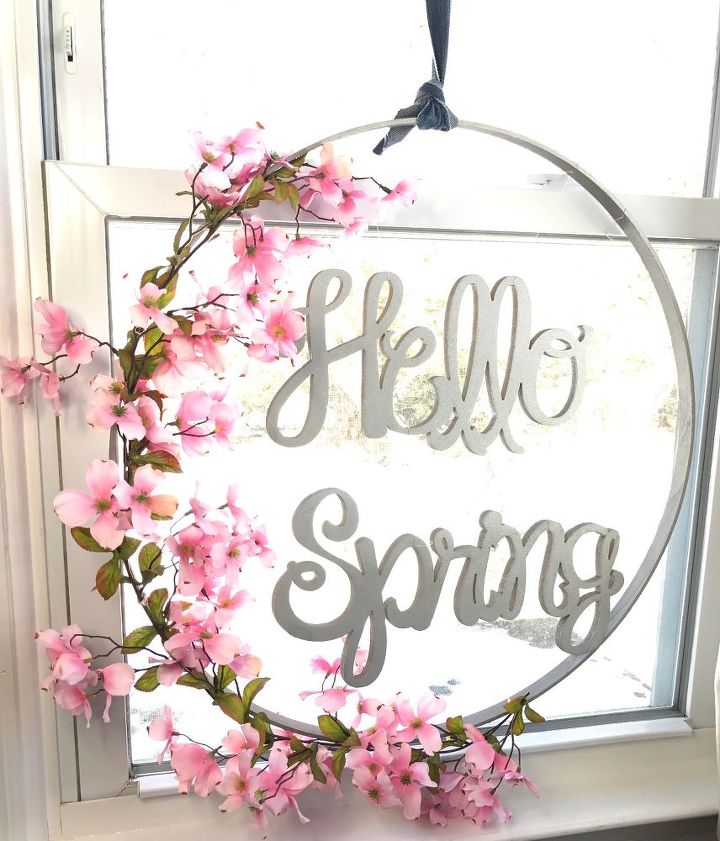
I'm not a fan of artificial flowers but I am so in love with this dogwood garland--I felt it was the most natural looking garland I've seen in a while, and the pink pops so well against the Satin Nickel color of the hoop and words. Here's to a beautiful spring ahead!
{
"id": "4094175",
"alt": "",
"title": "",
"video_library_id": "8112",
"thumbnail": "https://cdn-fastly.hometalk.com/media/2017/07/31/4094175/floral-hoop-wreath.jpg"
}
{
"width": 634,
"height": 357,
"showRelated": true,
"noautoplay": ""
}


Any price and availability information displayed on [relevant Amazon Site(s), as applicable] at the time of purchase will apply to the purchase of this product.
Hometalk may collect a small share of sales from the links on this page.More info
Comments
Join the conversation
2 of 38 comments
-
So beautiful! Thanks for the inspiration!
-
Lovely project and your video is concise and short. Just my style. Kudos.


Frequently asked questions
Have a question about this project?