


Framed Desk Organizer Using Gorgeous JoAnn Fabric

3 Materials
Slowly but surely, Rob and I are re-vamping and doing some remodeling in our little home. With these changes, I'm also trying super hard to hone in on a more specific look for my work space instead of just random unique things hanging around. I'm totally in love with the pretty JoAnn fabric I purchased for this desk organization project and even more in love with the result of this simplistic, yet functional addition to my space.
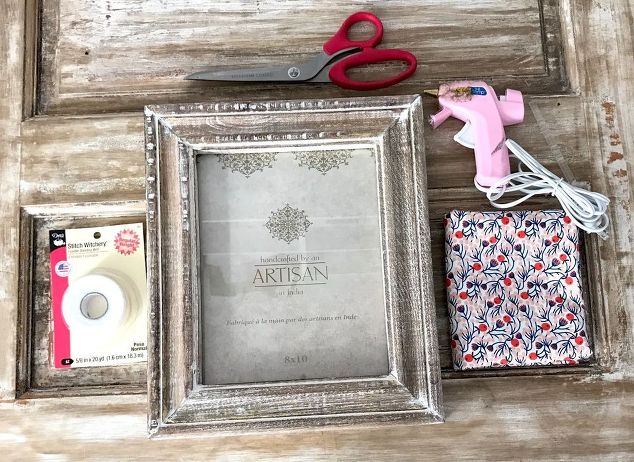
SUPPLIES:
-8x10 frame from (you can purchase a similar one here on Amazon)
-1/2 yd. fabric
-regular weight Dritz Stitch Witchery
-fabric scissors
-glue gun (you can use any glue gun you have, but I prefer my Ad-Tech High Temperature Glue Gun that I use all the time.)
Not pictured:
-Expo dry erase marker (it was the only thing I had in reaching distance of me...you can use a fabric marker or something that you can make light marks with for cutting)
-iron
Your Joann coupon is here! Just print and head on over to JoAnn to get started on that beautiful project you've always wanted to do. Scroll down to see the rest of this stunning project!
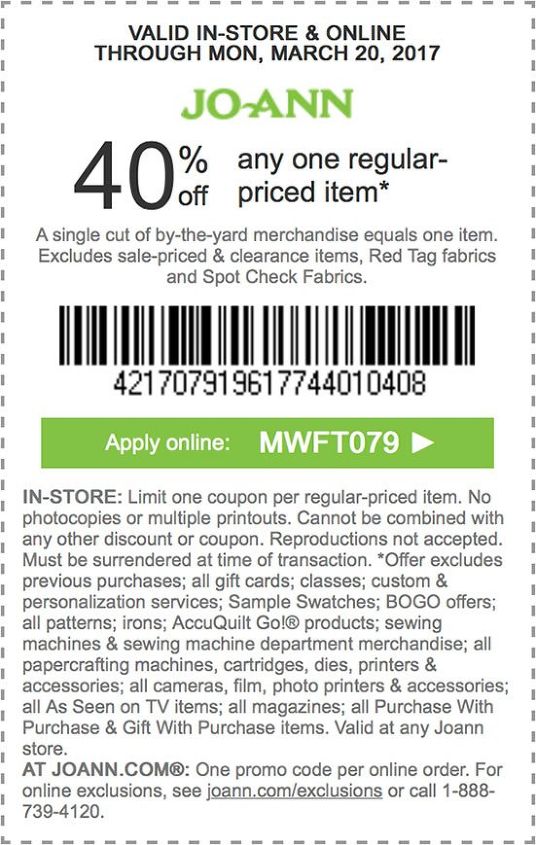
Your Joann coupon is here! Just print and head on over to JoAnn to get started on that beautiful project you've always wanted to do. Scroll down to see the rest of this stunning project!

STEP 1: Mark fabric and cut
First, I laid my fabric face down on the back of my frame and marked the corners around the edge of the glass. Make sure you give yourself 1/4" or so of excess fabric around the edge because you'll eventually glue the edges to the glass (or wood insert if you have an insert in your frame) and you want your fabric as tight as possible.
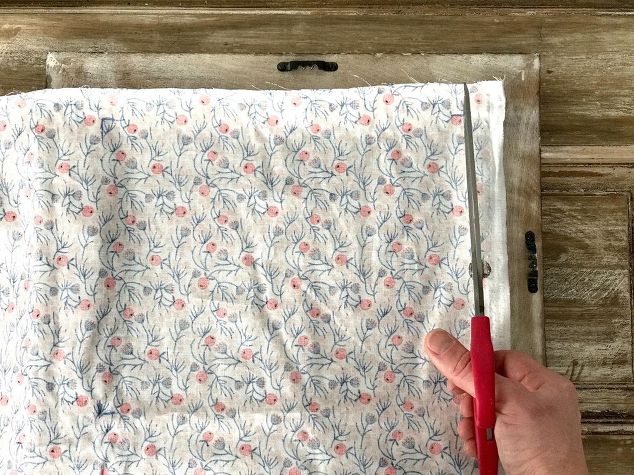
Next, I cut my fabric where I had made my marks, being careful to try and cut straight (I'm horrible at cutting fabric with scissors! People use a rotary cutter, because you can get nice clean lines, but I never even think of it until I'm already cutting.)
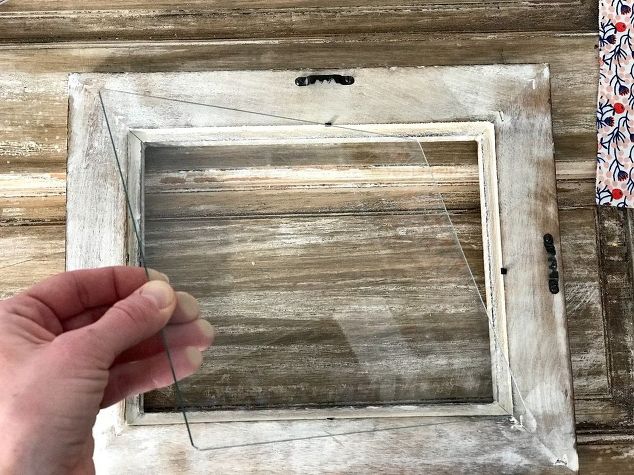
STEP 2: Remove glass and hot glue the fabric
After my base fabric was cut, I removed the glass from my frame...
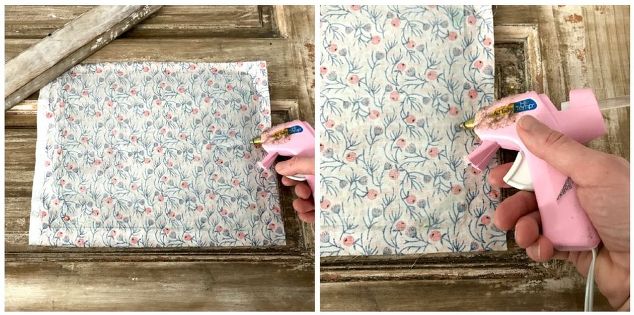
...then, I hot glued the glass to the back of the fabric. Make sure the fabric is as straight and tight as possible.
*Remember: we are going to use the exposed fabric side for desk organization! :)
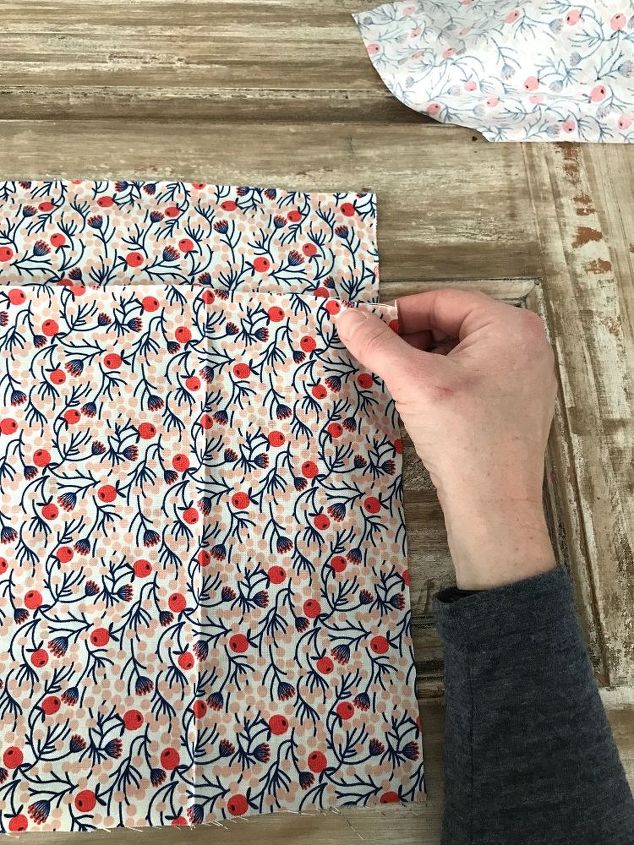
STEP 3: Create pockets
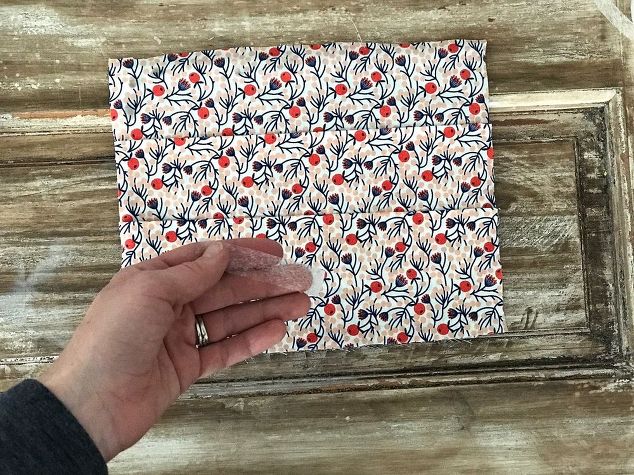
After my base fabric was glued onto my glass (again, if your frame comes with a wooden insert, you may use that instead of the glass--you can even use the easel backing itself but I didn't think of that until after the whole project was done--hindsight is 20/20, right?), I cut two more pieces of fabric, roughly the same size as my original piece. Then, I eyed up where I wanted my first pocket to go.
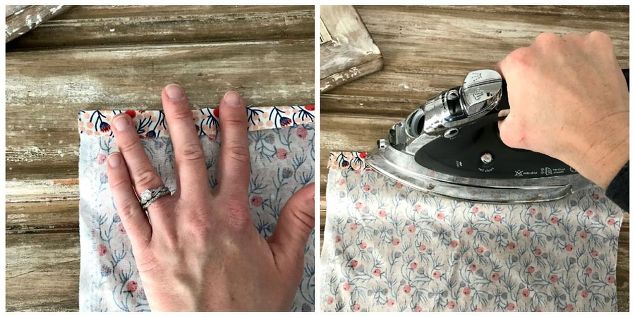
Then, I folded the top of the fabric down and ironed it back onto itself in order for it to stay still. After that, I cut off a piece of Stitch Witchery and placed it in the fold I had created. Then I ironed the fold again in order for the Stitch Witchery to adhere to the fabric, creating a nice, crisp edge.
I repeated each part of this step (Step 3) for a second pocket, also making sure to add Stitch Witchery to the sides.
*Note: I experienced some of the Stitch Witchery not wanting to adhere so I simply added a dab of hot glue in those areas. If you wish, you can use hot glue or fabric glue for the entire project, however, you have to be careful not to apply too much because you will create bumps in the fabric.
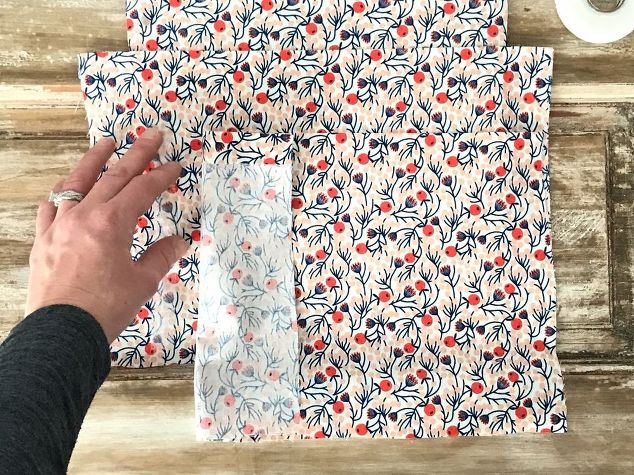
Finally, I cut the excess fabric off around the edge of the glass, ensuring that I still had roughly 1/4" of excess fabric. Then, ironed Stitch Witchery in between the bottom pieces of fabric. (I'm not the best at sewing, so this stuff is really great!)

When you're ironing on the last few strips of Stitch Witchery, give your whole surface a good ironing, making sure everything is nice and crisp.
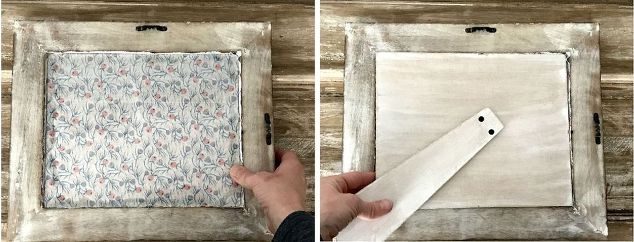
STEP 4: Insert fabric & secure frame backing
Lastly, I placed my glass with attached fabric back into my frame with the glass closest to me. Then, secured the easel frame backing.
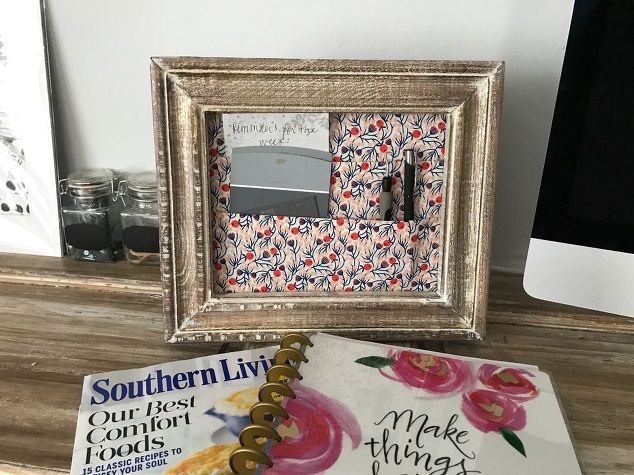
I'm so happy with how this pretty little desk organizer came out! Of course, if you're a sewer, I'm sure you can do wonders with the pockets but this 'ole girl sticks with adhesives (haha! Pun intended!). So, given the minimal supplies I used, I was pleased as punch with the result.
Comments
Join the conversation
2 of 4 comments
-
Yes my granddaughter will love it


Frequently asked questions
Have a question about this project?