


French Drum-style Table

4 Materials
$20
Medium
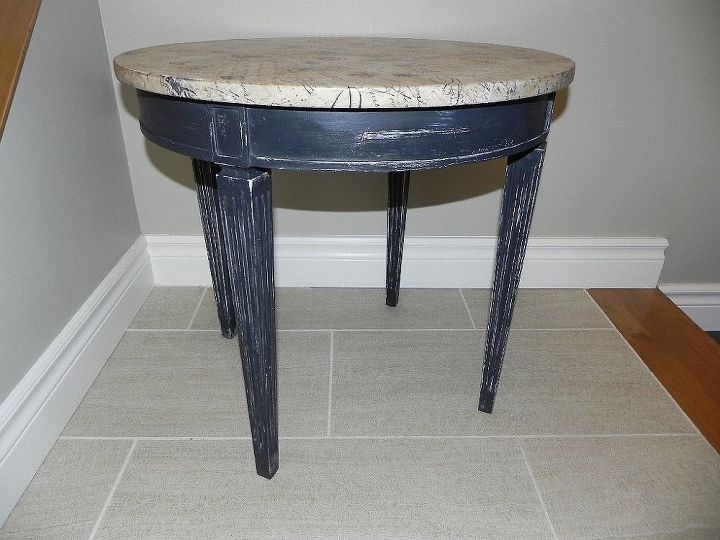
I've been admiring those drum tables you see online, in DIY projects, with new paint jobs, stains, stenciling, decoupage and looking oh-so-amazing! Those legs. It's the legs that do me in when I see a chair or table I must have. I call them 'sexy legs'. swwoooonnn!
When I found this table at a thrift store and saw that it was ONLY $8.50, I scarcely believed my eyes! I actually held my breath while I quickly went to the cash with it, paid for it and almost threw it into the back of my van. I sat behind the steering wheel and almost pinched myself to be sure it was all real! LOL
The top was thickly and badly painted so my initial idea of sanding and staining it had to change, but that just got me on a different path to having so much fun making this little gem over and then falling in love with it. Please read on to find out more. :)
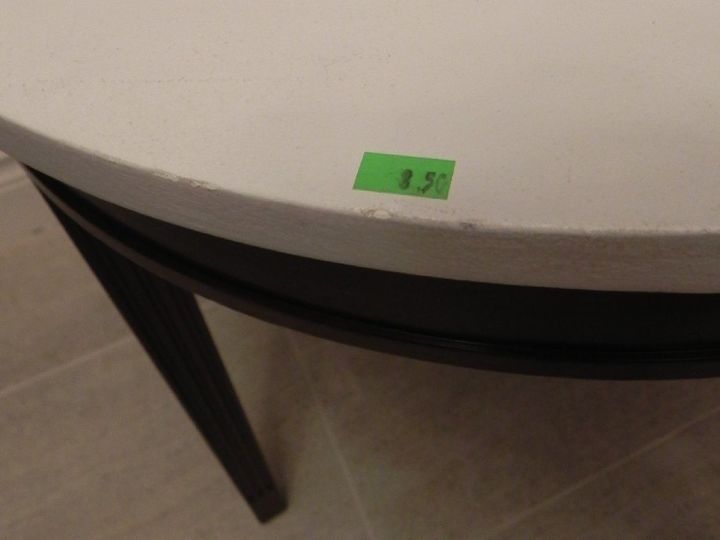
See? It's true - only $8.50!

How could I ever resist something with legs like these?
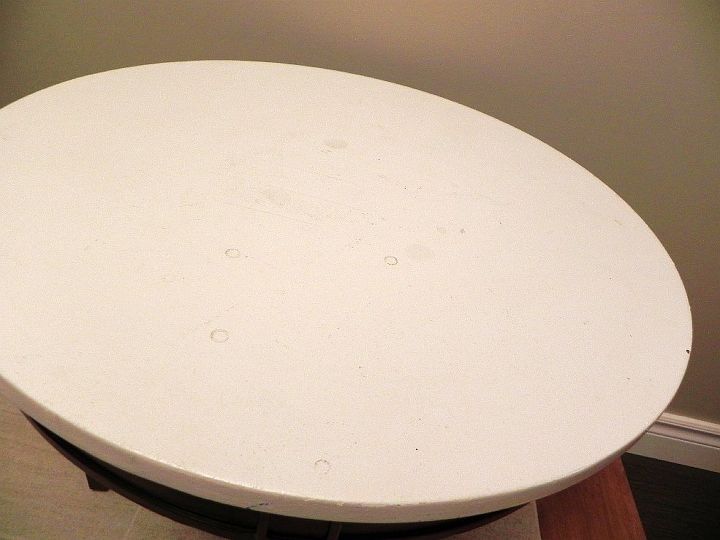
The top was badly painted and dirty, so I sanded it off the best I could, hoping I could stain and varnish it. When I saw the finish was pretty bad, I figured I could paint it so I used Graphite Rustoleum chalk paint and hoped that would work.
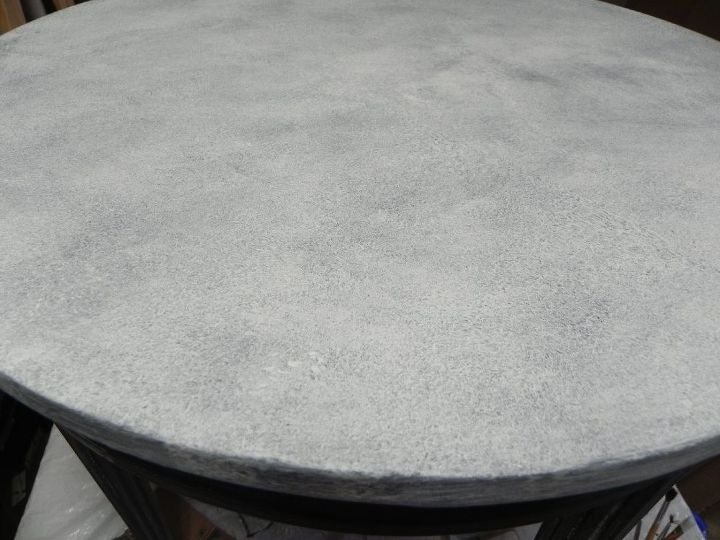
Hmmm... scratch that idea. It was UGLY! The finish was rough and though the table itself was made of solid wood, the top was some type of presswood that was not going to look good no matter what - unless I decoupaged it! This is a pic of it once the primer had been painted on top of the graphite chalk paint.
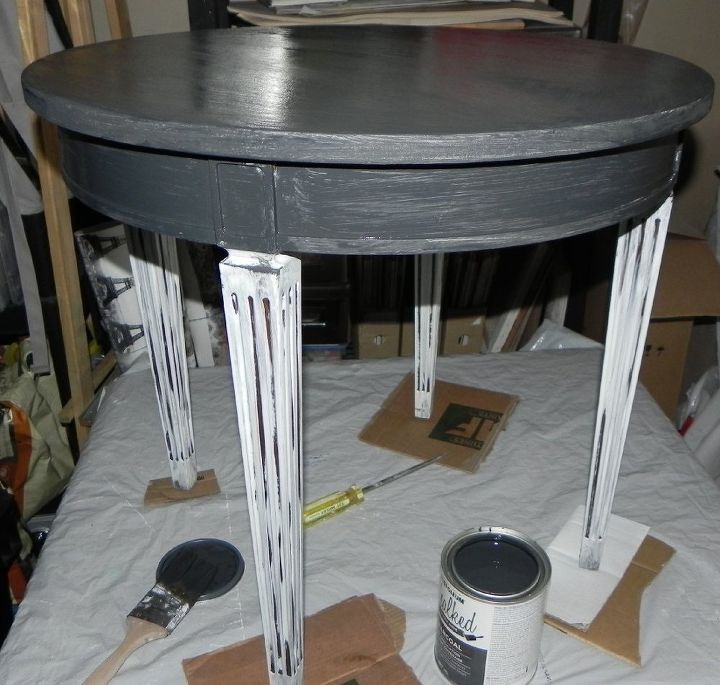
Once primed, I then applied graphite paint over everything but the top since I wanted a light background behind the tissue paper I was going to decoupage there. In theory, you don't have to prime before using chalk paint, but since I like covering up any dark woods or shiny surfaces before laying on a pricier chalk paint, I use Zinsser Bullseye 1-2-3 latex (or oil in some cases) primer. It gives me good coverage and is cheaper to use. Also, I wanted to have white show through once I distressed the table.
Here is the tissue paper I chose. I got it at Michael's and just love it!

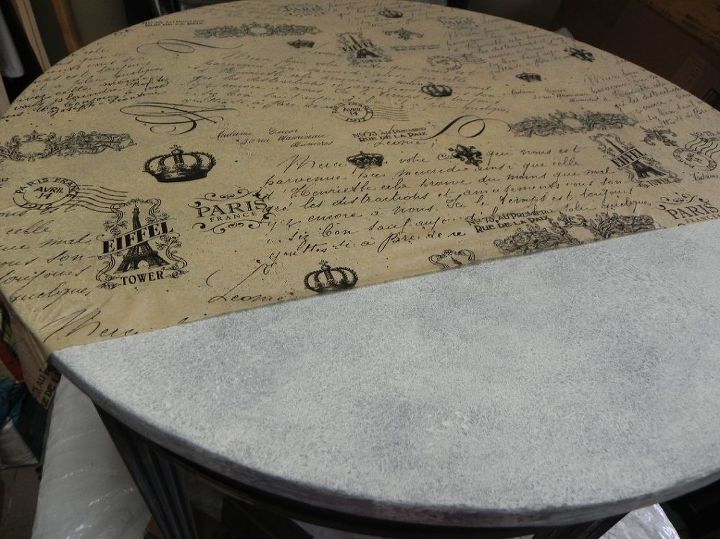
I applied Mod Podge onto the table and carefully measured out the paper so I'd have a large full piece on there. Turns out, that isn't as easy as it looks to do and I ended up tearing pieces, intentionally, and applying them all over for a more fun look. I forgot to take pictures after this as I was 'in the zone' and enjoying going from step to step. Please check below for pictures of the final outcome and I will explain what I did.
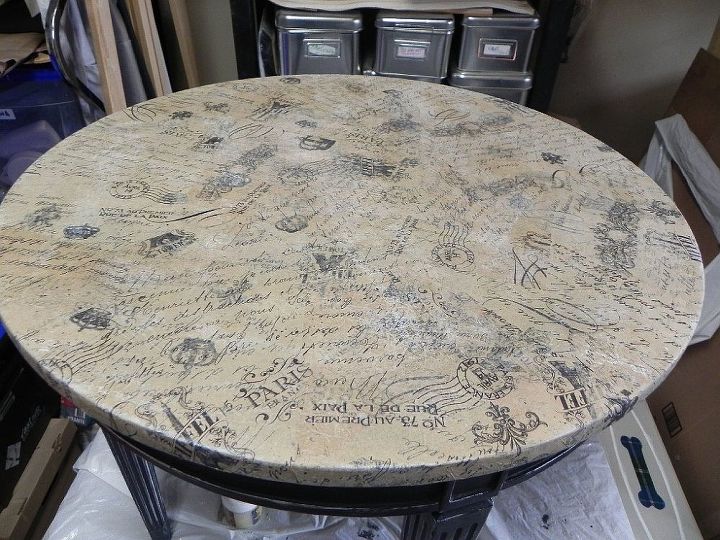
Once I applied the pieces of tissue paper with the Mod Podge (or white glue and water mix), I then used that in four final coats over the whole thing and edges where the paper was turned down. It gives it a resistant finish. Before the final coat, and while the glue was still wet, I did a bit of a dry brush technique to add some white to the top. The legs and apron of the table where showing a lot of white after distressing, which is what I wanted, but I felt it needed a touch on the top too.
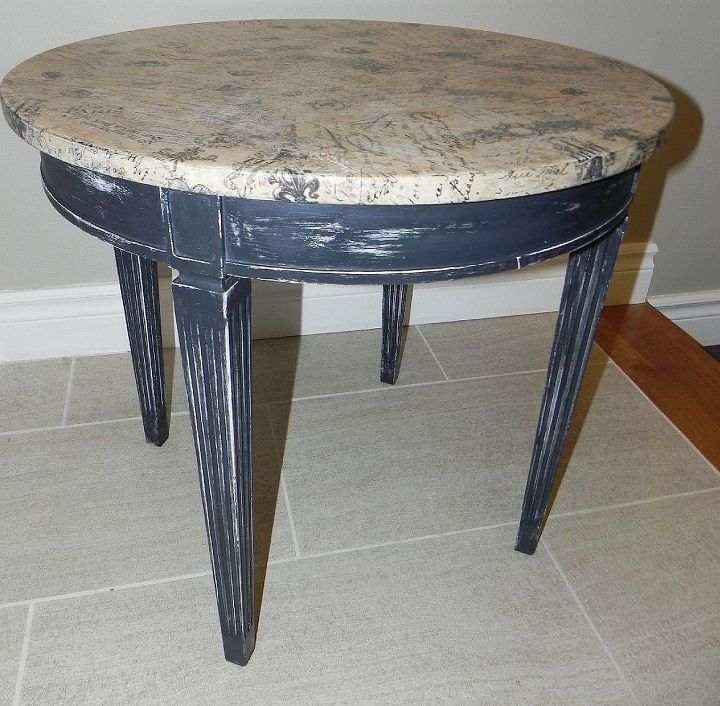
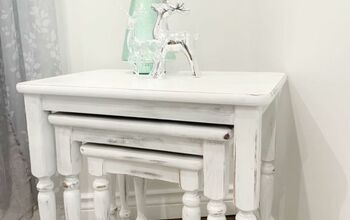
Here she is! Final product and I loved it! I kept a lot of white showing through two coats of graphite and then used two coats of beeswax to polish it off.

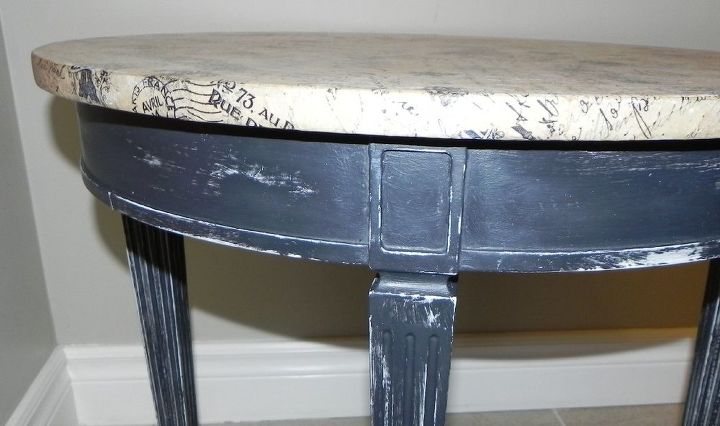
Detail.
Though I loved this table, I had no room for it so sold it to someone who loved it just as much. That makes me happy. :)
Comments
Join the conversation
6 of 10 comments
-
Great save! Your post made me think of the Ikea "Start the car" commercial, because the woman thinks the store made an error in her favour...lol
- See 2 previous
-
Seriously amazing transformation :)


Frequently asked questions
Have a question about this project?