


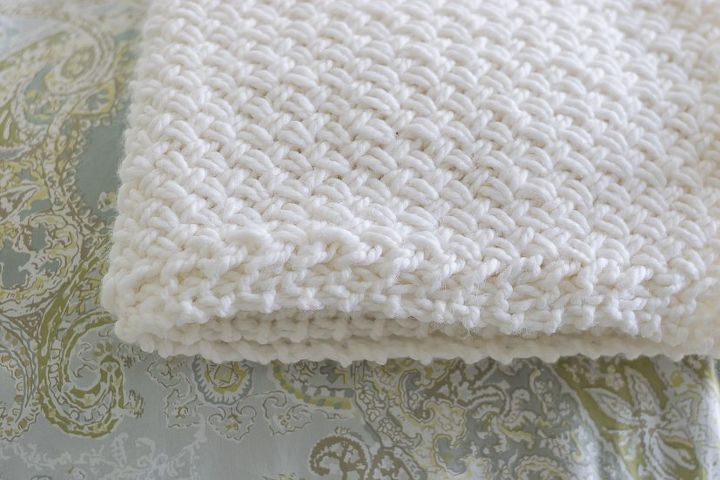
Knit a Diagonal Basket Weave Blanket
3 Materials
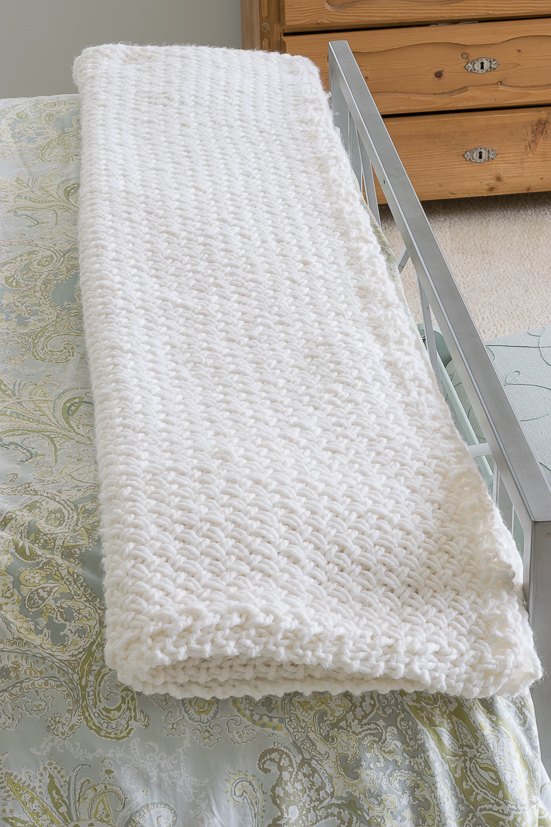
I have had this blanket on my 'want to make' list ever since I discovered the Diagonal Basket Weave stitch last year. I used the stitch to make some washcloths and fell in love with the woven pattern it creates and the simplicity of the stitch. It really is not much harder than a stocking stitch, but the end product looks so unique and looks much harder than it actually is. So, when I found myself needing to stay of my feet recently, I took advantage of that time to make this blanket. All told I probably spent the evenings over 2 1/2 to 3 weeks to make this blanket, which is just perfect on the foot of my bed.
Materials Needed:
I used 22 skeins of Plymouth Yarns Encore Mega, a wool/acrylic blend. With 63 yards per skein, the blanket took 1,386 total yards. In the perfect world I would use 100% wool, but that gets pricey. And since I want to be able to wash this as needed, the blend was a better option.
US 19 (15mm) circular needles
US 17 or 15 needles for binding off
Directions to Knit a Blanket, using the Diagonal Basket Weave Stitch (with a finished measurement of 69" by 59") :
- Cast on 151 stitches (or a multiple of 2 stitches plus 1) gave me the 69" width.
- 1st and 2nd Row: K1P1 and repeat for remainder of 1st row, ending with a K1
- For the next row and every subsequent knit row; K1,P1,K1 then skip the next stitch (but leave the stitch on left-hand needle) and K tbl the subsequent stitch, leaving that stitch on the left-hand needle. Then bring your right hand needle up front, knit the stitch that you initially skipped and let both stitches slip off of your needle. Repeat this pattern until the last two stitches and P1K1.
- Then, for the 2nd row and every subsequent purl row; K1,P1,K1, then skip the next stitch (but leave on the left-hand needle) and purl the subsequent stitch, leaving that stitch on the left-hand needle. Then purl the stitch you initially skipped and let both stitches slip off of your needle. Repeat this pattern until the last two stitches remain and P1K1.
- Work until desired length (I worked mine until it 59″).
- Work a seed stitch (K1P1) on the next 2 rows.
- Switch to your smaller needles to cast off. This will help prevent your bind off edge from flaring out.
Because a picture (make that a video) is worth a thousand words, I made a quick video showing both the knit side as well as the purl side of the Diagonal Basket Weave Stitch. The video also shows the beginning and end of a row.
{
"id": "3757774",
"alt": "",
"title": "",
"video_link": "https://www.youtube.com/embed/LphfApWKgvU",
"youtube_video_id": "LphfApWKgvU"
}
{
"width": 634,
"height": 357,
"showRelated": true
}
And in the off chance you don't need a blanket, this would make a fantastic gift for someone.


Want more details about this and other DIY projects? Check out my blog post!
Comments
Join the conversation
2 of 3 comments
-
Aw...thanks friend!
-
Your video is GREAT! It makes your first statement true: that it's not much harder than stocking stitch! Thanks!


Frequently asked questions
Have a question about this project?
Hello!
I am about to start off this project and super excited to do so! Your video is very helpful! One clarification needed though:
1st row: K1 P1 K1 and repeat til last stitch which is K1
2nd row (which I assume will be the WS): K1 P1 K1 and repeat like row 1?
Essentially creating a seed stitch pattern for the border I am assuming?
Let me know if I am reading the pattern wrong!
Thank you!