


Storage Bin to Toy Box

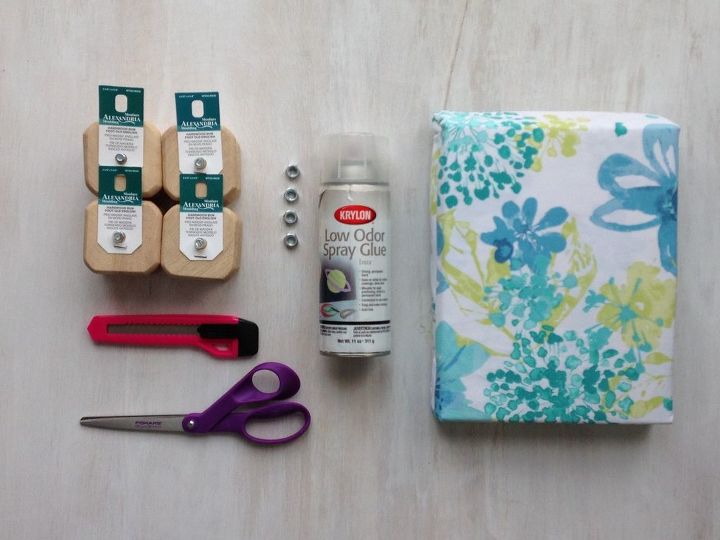
8 Materials
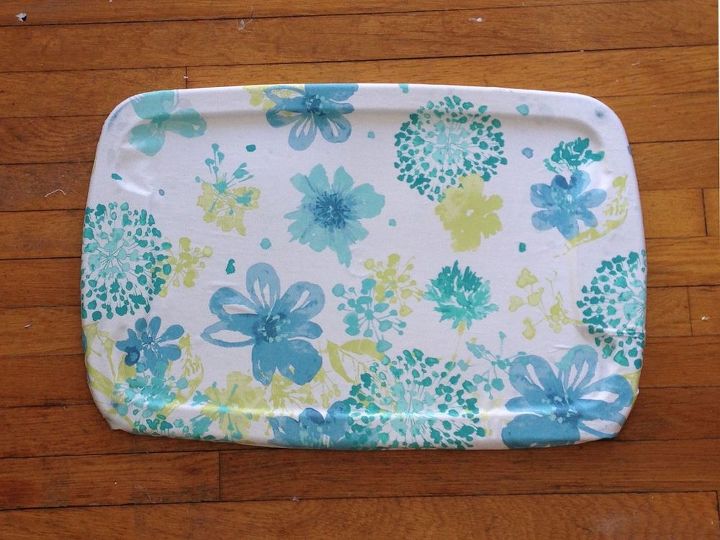
Do you have one of those plastic storage bins lying around? You know, the ones we use for moving, storing decorations and tucking away clutter? I've found another great use for these bins - a toy box! Create a playful toy box with a bin, fabric and a little glue.
We want to help you DIY, so some of the materials in this post are linked to sellers. Just so you know, Hometalk may collect a small share of sales from the links on this page.
SUPPLIES:
- Fabric (I used a curtain panel)
- Scissors
- Wood Fence Post Caps ( x 4)
- Lock Nuts ( x 4)
- Wooden Letters (optional)
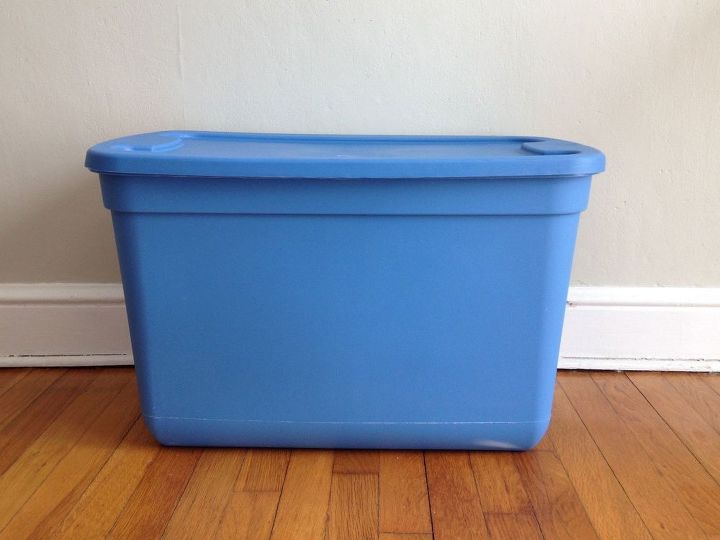
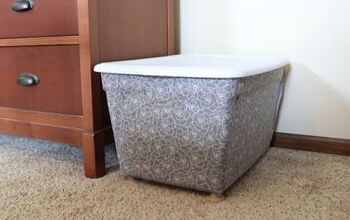
This is the plastic storage bin. I'm sure you have one of these in your home. If not, Amazon carries a whole selection you can use for this project.
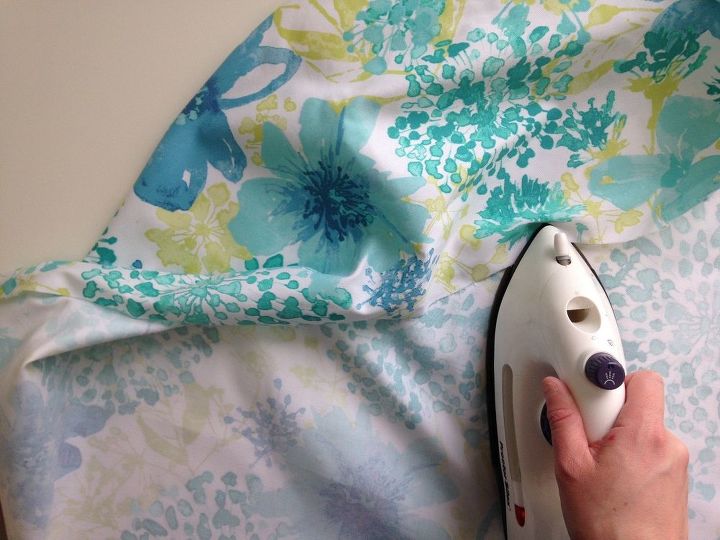
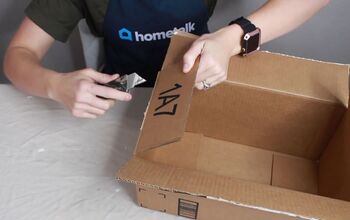
Step 1: Measure and iron your fabric
It's best to first iron your fabric so you don't have any wrinkles. Then measure and cut it out according to the size of your bin. Make sure to cut one piece of fabric per side. Leave about an extra inch on each piece.
Step 2: Measure & Cut.
Cut out one piece of fabric per side (including bottom and box lid). Leave about an extra inch on each piece.
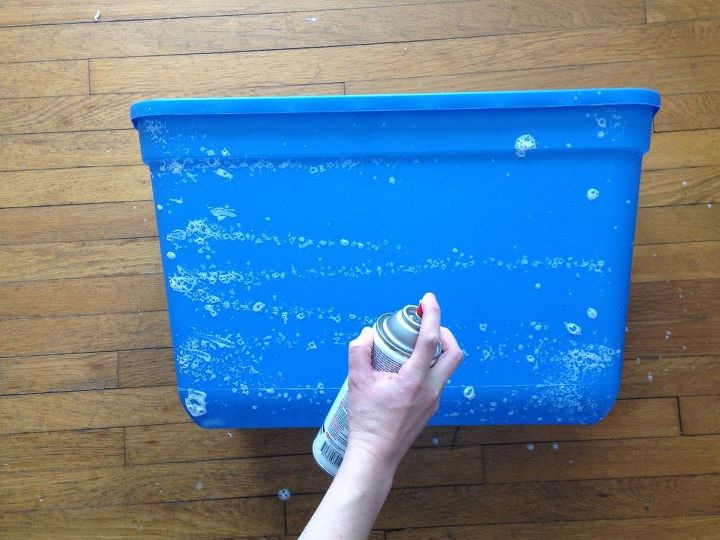
Step 3: Glue the fabric to the bin
Using your spray adhesive, spray the glue on one side of the bin. Let it dry until it's tacky and clear. Only spray one side at a time.

Apply the first fabric piece onto your tacky glued surface. Smooth out any bumps and lumps and follow the edges of the bin. Continue gluing and apply your fabric to each side of the bin.
Step 4: Add fabric to the bottom of the bin & your lid.
Using the same method as above, apply the fabric pieces to the bottom of the bin and the lid. You don't have to do the bottom, but I think this makes the bin look nicer.
Don't forget to cover your bin lid too!
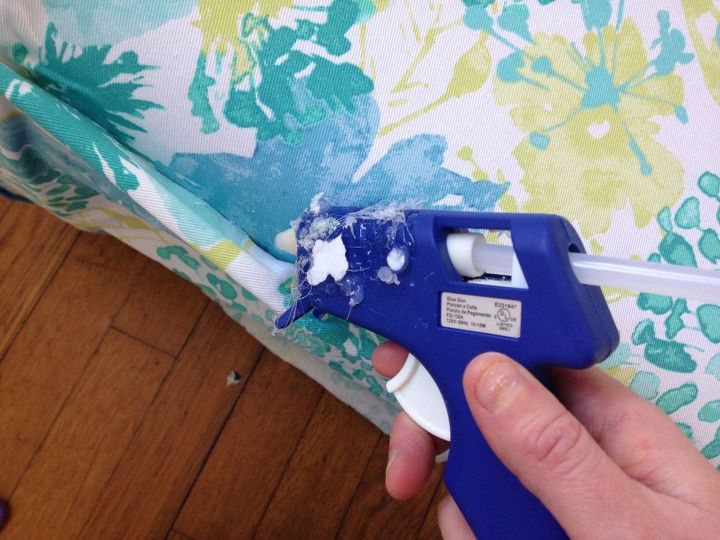
Step 5: Clean up the edges.
Fold under any raw edges of your fabric pieces. Using your hot glue gun, adhere the folded edge to the bin. Continue tucking and gluing all four sides of your bin, as well as the bottom and the bin lid. This makes your bin look much cleaner.
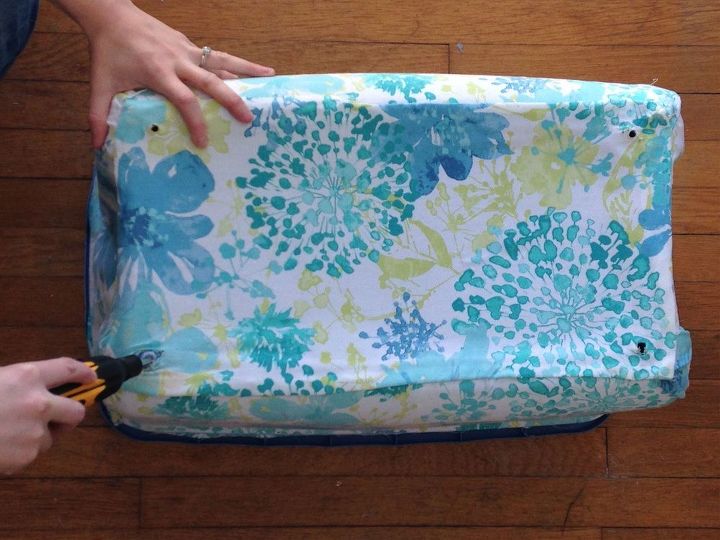
Step 6: Make holes at the bottom of your bin
Using a drill or a screwdriver head, poke one hole per corner into your plastic bin. These are the holes your fence post end caps will be going into, so you need to ensure the holes are large enough for your end cap screws. It might take a bit of effort to cut through the plastic, but it shouldn't be too hard.
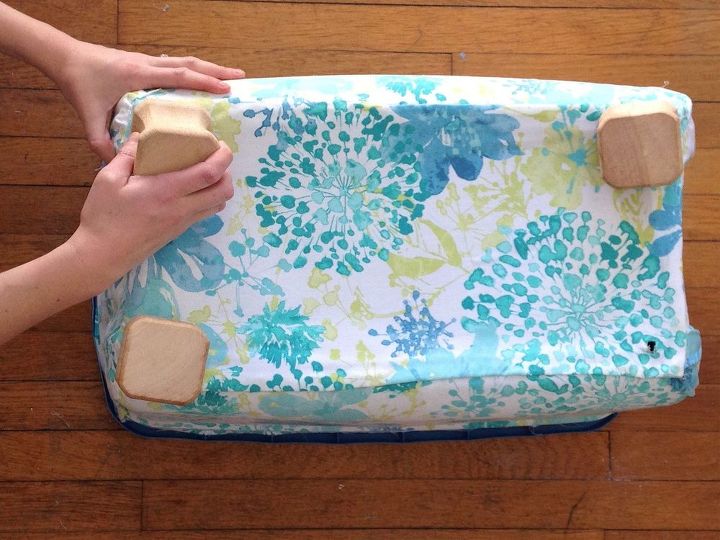
Step 7: Screw in your end caps.
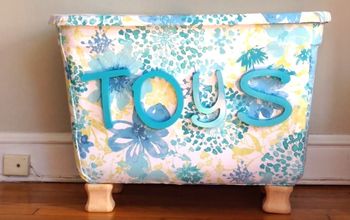
Grab those cute little feet and place one on each corner above the hole you created. If you want, you can paint the caps to match the fabric of your bin, but I liked the natural wood look, so I kept them the way they are.
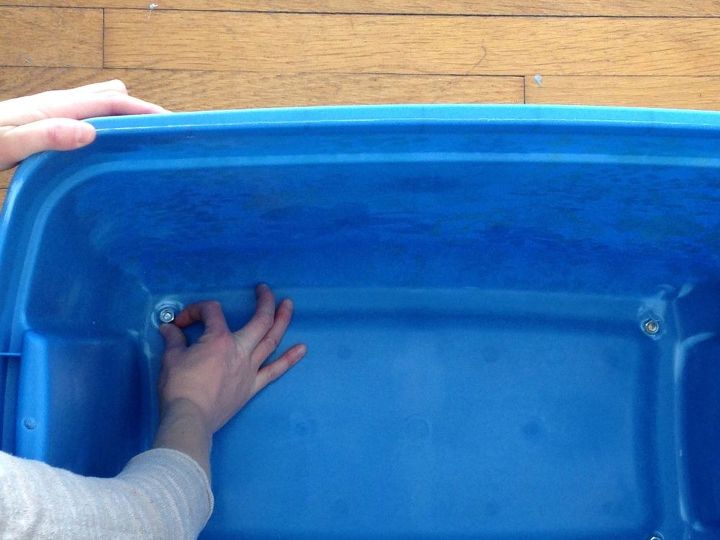
Then flip your bin over and screw one lock nut onto each of the end cap bits. Tighten each one firmly, so your legs are stable and not wobbly.
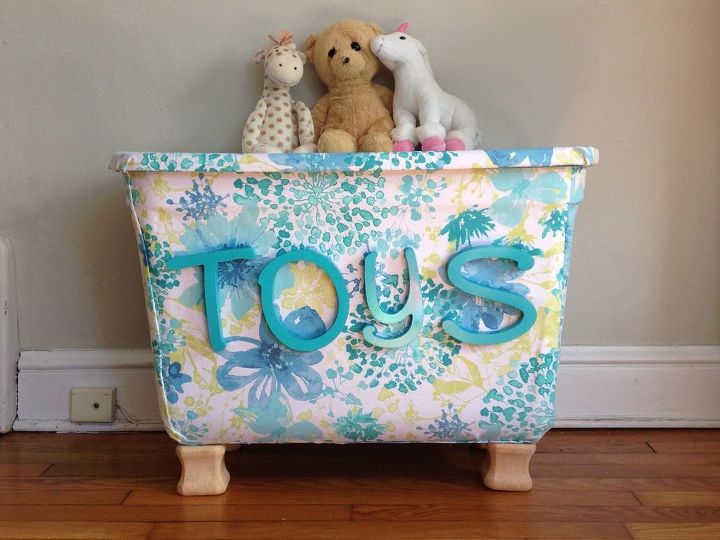
Step 8: Embellish with wood letters
This step is completely optional, but I chose to add some wooden letters to the front of the bin with hot glue. I'm so thrilled with the end result, and I can't believe how much stuff actually fits in the bin. Now I have a place to store all of my kids' toys, and it looks nice, too!
Then flip your bin over and screw one lock nut onto each of the end cap bits. Tighten each one firmly, so your legs are stable and not wobbly.


Any price and availability information displayed on [relevant Amazon Site(s), as applicable] at the time of purchase will apply to the purchase of this product.
Hometalk may collect a small share of sales from the links on this page.More info
Comments
Join the conversation
2 of 113 comments
-
A few years ago a child died when the lid on a wooden toy box fell on his neck. This is the first time I've seen a safe toy box. I will definitely try this darling idea.
What a great shop idea. And, a great idea to put in your closet to collect clothes for donation and to de-clutter at the same time.
-
Love this


Frequently asked questions
Have a question about this project?
I have some vinyl shelf liner I'm going to try this with for a more upscale look. Bought it a couple of years ago, now I have a project for it!
Very cute idea. I would've thrown the toys in the plain ole bin and called it done! Nice way to customize a toy bin for each child's room. So, where did you get those post caps that you used for feet? I like that style for the furniture re-do I'm planning.
Doesn’t the fabric on the lid edges loosen each time you open up the container?