


How I Tiled My Fireplace Hearth
5 Materials
1 Day
Medium
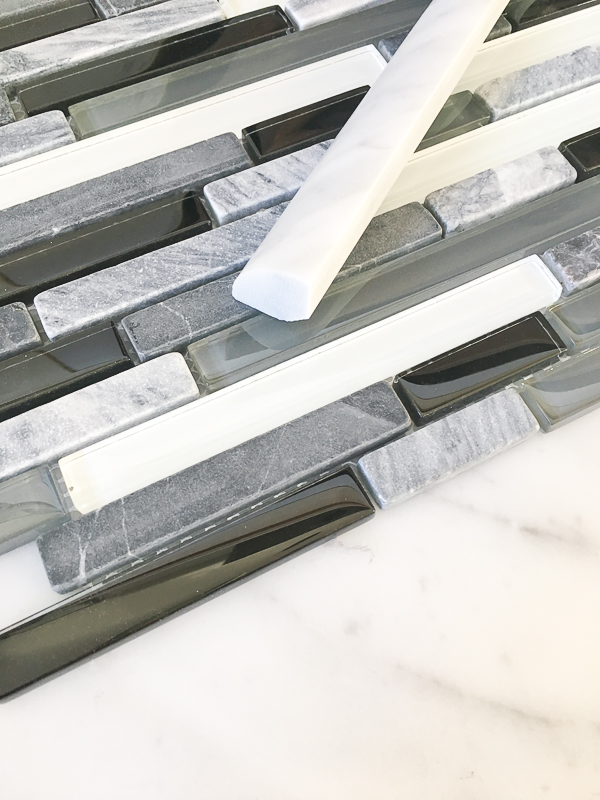
After building up my hearth (which you can read about here), it was time to add the tile! I chose these gorgeous 18" x 18" honed Carrera marble tiles for the hearth, with matching marble quarter round trim for the edges. The mosaic tile pictured will be installed on the fireplace surround.
I purchased a box of six 18" x 18" tiles, even though I only needed four for the fireplace hearth. This way I could choose the best ones that flowed well from one tile to the next. I numbered them with painter's tape to keep track of the order.
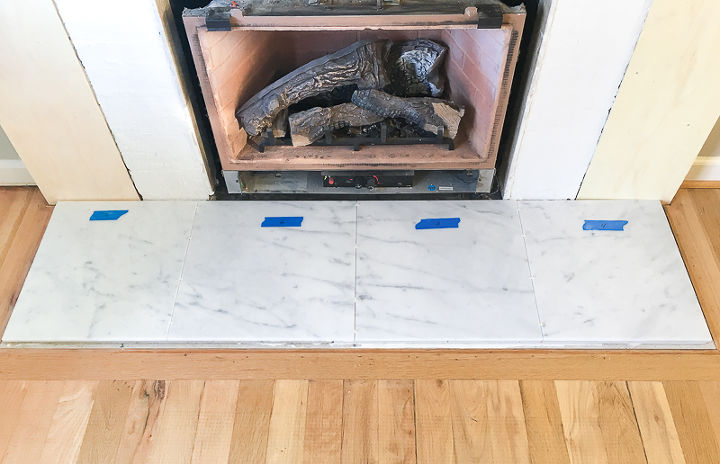
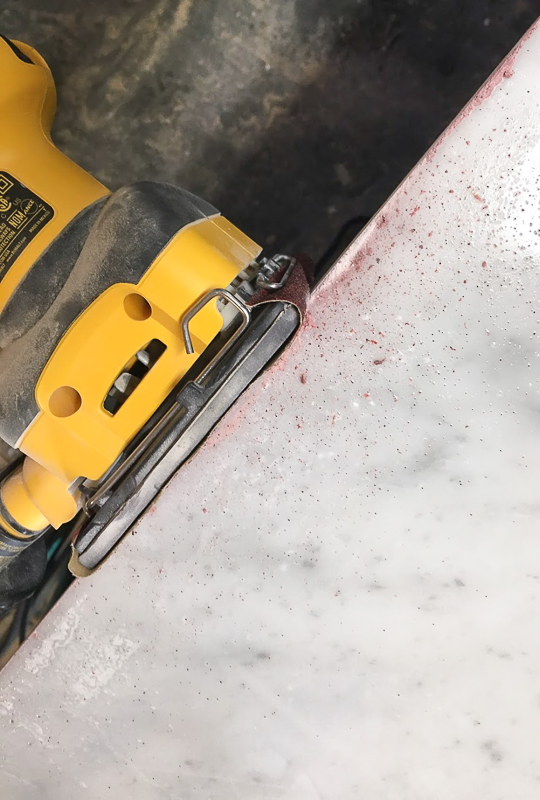
The end pieces needed a few inches cut off with a tile saw to fit on the hearth. Then I sanded the cut edges smooth with 60 grit sandpaper.
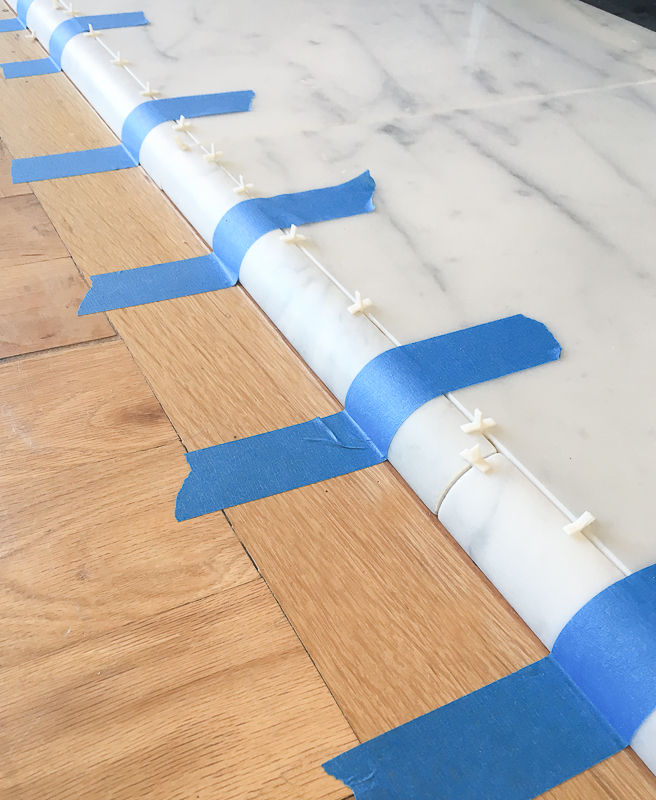
Large tiles like these need special large-format thin set mortar to prevent sagging. I applied a thin layer to the hearth, then set the marble tiles in place. I used tiny 1/16" spacers for minimal grout lines.

The marble quarter round trim needed special installation. I wanted them to adhere only to the backer board, and not to the hardwood floor surrounding the fireplace hearth. I used Liquid Nails for marble, which is easier to control than mortar.
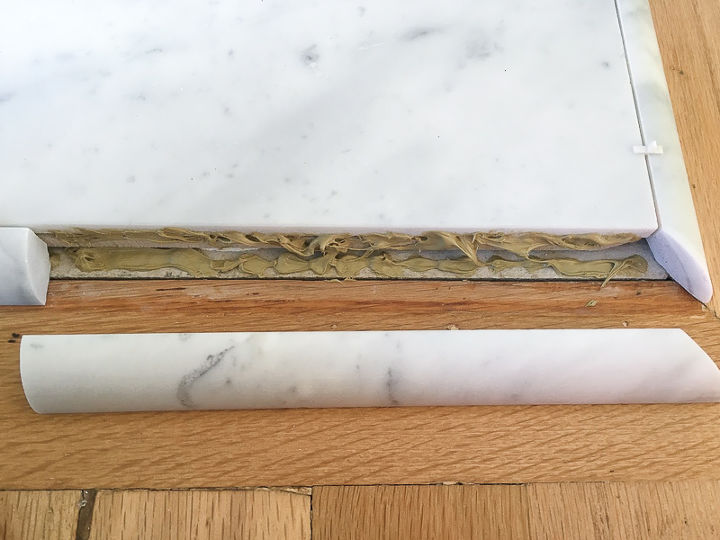
To accommodate the trim that will be installed at the corners of the fireplace surround, I cut a notch in the quarter round trim end.
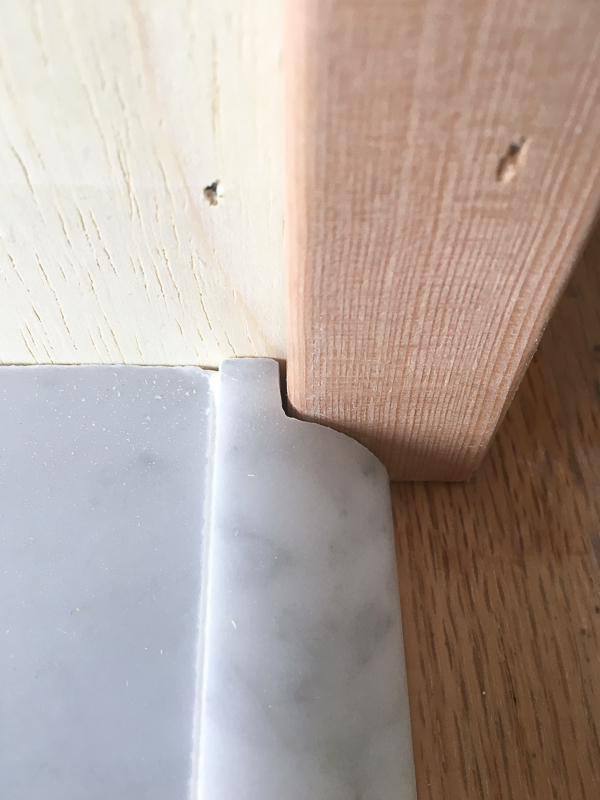
I used 1/16" spacers again, and held the quarter round in place with painter's tape until set.
Once everything is dry, it's time for the fireplace surround tile! If you want to see my entire fireplace remodel series, click here.

Want more details about this and other DIY projects? Check out my blog post!


Frequently asked questions
Have a question about this project?