


Farmhouse Dining Room Table & Chairs Makeover
9 Materials
$100
2 Hours
Easy
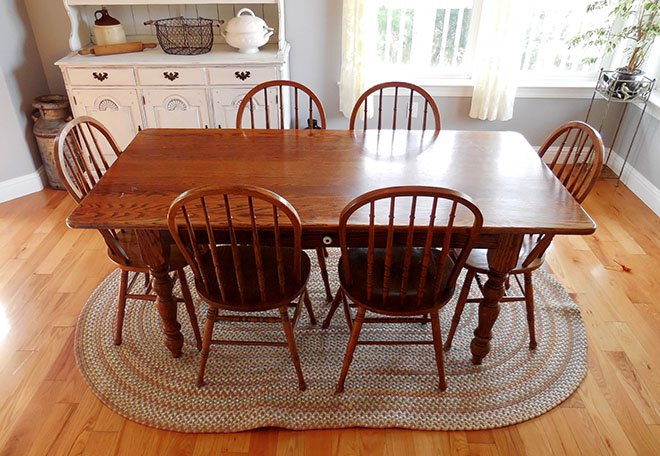
I finally got around to refinishing and painting my dining room table! I found this oak wood farmhouse dining room set on Craigslist. What attracted me to this set is the table is very solid and is only one piece (no table leaves).
I also liked that it has a drawer on one side (you can see it in the photo below). You can’t see it in these photos, but the set was very scratched up and had water damage on the table top and a couple of the chairs from years of use.
Here’s my supply and material list for this project:
- Electric Sander
- Sanding pads in 80 and 150 grit
- 1 quart Varathane Wood Stain in Kona
- 1 gallon Varathane Polyurethane in semi gloss
- 1 quart Valspar Chalky Finish Paint in Kid Gloves
- 1 pint Valspar Antiquing Wax
- 1 paint Valspar Sealing Wax
- Paint and wax brushes
- Soft cloth rags
First thing we did was moved the table and chairs into our shop for the sanding, staining, and polyurethane coats. Unfortunately, I didn’t get any pictures of this part of the process because I simply forgot do (I know; bad DIY blogger, bad!). But I will describe it here and I will tell you that this is a very dusty and stinky part of the process, so you do not want to do it inside your home. Since all the pictures I do have of the remaining steps are inside of our home, I want to make it clear that I did not do any of the sanding, staining, and polyurethane coats inside our home.
We sanded the table top and chair seats with a palm sander and a detail (triangle pad) sander. Sanding the table top went quickly enough, but it took a lot of time to sand the six chair seats as there was a lot of detail work between the chair spindles.
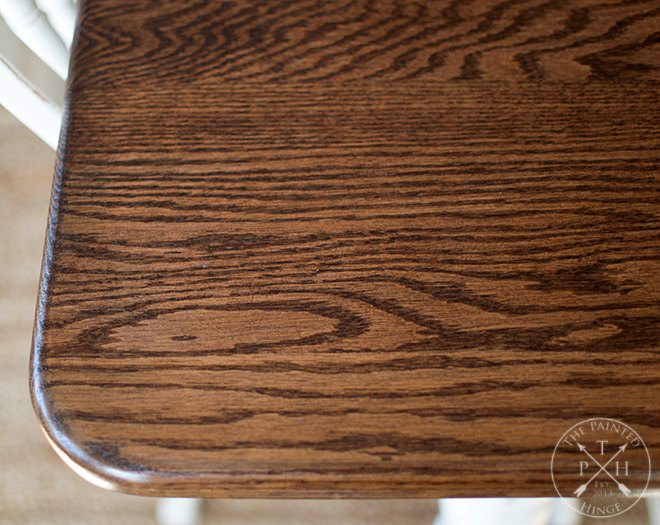
Once everything was sanded and wiped clean, I applied one coat of the stain, wiping off any excess with a dry, dust-free cloth. The stain brand and color I used is Varathane Wood Stain in Kona. I could have applied another coat if I wanted it to be darker, but I was satisfied with the color with just one coat.
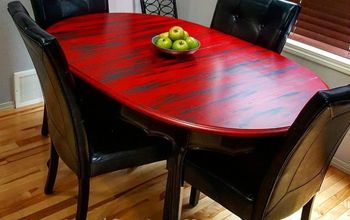
I allowed the stain to dry overnight before I applied the polyurethane coats. I applied three coats of polyurethane, allowing it to dry a few hours between coats. The polyurethane I used is Varathane polyurethane in semi gloss. I don’t know if it’s true with all brands/types of polyurethane, but with this one if I allowed it to dry more than 24 hours between coats, I would have to lightly sand the previous coat before applying another coat. I wanted to avoid doing that, so I made sure that I timed the coats to where I could get them all applied within the course of one day. You can see the finished tabletop in the picture below. I really love how well it turned out!
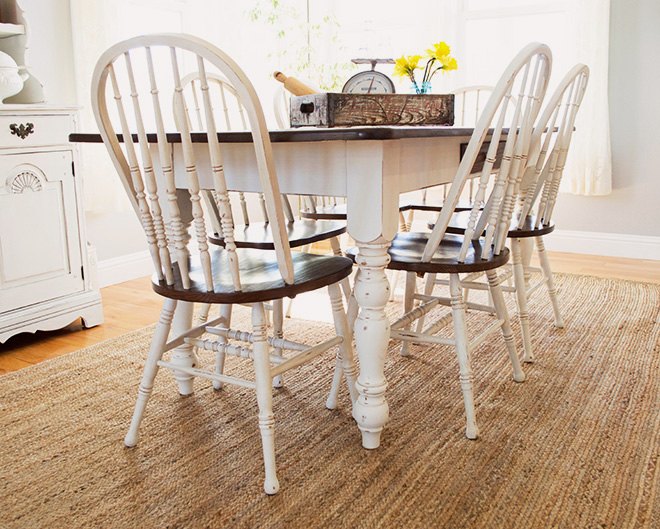
At this point we brought the table and chairs back into the house so I could paint them over the weekend. I did one coat on Saturday and one coat on Sunday. The paint I used is Valspar Chalky Finish paint in Kid Gloves.
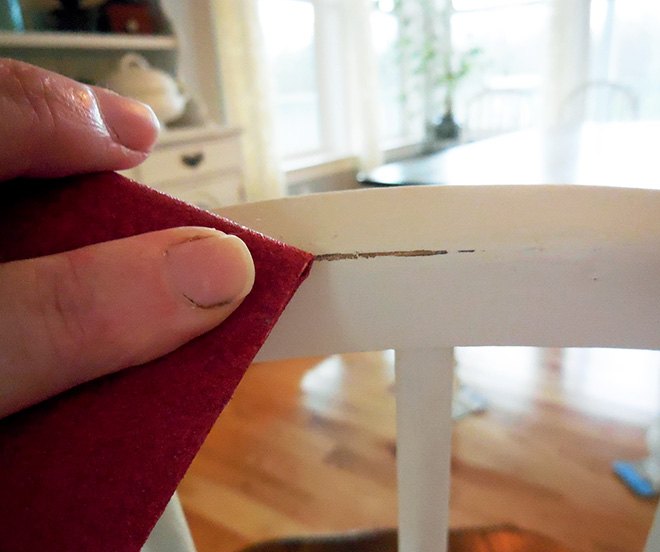
The next step was to distress the painted areas. I decided to do a light to medium amount of distressing with 150 grit sand paper. You can do as much distressing as you want, or skip the distressing entirely. It is up to your personal taste as to how you want your finished project to look.
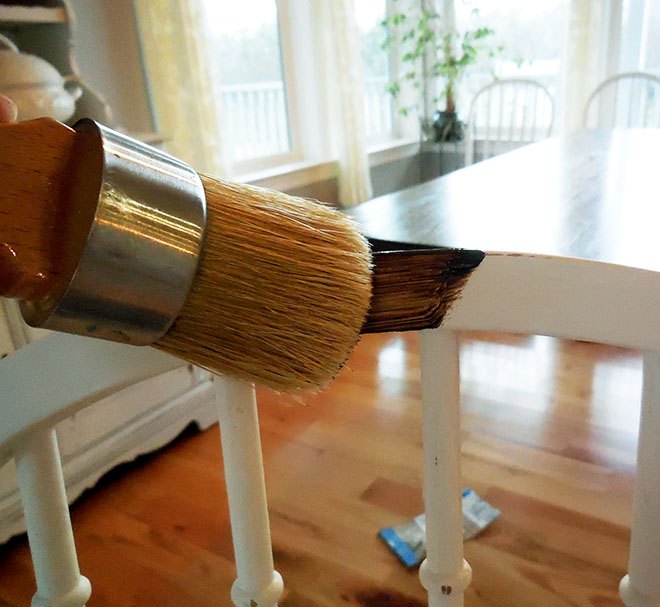
Next was the antiquing wax coat on the painted areas. Like the distressing, you can skip this part if you want. I like doing it because I like the aged look it gives the paint. I applied it with a wax brush in a small sections and wiped it off with a clean damp cloth. I didn’t leave it sit more than a minute or so on each section as I wanted just a touch of an aging effect.
Finally, I applied the sealing wax to the painted areas. It’s pretty much the same technique as applying the antiquing wax, except I allowed each section to dry a few minutes and then wiped it off with a clean, dry cloth as to not remove as much of it. The sealing wax does what the name implies – it seals the chalk paint and gives it a little shine and a smooth finish.
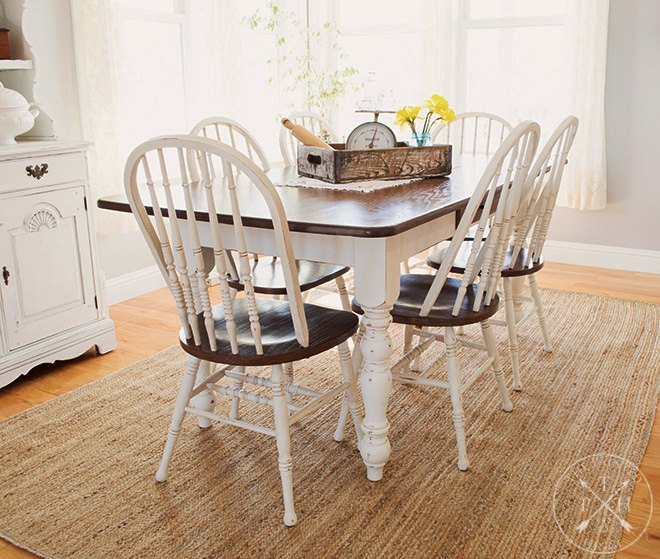
I was so happy when it was finally all finished!  And I was very happy it turned out as well as it did, because I would have been pretty peeved if I didn’t like how it turned out after all the time I spent working on it!
And I was very happy it turned out as well as it did, because I would have been pretty peeved if I didn’t like how it turned out after all the time I spent working on it! To see more pictues and info on this project, click HERE!
To sign up for my FREE weekly newsletter, click HERE!

Want more details about this and other DIY projects? Check out my blog post!
Comments
Join the conversation
2 of 9 comments
-
I di my table and chairs this summer with some color.

-
This is what I want to do. Very pretty.


Frequently asked questions
Have a question about this project?
Did you apply the stain with a cloth or brush-(bristle or foam)?