


DIY Painted Wood Signs – Without Using Stencils!
Hey Friends! I love the look of painted signs using stencils! The problem is that I can’t find letter stencils that are big enough to make the size of letters I want to make. My only option is to by custom stencils (which can be costly) or buy a cutting machine and make my own stencils (even more costly). This is an alternative that takes a little more time, but saves a lot of money!
All this really boils down to is creating and printing out letters, tracing them onto a wood board, and painting them in. It does take a little more time than using stencils, but it not hard to do at all. As long as you can paint in between the lines, you can do this!
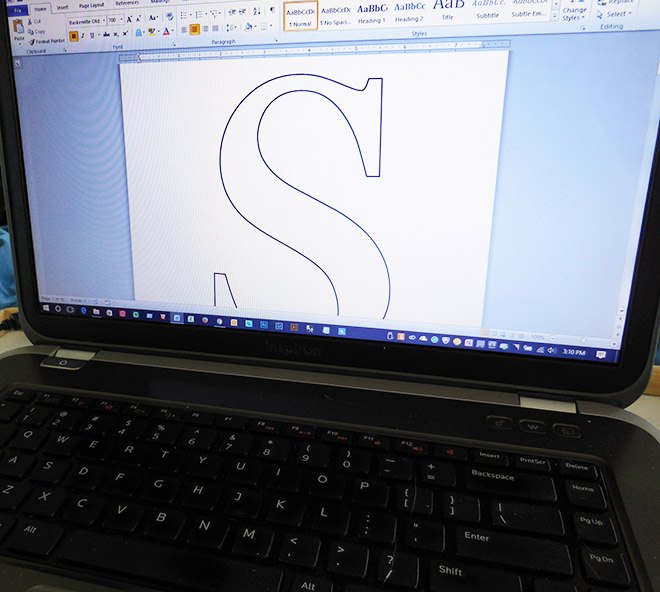
I used Microsoft Word 2010 to create the letters for this project. You can find detailed directions on how to use Word to make these letters by clicking the link at the end of this post to go to the project on my blog. You don't have to use Word; you can use any word processing software.
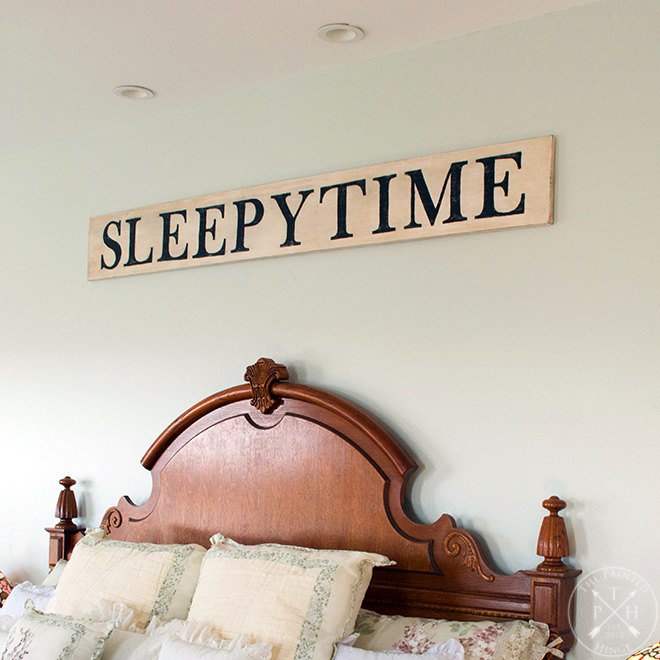
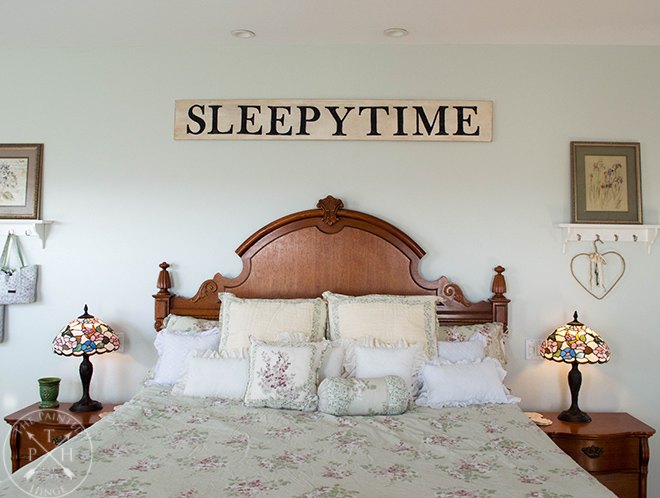
I used Baskerville Old Face font in 700pt for the sign in this project. You want to make the letters to fit on the size of wood board you’re using (we’ll talk more about that later). 700pt font is big – one letter takes up one sheet of letter sized paper. The sign I am making for this project says “Sleepytime.” I wanted a farmhouse style sign for our master bedroom, but I wanted it to be something I’ve never seen before. I came up with “Sleepytime” because it is the name of one of my favorite bedtime teas. 
Once you make all the letters you need, print them out! (See the instructions below about sizing the font to the wood board before you do though.) Save the document if you think you will want to make another sign. You can reuse the letters you printed out as well.
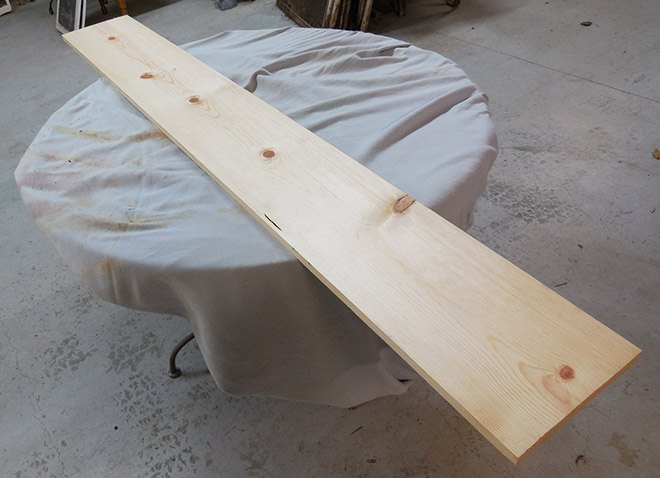
Now I know that I’m not going to make some people happy here, but fitting your letters to the size board you are using (or vice versa) is not an exact science. The questions you will want to ask yourself is how big do you want the sign to be, then how big you want the letters on that sign to be. Once you get that all figured out, measure out each letter using the ruler in your word processing software, figure out how much space you want between each letter, and add it all up to get a decent estimate if it’s going to fit the height and length board you’ve chosen for your sign before you print anything out. Sometimes, you may want a sign that is 6′ long, but the word(s) you want to put on the sign in the font size you want to use won’t fit. You will have to either make the font smaller or get a longer board.
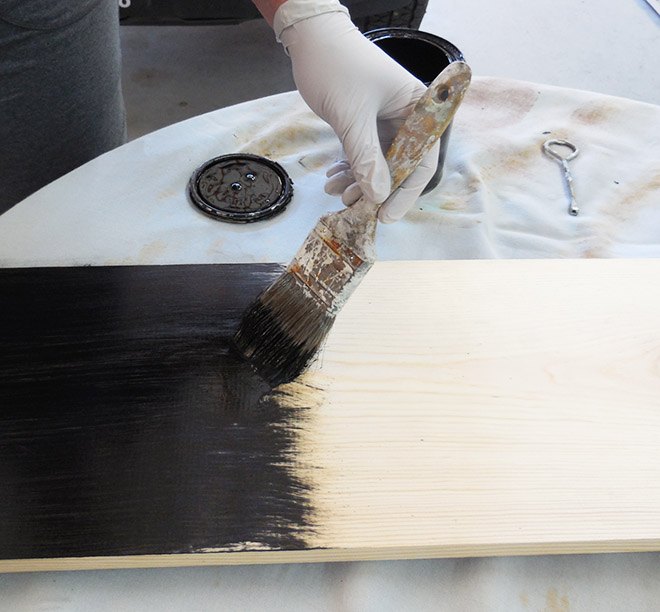
Now it’s time to stain the wood. I used Varathane wood stain in Ebony. I did two coats, painting each coat on using a brush, allowing it to set for a few minutes, then wiping off the excess with a clean lint-free cloth. I allowed it to dry thoroughly between coats. The wood stain has a strong smell to it so you will want to do this outside or in an open area like a shop, which is where I did it.
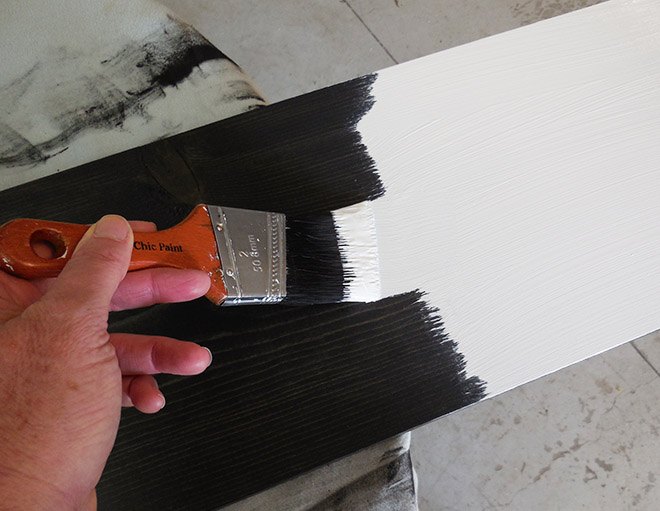
Once the stain was thoroughly dry, I put on two coats of paint, allowing each coat to dry thoroughly. The paint I used Is FolkArt Home Decor chalk paint in White Adironack.
Now comes the fun part – the stenciling! Since this doesn’t use a lot of paint at once and I wanted to be warm and comfortable while working on it, I brought the sign into the house so I could work sitting at our breakfast table.
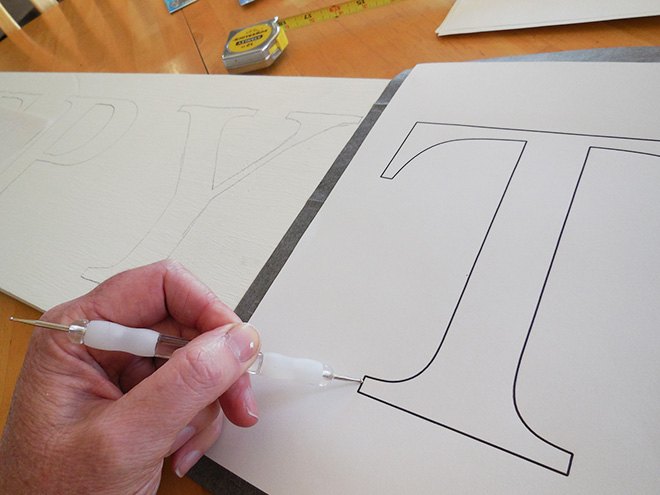
In order to trace the letters onto the sign, you will need graphite paper. The graphite paper I used is Royal Brush Gray Graphite Paper. It comes in white color as well for tracing on darker colored surfaces. I also got the Royal Brush Embossing and Styling Set to trace the stencils.
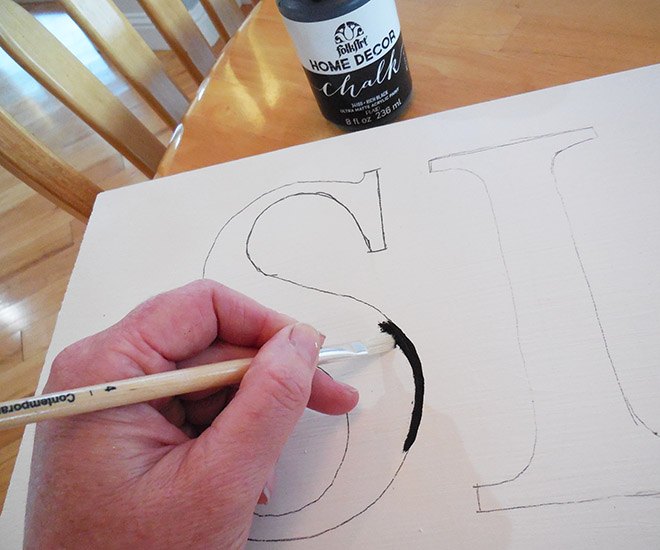
Once you got all the letters stenciled on, you can start painting them in. I used FolkArt Home Decor Chalk Paint in Rich Black. I just used an art paint brush to paint on the letters. Again, don’t worry about being perfect – you can always touch it up with more white paint, and once you distress the sign, you won’t see any minor mistakes anymore anyway.
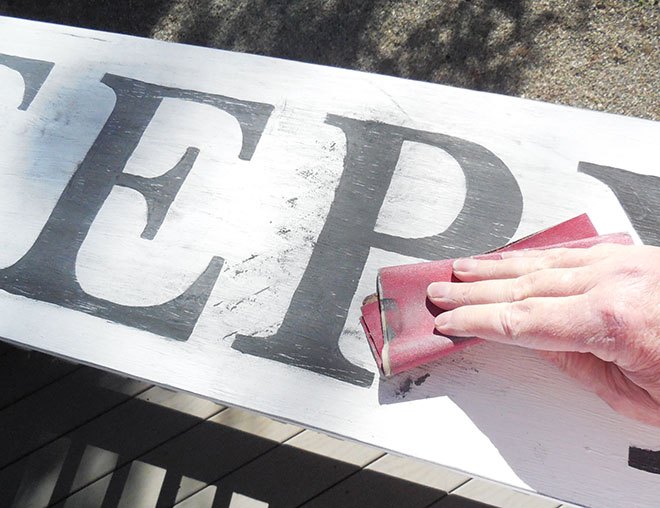
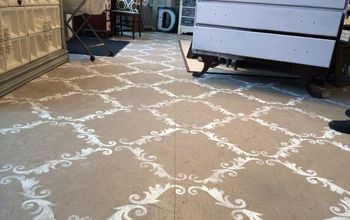
Now it’s time to distress the sign. You’ll want to take the sign outside because as you can see below, sanding the sign makes quite a mess! I used 150 grit sandpaper and sanded the face and edges of the sign. Once you’re done sanding, wipe everything off with a clean cloth, then go over it again gently with a clean damp cloth. Allow it to dry a bit before you put on the wax.

You’re now ready for the finishing touches! I used FolkArt Home Decor waxes in Antiquing and Clear. Using the Antiquing wax is optional; I like how it makes the paint look older.
Working in sections, apply the Antiqing wax with a wax brush, allow to sit for a minute, and wipe off the excess with a clean, damp, lint-free cloth. Let it dry for a couple of hours and then apply the Clear wax, working in sections and allowing it to sit for a few minutes before wiping the excess of with a clean, dry, lint-free cloth. Allow your sign to dry thoroughly before hanging it up.

Want more details about this and other DIY projects? Check out my blog post!
Comments
Join the conversation
2 of 13 comments
-
Well I love this it is just so cute and the words are perfect for the bedroom !!! Thanks for posting this ...I will be making some of these myself for family and friends .....
-
It's just sweet! ☺️


Frequently asked questions
Have a question about this project?
Sleepytime! The tea was the 1st thing to pop into my head when I saw the first image! Any chance you could add a close-up picture of the edges of the letters with the distressing and wax? How shiny is it, if at all? What did you use to hang it?