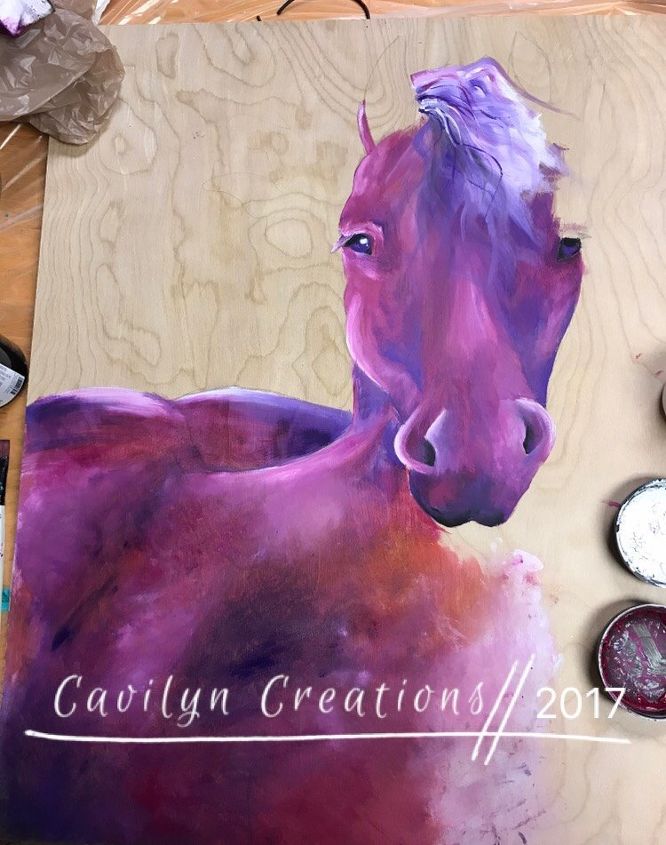
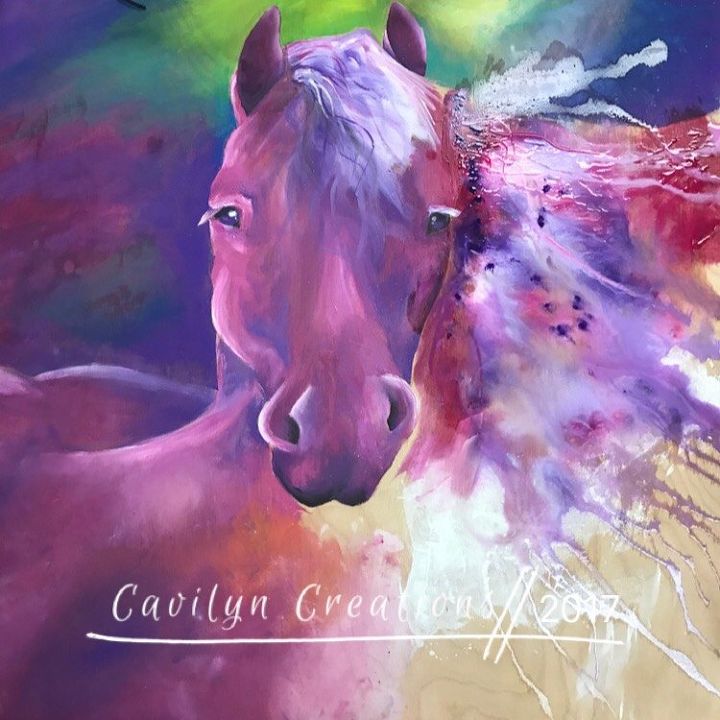
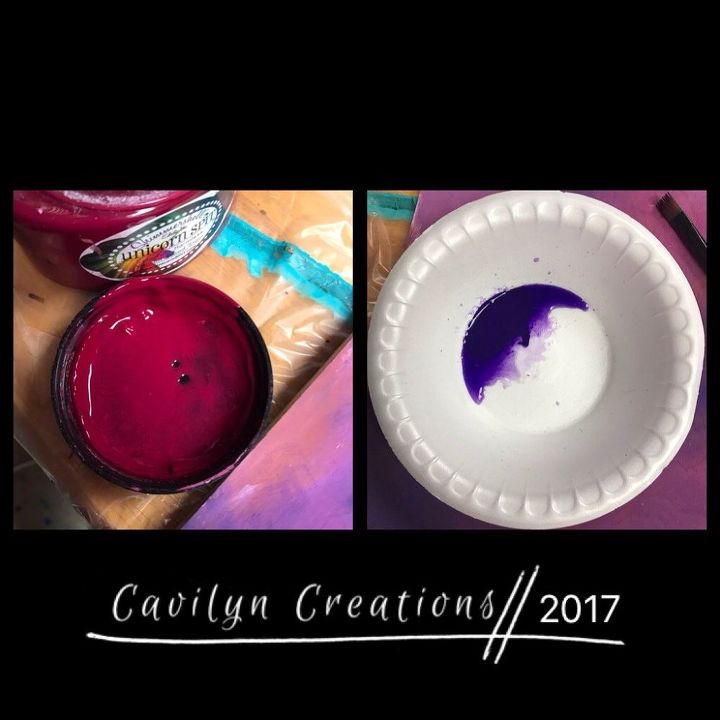
Unicorn SPiT is the Stuff Dreams Are Made Of!

Abbie Lummus
by Abbie Lummus
10 Materials
SPONSORED ARTIST

When I think of what makes me happy relative to Unicorn SPiT, there are several things that come to mind. I love the scent of the jasmine in Unicorn SPiT. It reminds me of the many projects we have done together as a family these past two years. Spending time with my mom and sisters doing creative things, especially painting, really brings me joy. And seeing an idea take shape and become something beautiful is so satisfying for me. I can treat Unicorn SPiT as watercolor and get many of my favorite effects. Unicorn SPiT has rapidly become one of my favorite mediums due to its versatility. It works so well for my favorite subject-HORSES!

By Abby Lummus/Cavilyn Creations
Decisions to be made:


*This post is sponsored by Unicorn SPiT, but all statements and opinions are mine. **


As an artist, when I create a new piece I try to challenge myself.  After a few years, you begin having trouble doing new things, and getting inspired. Being a Sponsored Artist requires me to do just that!  So I appreciate the challenge and the chance to stretch my talents.  This month, my sponsored colors were Unicorn SPiT’s regular Purple Hill Majesty, and Roswell.  Therefore, coming up with something I could incorporate these colors into proved challenging.  My favorite animal to paint is a horse, because I own some myself!  This month I was inspired by an original painting by Marcia Baldwin.  She is a very talented well known artist in the oil painting field, and I learned about her in my Art class last year.    She paints animals primarily and I love her use of color with whimsical renditions of animals.
Supplies Needed:


* Unicorn SPiT Colors: Pixie Punk Pink, Midnight’s Blackness, Blue Thunder, Navajo Jewel, Purple Hill Majesty, Roswell, Phoenix Fire, Lemon Kiss, White Ning.
* A set of clean detailing paint brushes
* A Hair Dryer
* A water filled Spray Bottle
* Paper Towels and Paper Plates
* A board to paint on- I chose a 2 ft x 2 ft piece
* Pencils
* Sealer was Famowood 2 part Epoxy Glaze (supplies for it will be detailed later in the post)


*Roswell and Purple Hill Majesty had to be included as they were my identified challenge colors for this month.  I happen to love them both!


Finding the perfect board
Because Unicorn SPiT comes most alive on wood, that is the material I chose.  First things first, find the perfect grain! I went to Lowes, but Home Depot or any wood supply store would work too.  I chose to purchase a 24” by 24’’ piece of higher grade plywood, with a ¾” thickness.  I lightly sand my wooden canvas with a 100 grit sandpaper to open up the grain of the wood but not generate a sense of roughness.  If it gets too rough, it is difficult to paint smooth flowing lines, etc.  So avoid the lower grit that is more coarse, as you will not be pleased. 
The Beginning of the Painting starts with a Pencil:
Once I found the perfect board, I was ready to lay down the first lines!   I used the painting by Marcia Baldwin as my inspiration to produce a rough sketch.  This painting was going to be very flowy and organic, so there wasn’t much to draw!  I find it easier to just sketch in the big things, to get proportions and shapes correct.  Then I let my creative juices flow and  begin the real fun of creating.
The first Layer:
Now that I have my rough outline, I can begin laying the SPiT down! I started on the head, and worked my way around.  Spritzing the wood where I was about to paint, I then used Pixie Punk Pink as the main layer.  I very slowly began building the many layers of color. Some might ask why did you start with the head?  Sometimes it is easier to do the background first.  But that generally applies for me in the situations where I have very defined edges of sections of the painting.  Because this is somewhat abstract and cloudy around the horse,   felt it was safer to start with the hard stuff.  You could do it in a different order and gain the same effect.  I think I was just so excited to get started that I went straight to my favorite part- the horse!
Shading and highlighting:
After laying the Pixie Punk Pink layer down, I used Purple Hill Majesty to shade the horse, and White Ning to Highlight.  I tried to think of where the natural lighting would hit on a horse in a similar position. You shade darker where there are shadows and you use a light color to represent the appearance of light.  So because you do not generally see the inside of the ears as an illuminated area, it makes sense to darken them to give them depth and dimension.  You will use White Ning last to highlight where the light or sun might strike the fur and warm the horse.
Little by little:
By adding the color in layers I achieved an amazing amount of depth. I did not mix variations of Pixie Punk Pink or Purple Hill Majesty separately in order to get the variety of the colors.  Instead I added White Ning to sections of these colors on the painting while they are still wet.   This added depth to the face as you can see.  Then I painted the left eye first, because the forelock would later cover most of the right eye.  Once most of the colors of the face were applied, I began adding the foundation of the forelock.  Using White Ning, and Purple Hill Majesty to start.  I poured my color onto a paper plate, dipped half of my brush in each color.  Then using long wavy strokes, I drew the forelock, giving it a very blended look.  This is a method used by painter Donna Dewberry in her one stroke flowers. She loads her flat brushes with two different colors, one on each corner of the brush and then wipes it a couple times on a paper towel to get the colors to blend on the brush before touching the canvas or in my case, the wood.
Painting the Body:
After painting the forelock which is the hair on the top of the head that comes down between the ears onto the forehead, I started to paint the right eye.  Since the right eye will be covered significantly by the flowing mane and forelock eventually, there can be less light reflected in it, and more Midnights Blackness than Purple Hill Majesty. After the completion of the right eye, I moved onto the body!  I spritzed the entire body, and laid large clouds of Pixie Punk Pink, Purple Hill Majesty, Phoenix Fire, and a tiny bit of White Ning mixed in.  Using my fingers, I blended the colors together. 
Background Check:
After the body is painted, and blended to my satisfaction, I painted the background!  Because I used a hint of White Ning to highlight the rump, I need a contrasting color next to it to begin the background. I used mostly Purple Hill Majesty to get that gorgeous depth Unicorn SPiT provides. I also played around with a little Pixie Punk Pink to give variety and prevent the background from appearing flat and merely two dimensional.  We are really working towards a three dimensional painting, something unique to Unicorn SPiT in my opinion.  


Adding Roswell:
In my case, finding a way to incorporate Roswell proved interesting.  It was a color of a very different hue than what had already been used in the rest of the painting.  In the end, I chose to use it as an attention grabber in the top half of the board between the ears.  I really like the way it works with the painting. This is one of the reasons I love being a sponsored artist.  It encourages me to make color choices I wouldn’t have originally thought of.  I felt that the use of Roswell would really draw your eye to the center of the head, and allow the eye to travel down the head and into the gorgeous details present in the horse.
Heaven is seen through the horses ears:
After the Background is mostly finished, I painted the ears of the horse.  First, I used Pixie Punk Pink on the upper part of the ears. Then I painted Purple Hill Majesty at the base, and incorporated a very small amount of Midnight’s Blackness in the Purple Hill Majesty at the very base of the ears.  This achieves the depth and dimension we are striving for.   I then added highlights of White Ning on the top edges, as the light would strike the tips in a natural setting.
After one ear comes the next:
Here is the completed photo of the ears.  As you can see, they look like they are a part of the natural horse.  Very full of depth! With a  small area of Rowell above, also providing a little punch of color to the top of the painting, allowing the eyes of the viewer to go there first and then come down to the magnificently expressive face of the horse.
The fun part:
Now for the fun part! I was trying to get it to look like the mane was flowing naturally, so I didn’t want to paint the strands in with a brush.  Plus I don’t have the steadiest of hands, so it would’ve proven difficult. (I have benign physiologic tremors which are an extra challenging element for an artist.  Yes even at 17, I have to deal with this!  I am telling you this because there are no excuses not to play with Unicorn SPiT and not to believe in yourself!  As my mom always says, Find the work around!  She is a nurse and quite experienced with being forced to think outside the box.  So we do not allow this physical challenge to interfere and I expect my readers not to let something stop them from achieving their dreams!)  To accomplish this element of the painting, I first did a stain press using Purple Hill Majesty, Pixie Punk Pink, and White Ning, on the side area where the mane will flow.  To achieve a stain press, you simply apply small bits of Unicorn SPiT in your desired colors, spritz that area with a light mist of water.  Then cover it with a piece of clear plastic drop cloth just large enough to cover the area you need to press.  You try to lay it down without wrinkles and then lightly mist the top of the plastic with water also.  Then using your hands, you manipulate the color below encouraging them to mix in a unique fashion to your desired look.  Then you lightly and slowly lift the plastic and try to pull it up so as not to leave wrinkles behind.  This may take a little practice on a few separate boards so you do not ruin a painting that is this far along.


Getting it to flow:
After Stain Pressing the mane area to the right of the head, I spritzed it with water.  Then I used a hair dryer to blow the colors around, to make it look like it flowed smoothly.  I blowed the colors away from the head in a couple different directions, staying consistent though so that it rolled away from the horse’s head.  This lets it achieve an appearance and foundation for the individual strands that will be painted next.  
Adding detail:
After the area had dried, I decided it needed more definition.  Therefore I diluted Purple Hill Majesty, and Pixie Punk Pink enough that they would flow well off a fine paint brush.  Then I used the diluted SPiT on a fine paint brush to add thin strokes throughout the mane. This allows the viewer to see incredible details in the mane.  I adore playing with a horse’s mane!
Almost there:
 
Here is the almost final painting, just prior to Epoxying. Once dry, Unicorn SPiT turns chalky, so you really have to use your imagination and have a little faith.  Once sealed, I promise that it will become vibrant again, as it was while the SPiT was wet.  The final step is applying epoxy.  While this can be very intimidating, if it is done correctly I feel it is the very best top coat/sealer on the market for use with Unicorn SPiT.  And I can show you why.
The dreaded epoxy application process:
First let me say, please do not dread epoxy.  Honestly, ignorance is bliss.  My family had not heard any horror stories when we did our first piece and since Michelle said it was amazing, we had to do it!  I will try to make it feel easy because truthfully, I think it is!  Different but easy.  You just need to understand a few simple things about it.  We use Famowood 2 part Epoxy Glaze Coat.  It comes in two different containers, that you mix exact even parts and follow the directions.  You will want to know the exact measurements of your piece to be sure you mix enough.  It is one of those things in life where it is better to have too much than too little- kinda like Halloween candy for the trick or treaters.  You will be mad if you do not allow for a smidge of waste:-).   Before you begin, tape the back of the piece along the edges with painter’s tape.  I generally do two rows so that I am sure the roll off after the pour that gets on the back will be easily removed as you pull it off the next day. 


The supplies needed for this are listed below.
*Famowood 2 part Epoxy glaze (sold at Lowes, but not Home Depot, and available at other retailers)  
*3 plastic containers appropriately sized to the volume needed to cover your piece
*plastic spreader (sold in the painting department and used often to spread adhesives)
* Heat gun sold in paint section- ours is a nice Wagner- not the most expensive but not the cheapest
 
PROCESS OF MIXING AND APPLYING EPOXY:
You mix one part into the other- directions are to be followed here- and stir for 6 minutes.  Then you pour that mixture into another larger container and stir it for 6 more minutes.  You will notice the mix begins to get a little warmer.  It won’t burn you as it is not that hot, but I did not want it to scare you if I had not mentioned it.  LOL You will notice bubble formation as you mix. Do not panic as there is a method to remove them after you pour the mixture on to the painting. 
        You gently pour the epoxy mix into the center of the painting and then extend the circle out as a spiral getting it to a little closer to the edges.  You use your spreader (bought in the painting department which can be used to apply adhesive materials), to move the epoxy gently across the piece.  You do not want to do a lot of strokes as it will begin to set almost immediately.  You have a short window to get it to cover the piece.  But have faith, it will be enough time.  I have never had an issue with the spreading.  If you have decorated a cake, you are already a pro!  Once you have the painting covered, you will likely be concerned about the bubbles.  Do not fret.  You will now use your handy dandy heat gun to draw the bubbles to the surface and out of the epoxy.  I do need to warn you here about what can unfortunately occur.  You can catch your epoxy on fire.  Think of your marshmallows on a stick!  You are trying to achieve a golden brown marshmallow, not one with charcoal on it! EWWW!  If you like them, do not tell me.  We are explaining epoxy techniques here, so let’s not debate the marshmallow right here.  Just trust me! LOL The best way to get the bubbles out is to lightly move the gun across the painting close enough to see the bubbles rise.  If they reappear after disappearing, it is said that you are getting it too hot and are getting close to a temperature you do not want as it will lead to smoking and potentially flames.  So just gently go across the piece getting your bubbles out.  This is the time to inspect the epoxy carefully for little hairs or dust that you do not want as a conversation piece when friends are viewing your work.  You can quickly remove them with a gloved finger or a tweezer.  The epoxy will self-level and fill in the little divot, most of the time.  If it does not fill in on its own, just dip your finger in the epoxy that has rolled off the piece onto the drop cloth you placed below.  Then you lift and drop the collected epoxy onto the divot and lightly wave the heat gun over that spot to get the heat to mix the epoxy into the hole and level itself. We have a home filled with pets so this presents a challenge for us many times.  Try to pour your epoxy finish in an area of your home with little air movement around it.  Do not wear the clothing you just groomed your dog or cat in – that is a recipe for disaster. Lastly, I take extra epoxy that rolled off the piece and use a gloved finger or two to get the edges covered in epoxy.  This presents a much more finished piece you can be proud of.
Thank you for reading my long post.  It was absolutely a pleasure to paint this and I hope you like it. 


Suggested materials:
  •  Unicorn SPiT Colors: Pixie Punk Pink, Midnight’s Blackness, Blue Thunder, Navajo Jewel, Purple Hill Majesty, Roswell, Phoenix Fire, Lemon Kiss, White Ning.   (www.unicornspit.com)
  •  A water filled Spray Bottle   (dollar store)
  • Detail brushes, flat paintbrush   (craft store)
See all materials
Frequently asked questions
Have a question about this project?
3 of 5 questions
Comments
Join the conversation
3 of 86 comments
  • Serendipity House LLC Serendipity House LLC on May 01, 2017

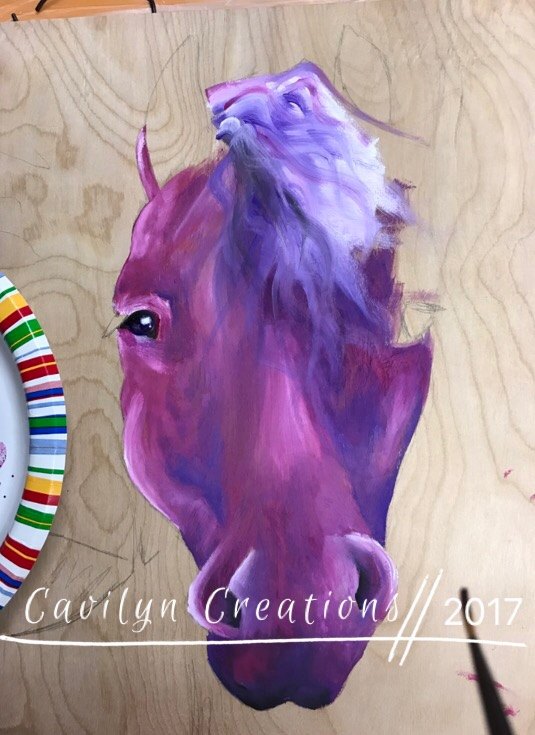
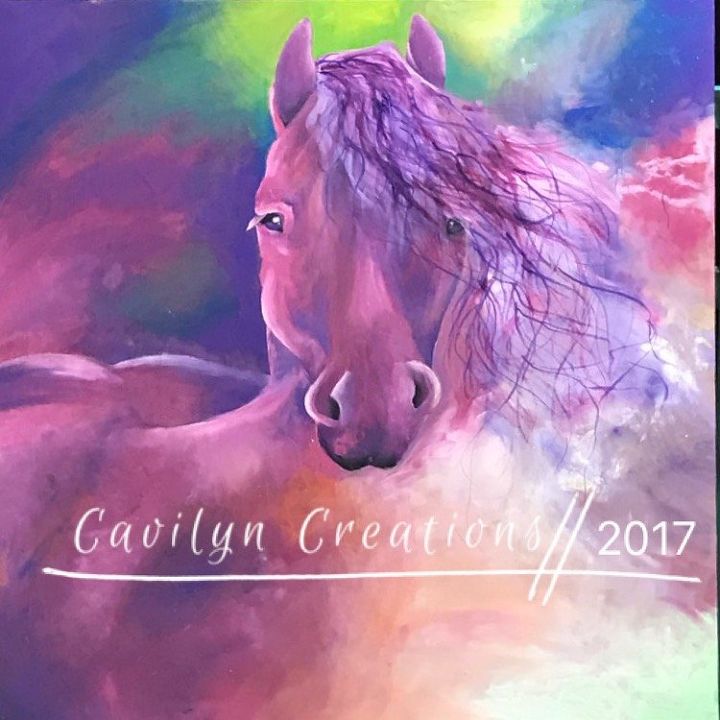
    One of my favorites- the color and the movement is outrageous!!! Thank you for taking us along as you created it.


  • Jessica Serrano-Gregg Jessica Serrano-Gregg on Aug 02, 2018

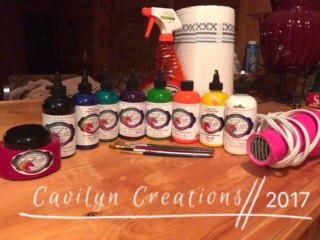
    You said you’re 17? Wow!!! I’m absolutely floored and inspired by you. I have so much more faith in our young people after reading your amazing post. It’s extremely well written, easy to follow but yet your personality shines through! You should be very proud of yourself as I’m absolutely certain your parents are. You’re very talented AND can explain your process. I’m so impressed by you! I also wanted to say thanks for explaining the epoxy coating process step by step. It does scare me!! Now I’m not as terrified to try it on my art. Since you’re so knowledgeable about the unicorn spit, do you have any color mixing recipes you can share with me? I’d love to know!! Also have you tried adding any mediums like mica to them? I’m dying to pick your brain and if you have any cool ideas, techniques and other stuff like that that you could share with a Unicorn SPiT newbie?? Videos lol?

    this is a stunningly Gorgeous piece of art and probably the best tutorial I’ve ever read anywhere. Heck, I’m proud of you and I don’t even know you! Please keep being you and spreading your knowledge, beautiful art, positivity and inspiration to the rest of us.The worlds a better, brighter and certainly is a more beautiful place with you in it! Wow! Just wow...

    • Abbie Lummus Abbie Lummus on Aug 02, 2018

      Thank you! I keep trying to work on my artwork! I am super passionate about it and have been exploring a lot of other mediums too. I am glad you were helped by my post!

Next