


Darling Writing Desk

6 Materials
I have decided my husband is an enabler! He has free time at work (when you work third shift maintenance and just wait for a robotic problem this happens) so he trolls online for project pieces for me. Anyway, he found a fellow that had this darling little writing desk stashed in a shed, and we went to rescue it! Sometimes inspiration strikes as soon as I lay eyes on a piece...other times it take awhile for the creative juices to flow...luckily I always have several pieces lined up and can pick and choose which ones to work on first. On to the desk!
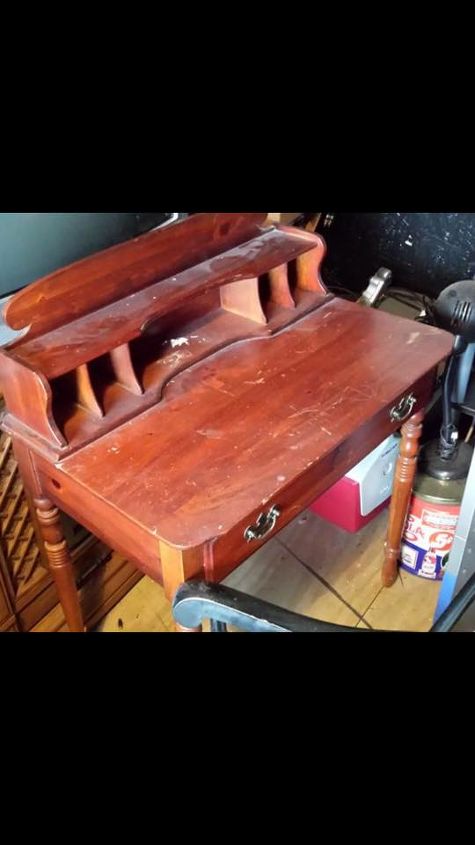
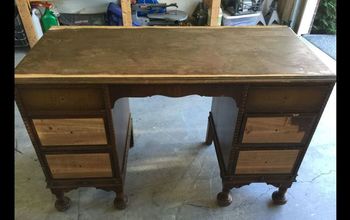
Here is the desk in the shed, dusty, scratched, and stuffed in with all kinds of odds and ends.
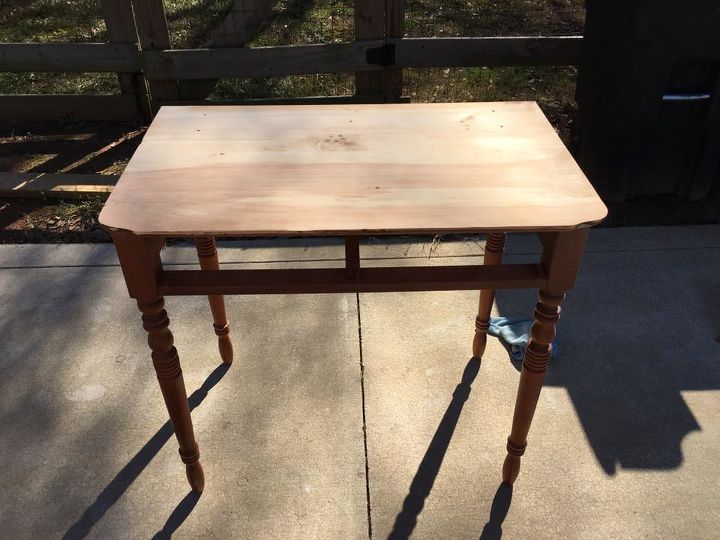
After we removed the letter slots and the drawer, I began the sanding process. I used an orbital sander on the top, and look how lovely that wood is! I sanded the rest by hand. I prefer sanding sponges, but normally end up wrapping them in sandpaper instead of buying new ones. Hey, those sponges aren't cheap!
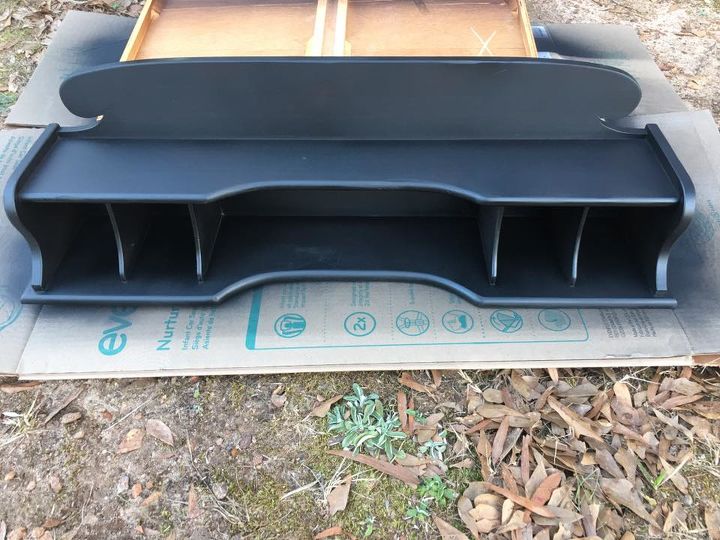
Next up, base coat! I don't know what everybody else does, but I spray the base coat on. So far I have only used cans of spray paint, but I did invest in a compressor and spray gun that I will practice with one of these days!
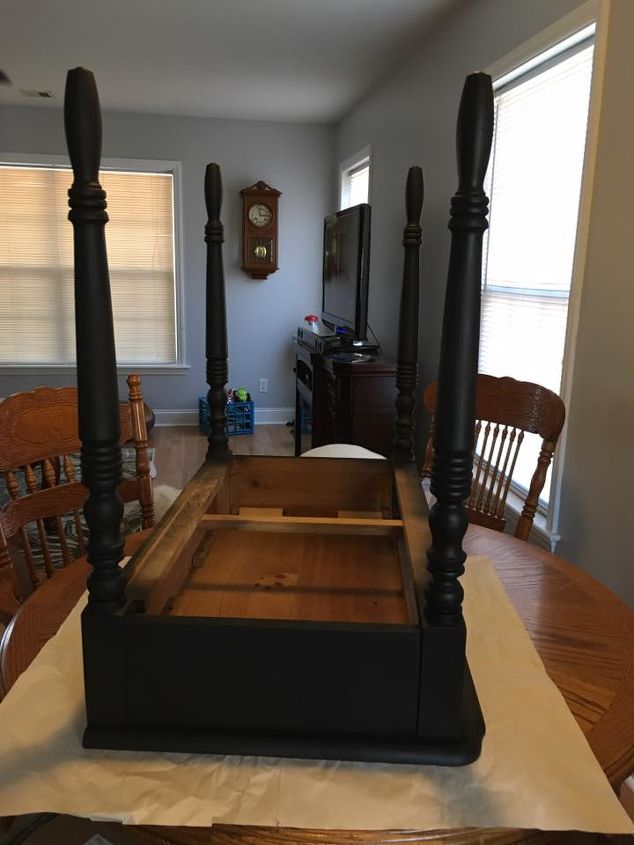
After the base coat, I lugged the desk into my main room and (yup, I know it's crazy) chalk paint right in my great room on the table. Now, it is my dream to one day have a workshop/store front on the lot next door....until then, this works just fine.
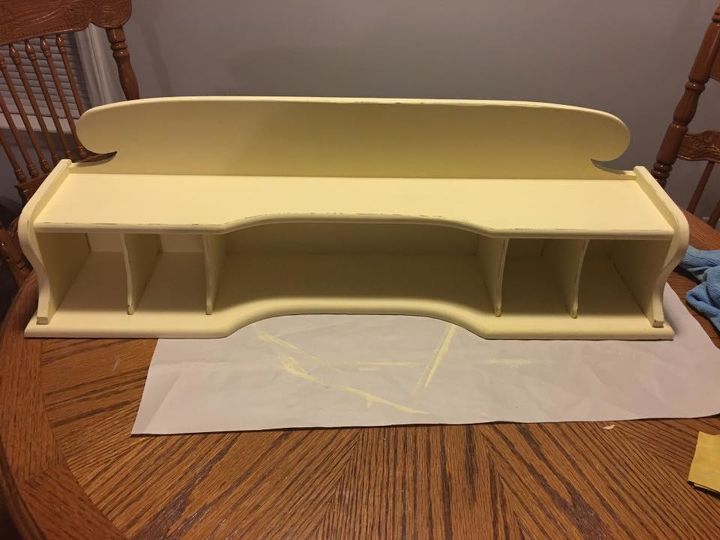
Chalk paint time! Let me tell you, those cubbies were not a blast to paint! I see all these people painting using nice big brushes...somehow I always convert back to my little one inch brush for my chalk paint. Hey, to each their own folks. The mail slot piece looked a little plain! So, I bought a cute sunburst accent at Hobby Lobby, painted it black and the dry brushed it to match. I had my husband glue it on for me. This is where my picture taking slacks off....but I can tell you the rest. ;-) I stained the top of the desk. The first go round I had this espresso stain/poly blend, but it just looked BAD! So, back out to sand it down again! Decided to go with a nice red mahogany stain and regular poly instead. The rest I sealed with a matte varnish. I also painted the drawer pulls with oil rubbed bronze spray paint.
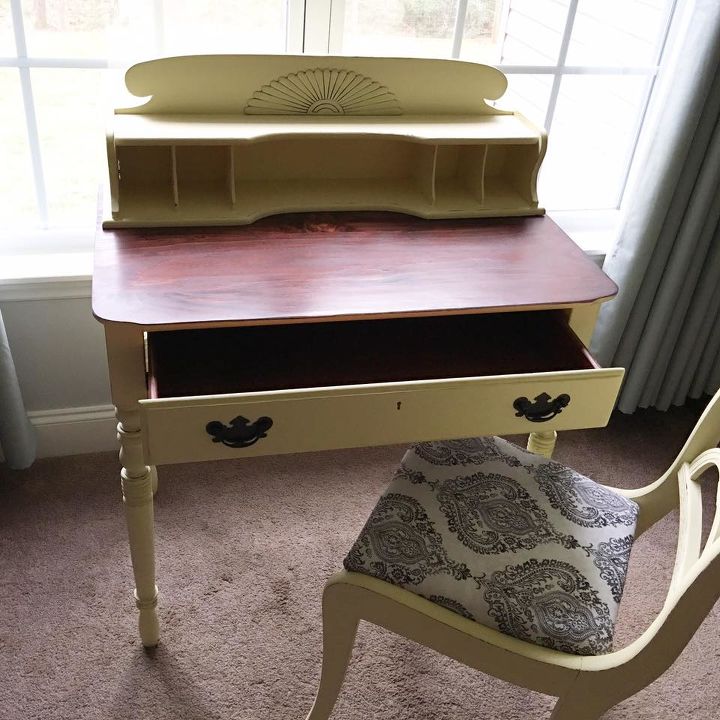
And here is the end product! I had already flipped the little chair for a previous project (but it ended up being too wide to fit in the vanity). Which is okay because it worked well with this desk. Follow my work on my Facebook page! www.facebook.com/nettesemporium/
Comments
Join the conversation
4 of 12 comments
-
WOW! I want that desk! Yeah I know "thou shalt not covet" but I still LOVE it!

-
Love it And the sunburst is a great idea that makes a huge difference.


Frequently asked questions
Have a question about this project?