


Turning a Coffee Table Into a Kitchen Island

by
Zest it Up
11 Materials
$30
2 Hours
Easy
Are you anything like me? Do you find yourself rearranging furniture, changing wall colors, and creating new decor in your home on a rather regular basis??
I know that folks exist who methodically lay out their home, look around pleased, and then never really, truly feel the compulsion to turn around and reinvent everything a year later (or six months later for that matter). However, that is not a camp that I belong to. Like seasons changing, I usually find some need or urge to start unsettling things in my home. What makes me do it? I am sure there is some deep seeded psychological explanation for it lurking somewhere….like a sense of discontentment, a need for the freedom inherent in change, or whatever. That is all fine and dandy, but honestly, I think that my home is my nest. It is my place of peace (even when my three kids are yelling at each other and I cannot find even 10 solid minutes for a shower). With that said, I am a creative soul, so I naturally gravitate towards creating in my own space. What works for one season, does not fly with another.
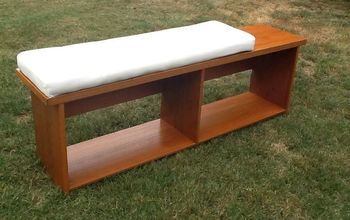
Case in point. I love to rearrange furniture as I discover better flow for our family routines. With three growing kids deep in the school year of homework and papers while being involved with sports and Scouts, I am sure you can imagine the chaos that ensues. Papers, back packs, balls, cleats, and the list goes on, exhaustively. Well, the other day, I decided that we needed more space…more openness. So, of course I moved the furniture around….it’s what I do . Sigh….it worked beautifully, but for one small detail. My thrift store find from last year, a side table, was now too large for the space. Since I am not one for chucking things, I decided my best bet was a good old fashioned repurpose job. Stepping outside the norm, I decided to change my side table from the living room, into a kitchen island!
. Sigh….it worked beautifully, but for one small detail. My thrift store find from last year, a side table, was now too large for the space. Since I am not one for chucking things, I decided my best bet was a good old fashioned repurpose job. Stepping outside the norm, I decided to change my side table from the living room, into a kitchen island!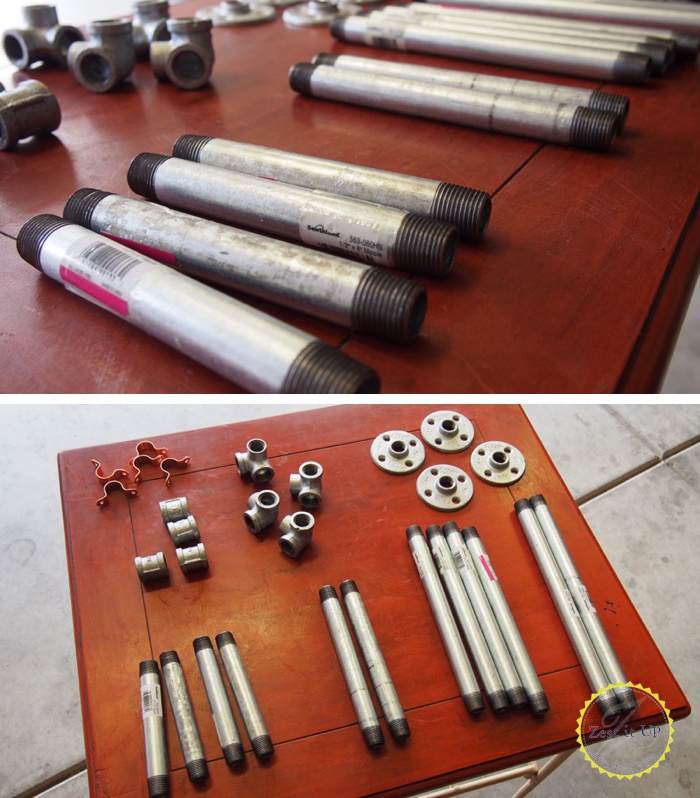
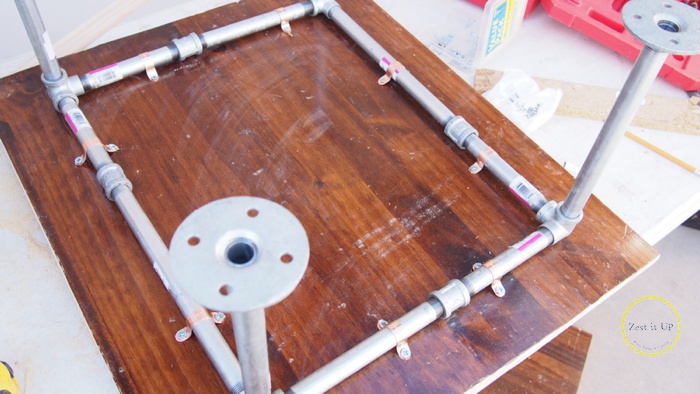
After a bit of puzzle solving in the aisles of Home Depot…this is the formula of pipes I decided upon. Remember, whatever you are using the pipes for, you measurements will undoubtedly be different from mine. You may just have to play around until you get the form and size you need. Here I decided go only 8″ high.
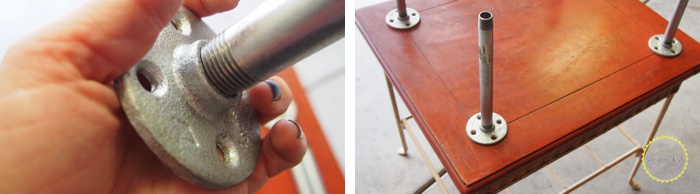
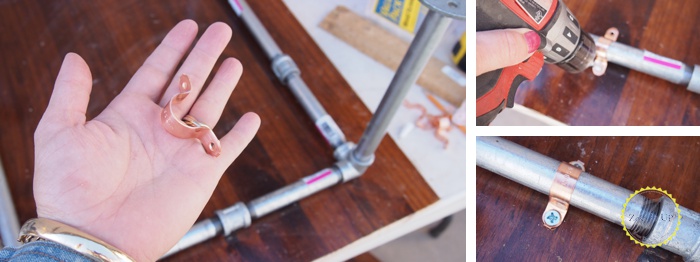
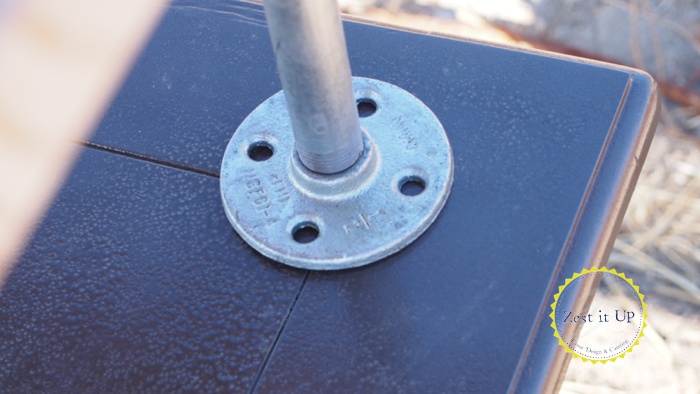
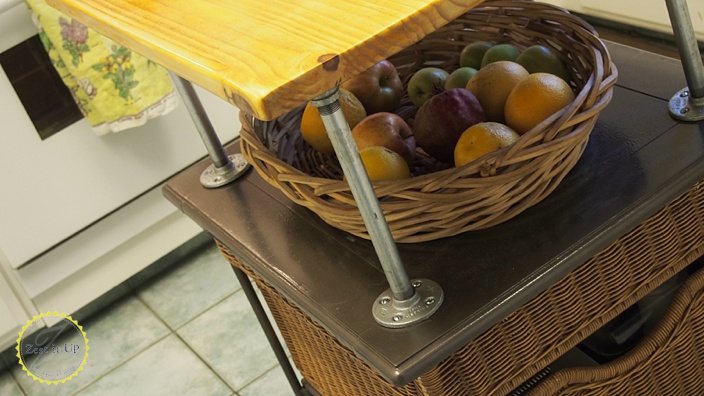
I screwed in my 8″ pipes into the flange pieces.
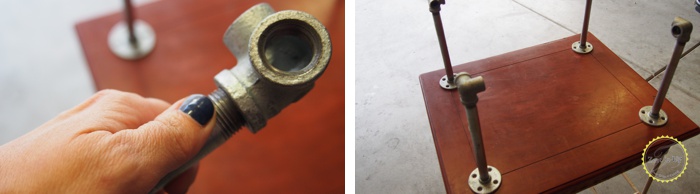
I screwed on the corner pieces.
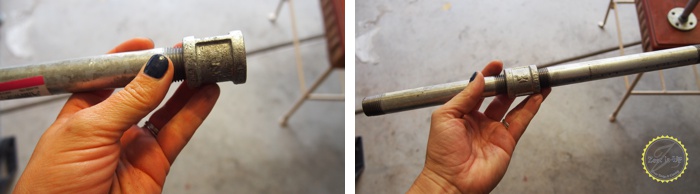
Now this is most definitely where things will vary. To get my happy measurement, I used a connector to join pieces for my optimal length.
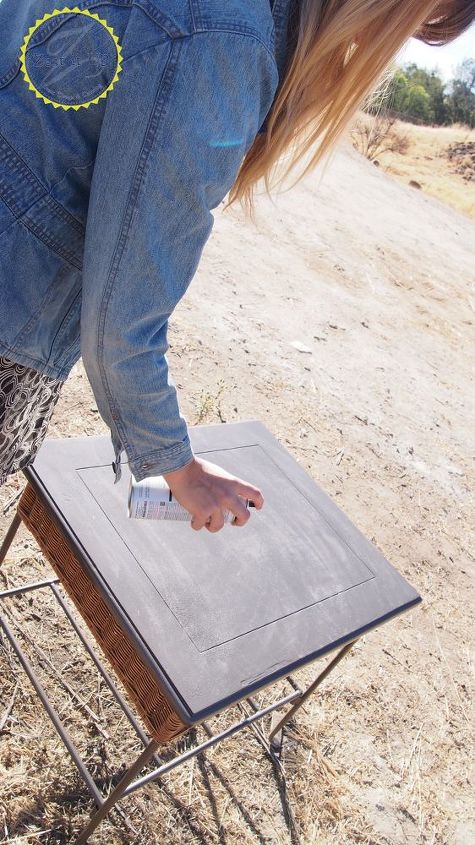
I painted my side table with metallic paint. My thought was to give the piece an industrial feel, but to keep things from looking hodge-podge by keeping the colors simplified and harmonious.
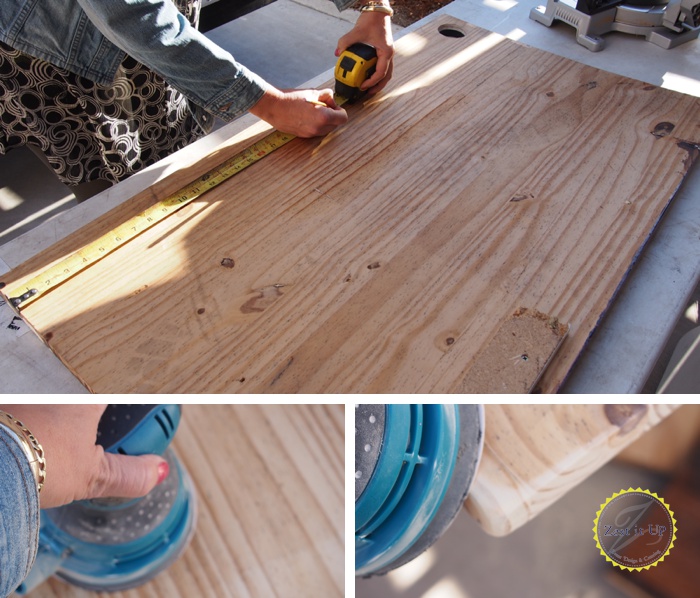
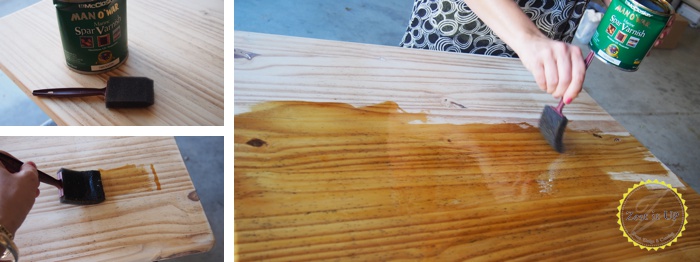
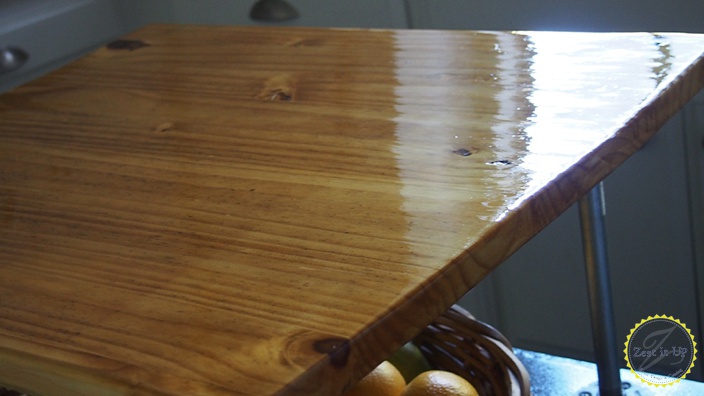
Time to prep my $5 piece of pine wood that I found at Restore (the Habitat for Humanity thrift store)
) Measure. Cut. Sand.
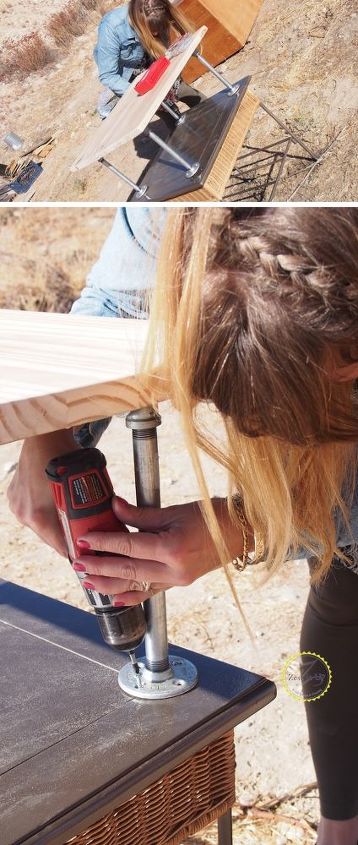
Now time to flip it over and attach my pipe construction.
I used these pipe brackets to keep things secure. Two on each side for a nice snug fit!
Time to attach my new top to my side table.
Finally! Time to give the new top a couple of coats of Spar Varnish. Just make sure that you allow 24 hours of drying time between coats. The Spar varnish will give my kitchen island a wonderful patina and a perfectly waterproof finish (this is the stuff they use on boats!)
Giving myself a pat on the back, I am super happy with my new island.
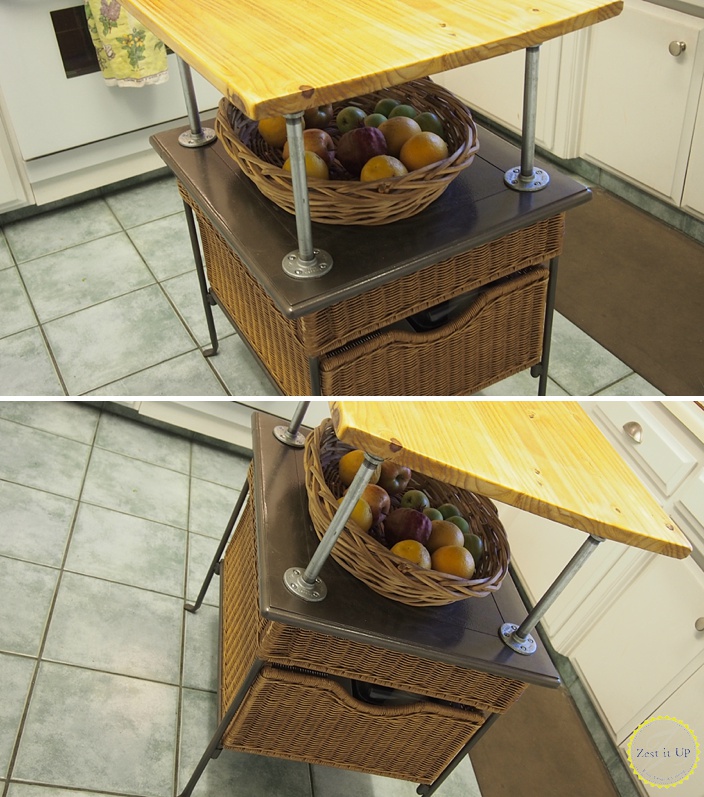
Who doesn't love a little more counter space in the kitchen?
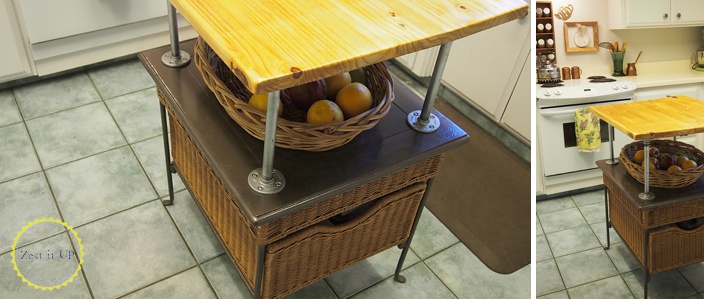
I also love the kitchen storage it provides with the drawers and extra shelf.
I can't wait to see what you guys come up with!!
Here is to rearranging furniture and repurposing pieces in your own home! Cheers!
xoxo
Chanda
Want more details about this and other DIY projects? Check out my blog post!
Comments
Join the conversation
3 of 12 comments
-
I am mostly disabled now. One of the things I miss the most is being able to arrange and move anything I want in my house. I have to do projects in ultra slow motion. But I love @Charlee 's attitude and energy. I will try to pack up all my Easter things tomorrow. Best wishers 😇
-
I love the industrial look with the copper fittings too ! The top finish is awesome !!! I LOVE a good thick shiny finish:) Great job..!!


Frequently asked questions
Have a question about this project?