


Lace Dyed Easter Eggs With Food Coloring!
Easy
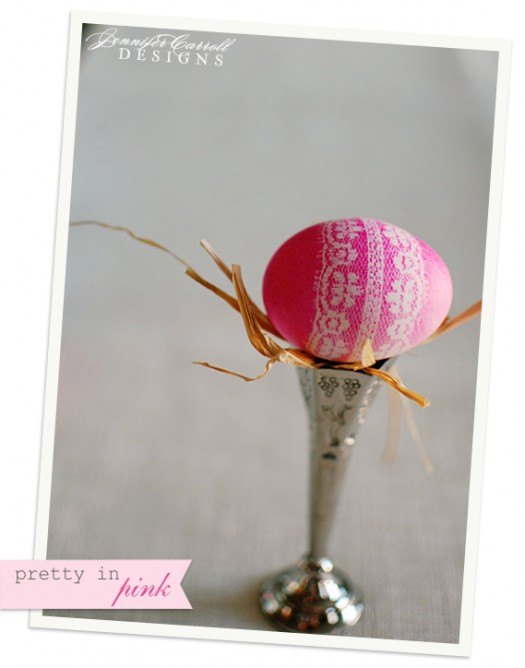
Here is a blend of good old-fashioned egg dying with the romance of lace! With this tutorial, you can create a beautiful silhouette to upgrade your Easter decor this year! Vivid colors work better with this craft so dare to go bold!
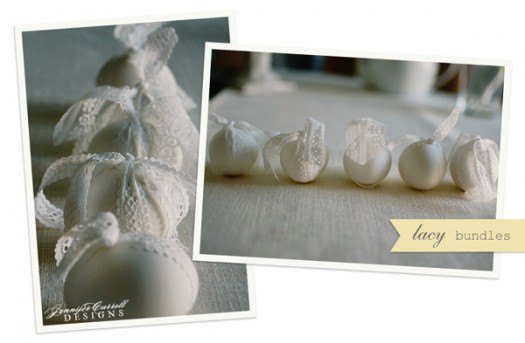
Step one is to boil your eggs. Once you've done that, you are ready to wrap your lace around your egg. I used a lace ribbon but you could use any kind you have, even a scrap from a dress!To secure it to your egg you can simply tie the lace ribbon onto your egg as I did here, use a rubber band, or you can use the pantyhose trick which has become so popular online. What's that trick? Wrap the lace around your egg and then place it carefully inside a pantyhose. Then cut the pantyhose to the size of your egg and dip it. The hose is tight around the egg and keeps the lace close to the egg so the dye doesn't seep through.

Now you need to prepare your dye. I used food coloring for mine. As I said, vivid colors tend to work best so I used bright neon colors. You need hot water, food coloring, and VINEGAR. Vinegar is the KEY to making this work so don't skip it. It's like the "activator" ingredient. Once you have your dye mixed, you are ready to dip your eggs. I dipped mine for 10 - 12 minutes. I preferred the color I got from the 10 minutes range. Play with it and see what works for you. Don't be afraid to play with the colors too! To make the pretty blue/green color I mixed, you guessed it, blue & green dye!

Pull your eggs out of the dye, pat dry, and THEN remove the lace. You want to be sure you don't let dye touch your un-dyed lace area because you want to keep that crisp silhouette effect.
Because these are real eggs keep in mind that they will spoil so I recommend making these a day or two before your celebration and store in the refrigerator. You can see more photos and read more details on my blog!

Want more details about this and other DIY projects? Check out my blog post!
Comments
Join the conversation
2 comments
-
So cute!!
-
Wow, these are so elegant!


Frequently asked questions
Have a question about this project?