


Farmer’s Market Farmhouse Crate Centerpiece
If you love this project, grab your quick start DIY guide & subscribe to our blog!
The sun is spilling in through the windows. The heater is finally off. The cold ground is starting to thaw and flowers are thinking about making an appearance. You don’t have to bundle up on 17 layers before you leave the house….ah Spring! It’s such a lovely time of year, isn’t it?
It’s this time of year that really makes me want to add little touches of flowers all over our house to bring the Springtime alive. Decorating your home for the seasons may seem like a hassle, but it doesn’t have to be with simple DIYs like this.
Today’s DIY tutorial will show you how to make a versatile farmhouse crate centerpiece to put some pretty Spring flowers on display in your home!I found the inspiration for my project in this unfinished wooden crate at Goodwill for $2 (but don’t worry because you can grab the same one at Michael’s for only $5 - visit blog post for a link to the product).
The crate had an sticker on the side that easily peeled off. I let it sit around for a few weeks before deciding to turn it until a farmhouse crate centerpiece and bring in some fun colors and flowers for Spring!
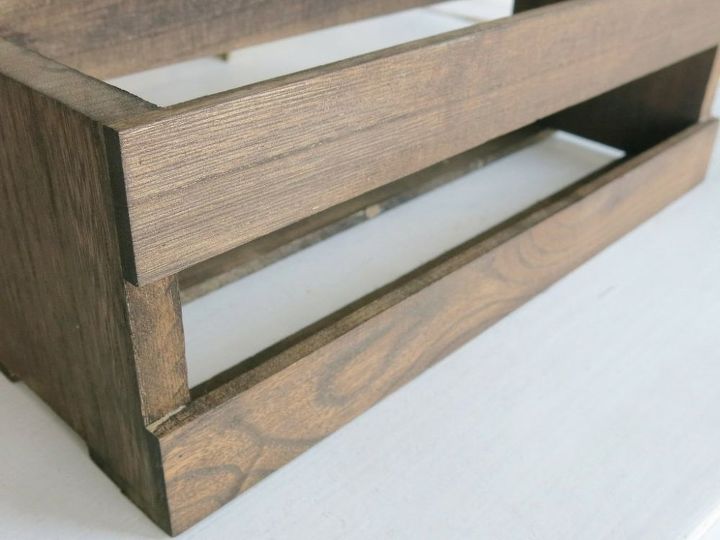
Step 1. Stain your wooden crate. You just need a light coat of stain all over your crate. Don’t worry about getting it perfect because you are going paint over it. …. I know, I know. I sound crazy, but just trust me!
Step 2. Cut your letter stickers using your cutting machine. I chose the words “farmer’s market”. The Cameo makes it so simple to create quick stencils using adhesive shelf liner for painting projects like this.Like I mentioned above, if you don’t have a cutting machine – no worries! You can head to the craft store and find some stickers that fit on your crate.
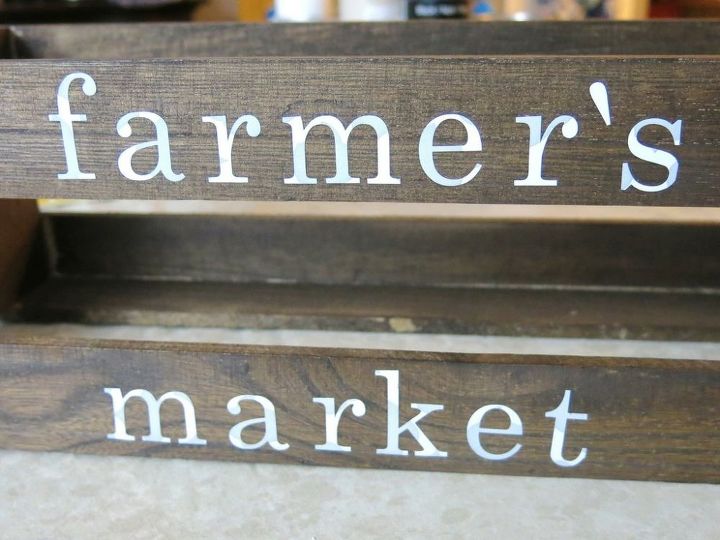
Step 3. Apply your stickers. Be sure press them on well because we’re going to be painting over them.
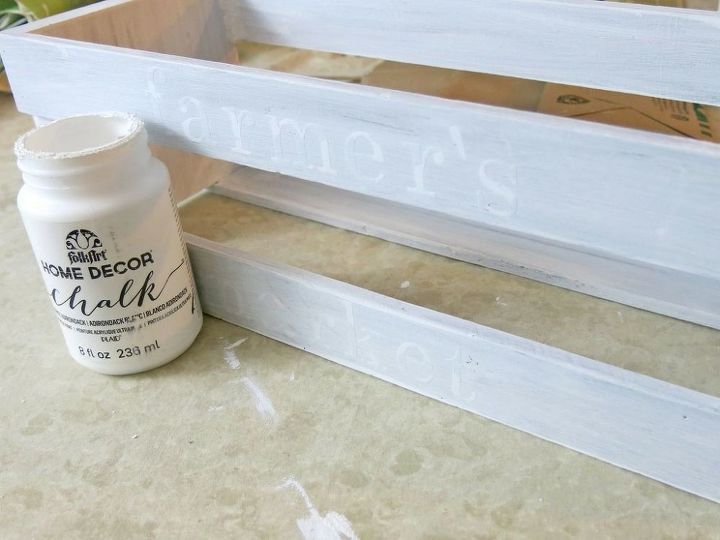
Step 4. Paint the entire crate. I did three coats of chalk paint. Take extra care around the sticker letters and don’t glop (is that even a real word? I totally use glop) lots of paint on the section because it will likely bleed under the stickers.

Step 5. Remove stickers once dry. You’re safe to remove the stickers once it is dry to the touch. If you’re having a hard time pulling the stickers up, try using tweezers to grab them!
Step 6. Distress your wooden crate. I used 220 grit sandpaper for a light sanding everywhere. With the wood stain underneath the paint, it’s a really fun result when you start sanding and that dark stain pops through. When distressing with sandpaper, I usually focus more on the edges to make it look vintage and worn.
Step 7. Seal with a finishing wax. I use Minwax finishing wax, which is clear. If you want to make the crate look even more vintage, you can try a dark wax which will slightly tan everything a bit as you seal. I wanted to keep mine bright and white to go with the colorful Spring decor!
Step 8. Fill your crate. I chose to fill mine with with the painted mason jars we made earlier this week) and faux flowers.


See! I told you that decorating your home for the seasons didn’t have to be a hassle. Adding the vibrant Spring colors and flowers will really help brighten your home as we move into the Spring season. What other ways are you preparing for Spring?This simple farmhouse crate centerpiece can really be used for any season though! I’m sure it will be one of the traveling pieces of decor in our home. Do you have home decor items in your house that are constantly getting moved around too?
VISIT THE BLOG POST (LINK BELOW) TO SEE HOW THIS FARMHOUSE CRATE CENTERPIECE TURNED OUT!

Comments
Join the conversation
-
Very pretty! Easy too! Thanks! ☺
-
So pretty! Love anything farmhouse style :)


Frequently asked questions
Have a question about this project?