


Hanging Macrame Chair

11 Materials
$40-60
5 Hours
Advanced
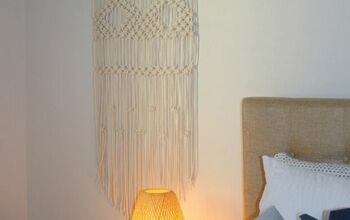
We are going to take a bit of a journey back in time today by doing some macrame. I know it was huge in the 70's, but it's back! Macrame is great for hanging wall pieces and such, but it can also be super functional! I decided to make a hanging chair hammock style with some macrame rope as the seating. A couple of wood dowels serve as the frame for this hanging macrame chair that can be made on the cheap and customized in the colors of your choice!
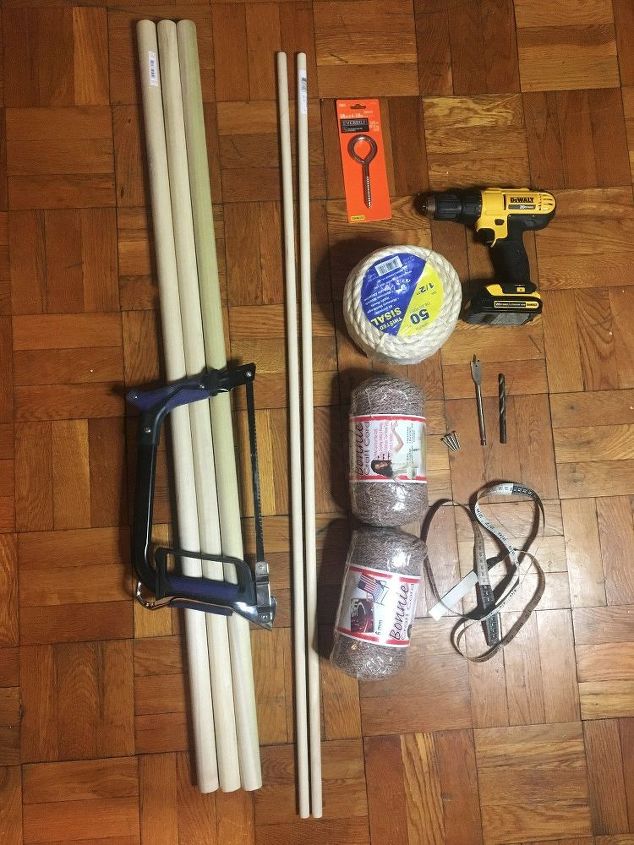
SUPPLIES:
- Two 5/8" Hardwood Dowels (at least 36 inches long)
- Three 1 1/4" Hardwood Dowels (at least 30 inches long)
- Hacksaw
- 200 Yards of ¼" Macramé Cord
- 8 Yards of 1/2" Rope
- Four 1" Wood Screws
- Drill
- 5/8" Spade Bit
- Measuring Tape
- Scissors
- 3/8"x4 7/8" Screw Hook
- 90mm Spring Carabiner
-Spray Paint (optional)
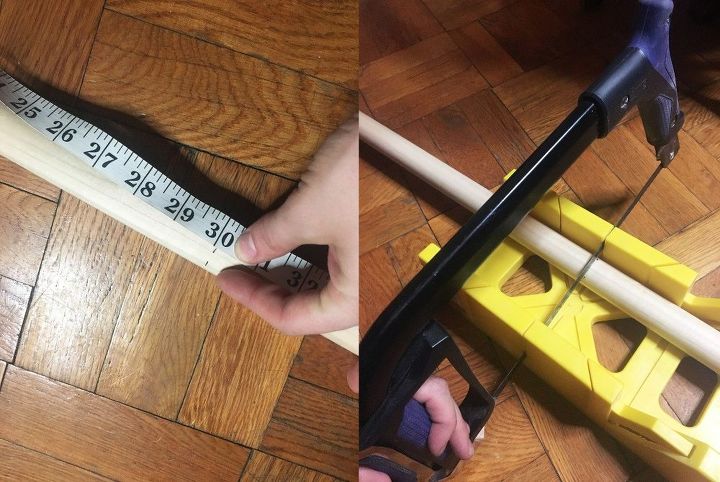
STEP 1: I could only find 48" dowels in each diameter so you first need to cut your dowels to the correct size. You need three 1 1/4" dowels that are cut to 30 inches. You also need two 5/8" dowels cut to 36".
Cut your dowels with a hacksaw or circle saw.
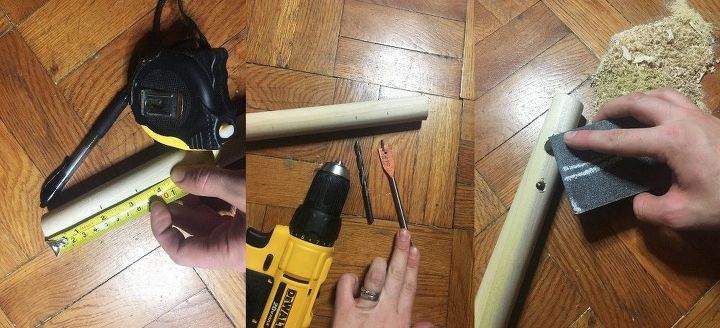
STEP 2: Grab two of your three 1 1/4" dowels and measure in 2" and 3.5" on each end. On your third 1 1/4" dowel measure in 3.5" on both ends. Make sure all the holes are level and precisely lined up so that the frame you create is perfectly square. (Set the 3rd dowel aside)
Grab a 5/8" spade bit and drill through the 2" marks with your 5/8" bit. Drill through the 3.5" marks with a 1/2" drill bit. Work your way up with the bits to avoid splitting the wood.
Once you have drilled all the holes sand them so they are nice and smooth.
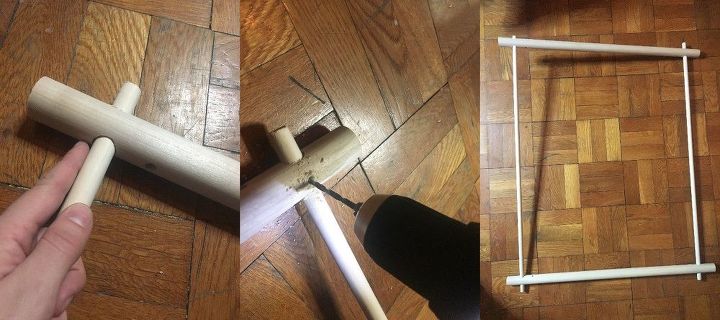
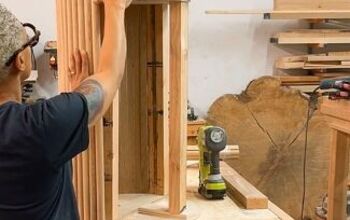
STEP 3: Feed your 5/8" dowels each end through the 5/8" holes drilled into the larger dowels in step 2 allowing a one-inch overlap on the ends.
Drill a pilot hole through both dowels where they meet in each corner. Secure the dowels in place with a 1" wood screw.
At this point you have created the square frame for the chair. It will look like the picture on the far right above.
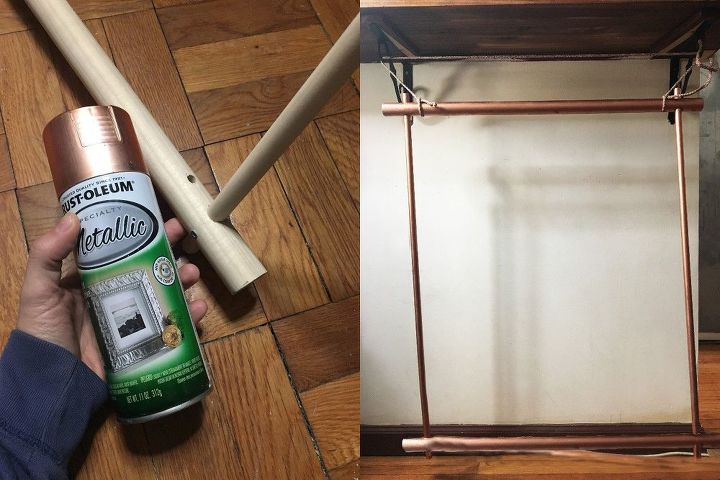
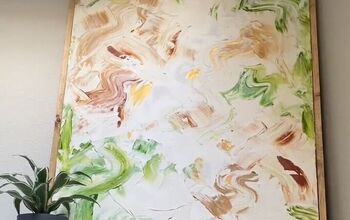
STEP 4: (optional) If you want to paint your frame now is the time to do it.
Hang your frame temporarily so that you can create the macrame seat. Make sure it is somewhere you can sit comfortably as the next step is a bit time consuming.

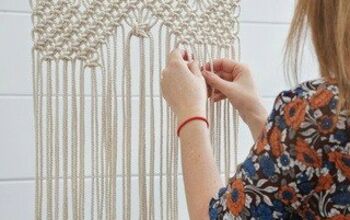
STEP 5: Cut your macrame cord into 16 26 foot pieces.
Fold each macrame piece in half and loop around the dowel from front to back. Send the tails through the loop. Do this with each cord so that you have 32 strands hanging when you are done.
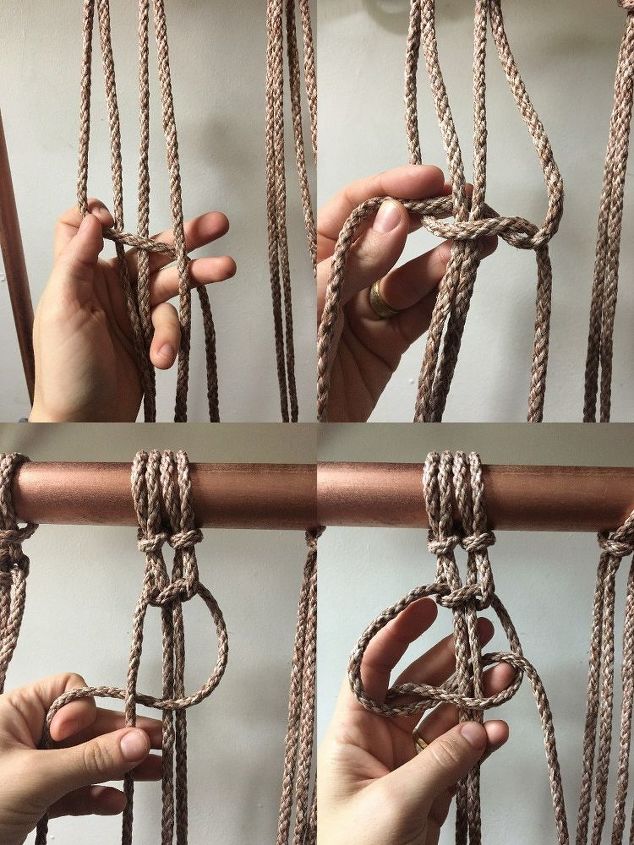
STEP 6: Now it's time to create the knots of the chair. Don't worry it looks crazy when it is done, but it is a simple square knot we will be working with the whole time. First take 4 strands and feed the furthest strand on the left over the middle two strands and behind the furthest strand on the right.
Now take the right cord and do the same thing in the opposite direction. Cross it under the center of two cords, through the hole, going over the left cord.
For the second part take the right cord and cross it over the two middle cords and then under the left cord. Now take the left cord, cross it over the two middle cords, go through the hole and over the right cord. Pull the cords and make a tight knot.
Repeat this with all the strands so that you have knots the whole way across the frame.
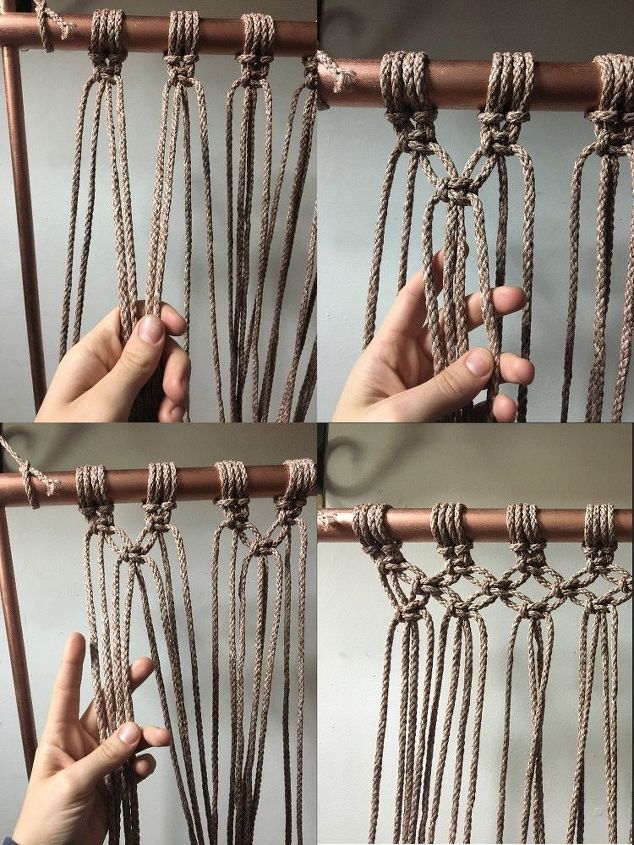
STEP 7: For the second row you will be creating the same knot, but skipping over the first two strands to connect the two knots in the first row. Basically you are grabbing the last 2 strands from the first knot and the first 2 from the second so they connect with each other.
Repeat step 6 with the strands. Continue this all the way across creating a second row with knots that rest in between each of the knots created in the first row.
For the third row you will go back to the first 4 strands and create the same knot in step 6 again.
Repeat this over and over until you have about 45-48" of knotted cord. The seat needs to be longer than the frame.
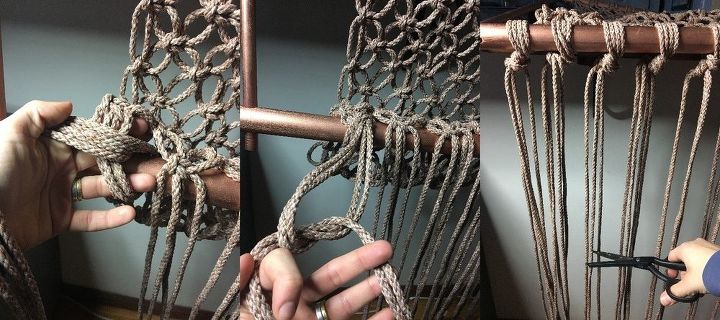
STEP 8: When you reach the length you need it is time to tie the end to the bottom of the frame. Take 4 cords and wrap them around the dowel and tie them securely in a knot. Then for extra security tie a second knot by dividing the strand in two pieces tying them in a knot and pulling it as tightly as you can. Now trim the hanging cords to the length of your desire.
*You can fray the ends for a nice fluffy bottom if you want.
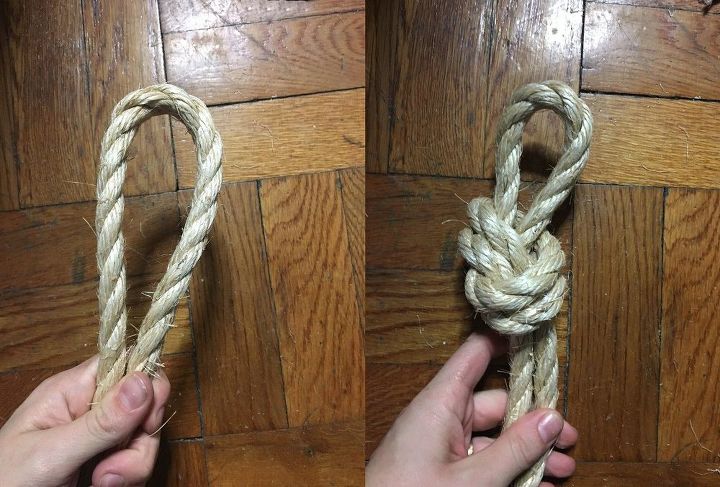
STEP 9: Now grab your 1/2" rope and cut a 10 ft. piece. Fold the rope in half.
Tie a knot several inches down to create a nice loop.
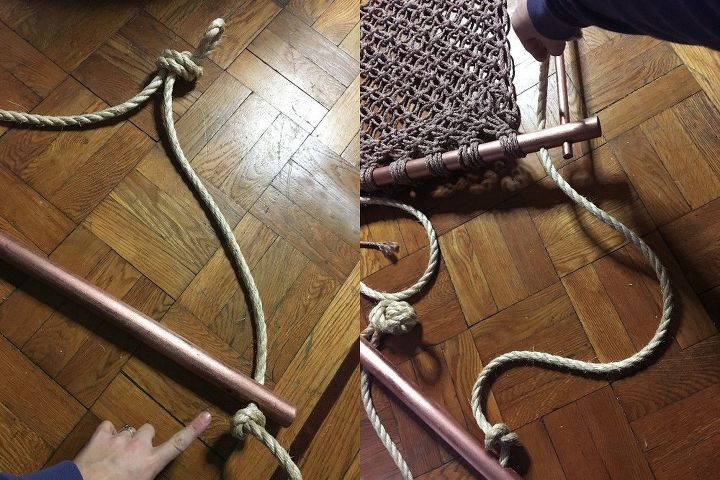
STEP 10: Feed each end of the rope through the 3rd large dowel that was set to the side in step 2. Tie knots underneath the holes leaving 20-24" between the top knot and the dowel.
Using the same rope feed the ends of the rope through the 3.5" holes on the dowel that rest at the top of the frame. Tie a knot under the dowel leaving at least 30" of rope between the 2 dowels. Make sure the knot is loose enough that you can adjust it if need be.
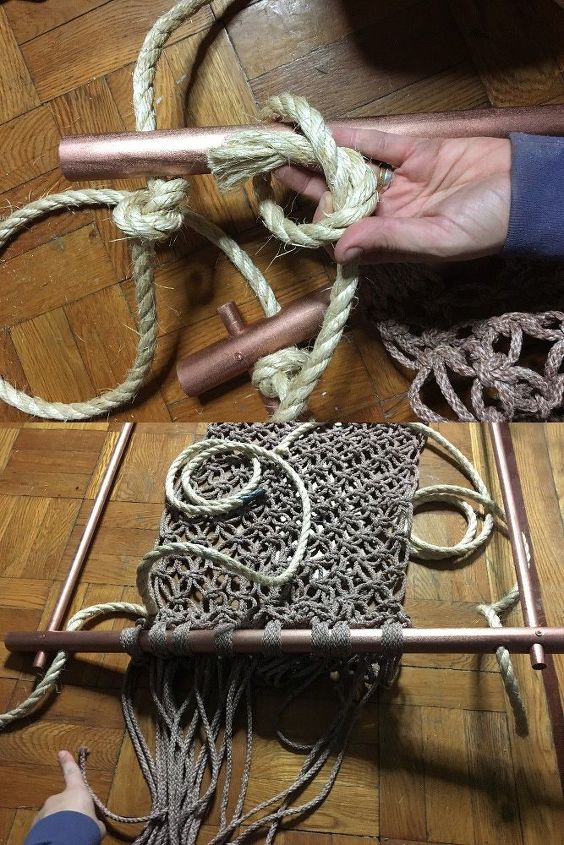
STEP 11: Cut 2 more pieces of 1/2" rope that are 65 inches each. Feed each rope through the holes in the dowel at the bottom of the frame. Send it through from the bottom going up toward the other dowels. Tie a knot underneath the bottom dowel.
Pull the rope all the way up to the top third dowel, wrap it around the dowel and tie a loose knot leaving 60 inches between the top dowel and the bottom one.
****These pictures should be in reverse. The bottom picture is first and then the top is the step to follow.
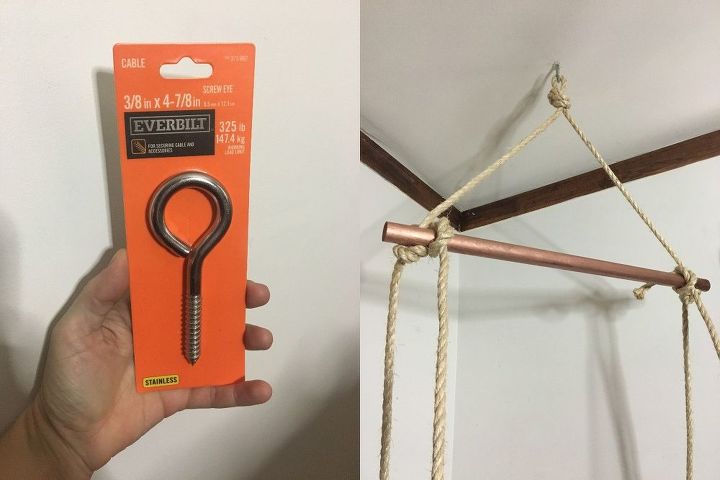
STEP 12: Now it is time to hang your chair! This part is important as you need it to be in a place that can bear the weight. If you are hanging it indoors you need to use a stud finder to make sure you are hanging it from a cross beam in the ceiling. Once you find a beam screw your screw hook into the beam nice and tight.
Then attach your carabiner to the loop of the knot at the top of your chair and feed the carabiner into the loop of the screw hook.
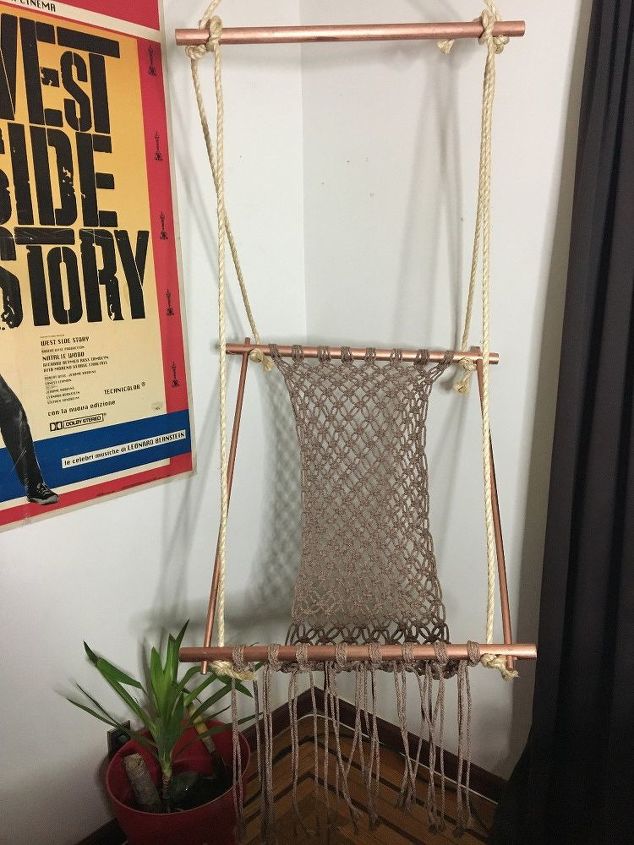
Now take a seat and enjoy!
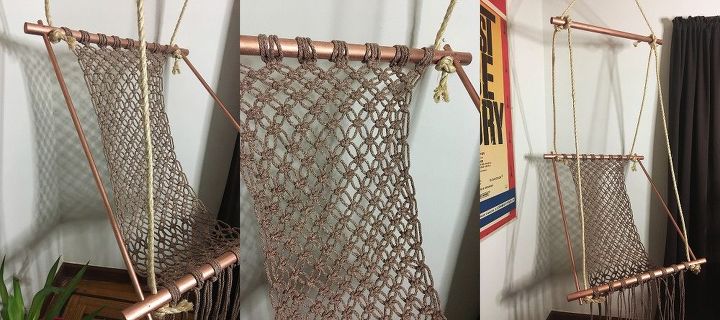
I know that the details look crazy on this thing, but it honestly is easier than it looks and the frame is harder than the macrame. You can make so many fun and beautiful pieces with macrame, but I love that this is also functional... and pretty comfy too!
Resources for this project:

HORUSDY 97217 Stainless Steel Carabiner with Screw Lock 90mm
2 of T.W . Evans Cordage 23-605 1/2-Inch by 50-Feet Twisted Sisal Rope


Any price and availability information displayed on [relevant Amazon Site(s), as applicable] at the time of purchase will apply to the purchase of this product.
Hometalk may collect a small share of sales from the links on this page.More info
Comments
Join the conversation
2 of 60 comments
-
I loved the act of macrame, soothed my brain and I made beautiful pieces.
-
Amanda, I just wanted to say that you are one of my fave DIYers!! Not only do you have some AMAZING ideas, you also have the talent it takes to bring your ideas to life. This is one of many that I hope to try soon. You are an incredible artist. Thank you for sharing your gift. Best of luck in all of your endeavors and please, keep rocking the DIYs


Frequently asked questions
Have a question about this project?
I don’t understand how you hung it when you used a circle screw. I don’t see a hook??
I love it! Can you tell me what the point is of the thinner dowels on the sides? I can't figure out their purpose and it seems like it would just weaken the wood to have two holes right next to each other. Please and thanks!
Do you have a video of tying the knots? I love this chair and want to make it but the directions are confusing.