


DIY Distressed Side Table
4 Materials
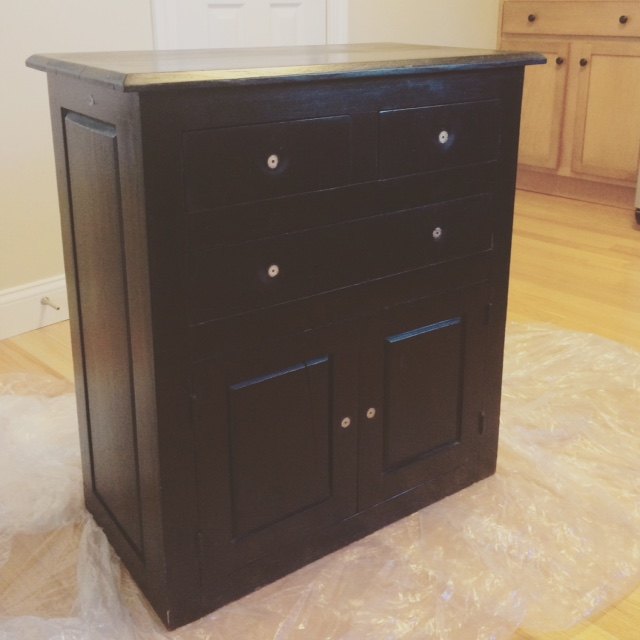
I wanted to take another chance to show you the POWER of PAINT! Yes, any old paint you have lying around!A client of ours had approached us with this old, black side table that she had been using as a telephone table in her kitchen. I showed her a few different finishes that could be achieved by just simply using paint! She chose a rustic look, with slight white-washing and distressing. I asked that she pick out a paint color, and I was off to the races!To view more pictures and detailed steps, visit our full post here!
Steps:
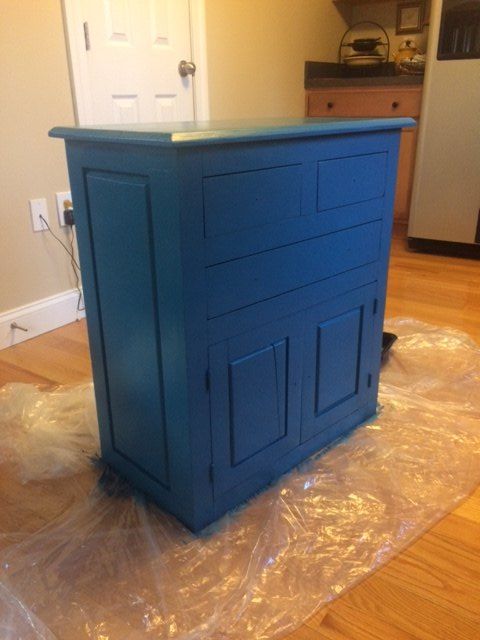
- Using your foam roller, apply an entire coat of paint all over your piece. Use your paintbrush to apply paint into the hard to reach crevices. Allow the first coat to dry completely
- Repeat Step 1 until you have achieved a full coverage, and can no longer see the base color through your new paint color.
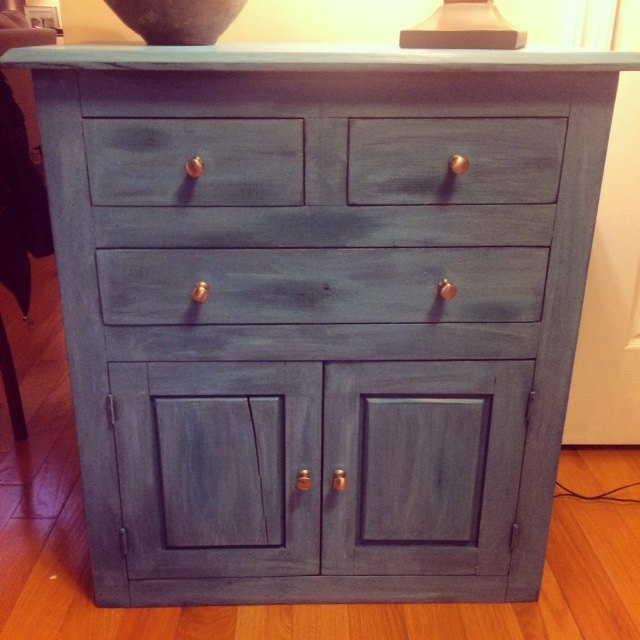
- Dip a corner of your rag gently into your cup of water. Ring out any excess so that the corner is just damp. Then dip this corner into the white paint. Begin to lightly wipe the white paint onto your piece.
- If you feel the white paint is being apply too heavily, use a clean damp corner of the rag and wipe away any excess. Continue to whitewash your piece however you like. There is no set design pattern you should follow!!
- Once you're happy with the white washed look, allow the paint to dry.
- Now, it's time for distressing- My favorite part! Grab your sandpaper and begin to lightly sand away paint from your piece.
- After your edges are sanded, randomly sand spots on your piece's flat surfaces.
- When you feel your piece is finished, step back and admire!
For more detailed steps on how to achieve this look, visit our full post here! I encourage you to take a look at any old wooden furniture in your home, and see if you can repaint it! It transforms a space completely, I promise!!

Want more details about this and other DIY projects? Check out my blog post!
Comments
Join the conversation
2 comments
-
It looks SO good!
-
Love it!


Frequently asked questions
Have a question about this project?