


DIY Wooden Box String Art Design

by
Troom Troom
In this tutorial we'll show you how to decorate a box with a floral string art pattern. Using this diy box design you will create a cute box that perfectly keep dry tea or tasty homemade biscuits!
{
"id": "3799814",
"alt": "",
"title": "",
"video_link": "https://www.youtube.com/embed/vykSz3eSNWo",
"youtube_video_id": "vykSz3eSNWo"
}
{
"width": 634,
"height": 357,
"showRelated": true
}
We’ll need:
- a blank wooden box;
- acrylic paints of brown shades;
- flat brushes;
- water;
- nails, 5/8 length;
- hummer;
- white and green threads.
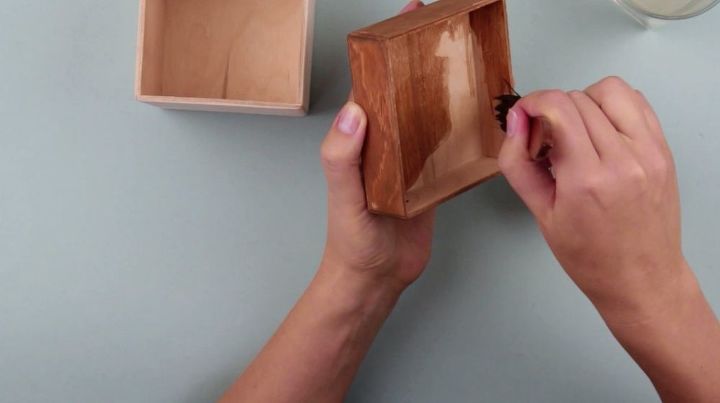
Start by painting the wooden box. Squeeze brown paint into a cup.
Mix it with water to enhance the wood pattern when applied.
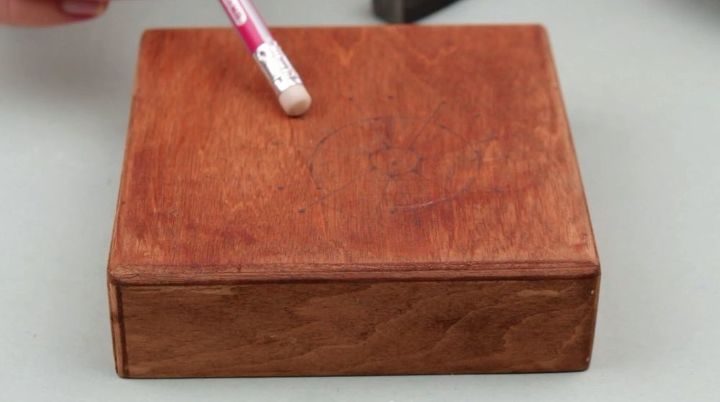
Paint the box.
Start decorating when dry. Use the dandelion pattern you can find in the attachment to this tutorial. Prepare the nails, 5/8 inch length and a hammer.
Draw the dandelion pattern on the lid. You can either use the pattern from the attachment or draw it by hand. Trace any round object of the appropriate size.
Mark the center. Draw a smaller circle inside.
Start making the marks in the central part following the pattern.
Use a ruler to make the job easier. Mark the dots on the bigger circle and outside.
The pattern is ready.

Hammer the nail in the center.
Then add the nails to the marking. Done!
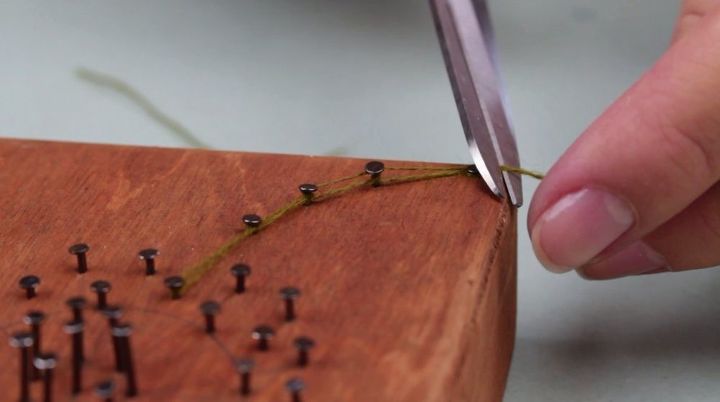
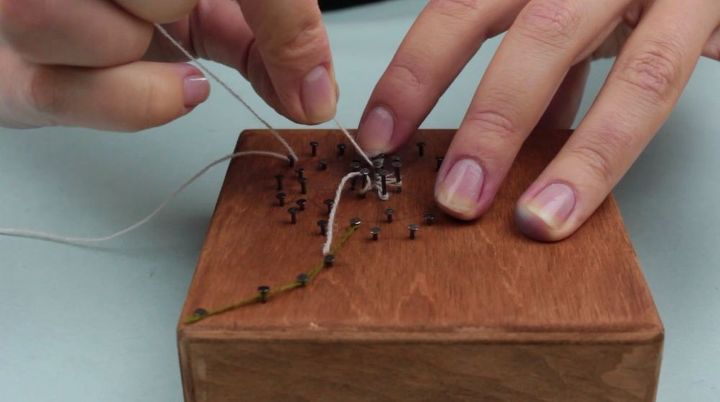
We’ll need white and green threads for the next step.
Fasten the end of the green thread around the edge nail. Weave around the nails shaping the dandelion stem. Wind around each nail. The nail-heads will keep the thread in place.
Cut out the excess.
Fasten the end of the thread around the first nail.
Hammer the nail to fix the thread with the head. Cut out the excess.
Weave around the nails shaping the dandelion flower with the white thread. Move from the center outwards.
Press down the thread with tweezers if necessary.
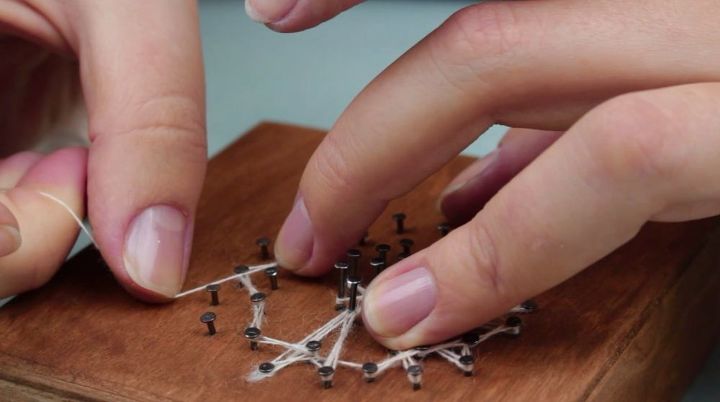
Join the flower core with the outer circle. Weave the nails several times to make the pattern intense.
Link the elements.
The job needs patience but the result is worth it.
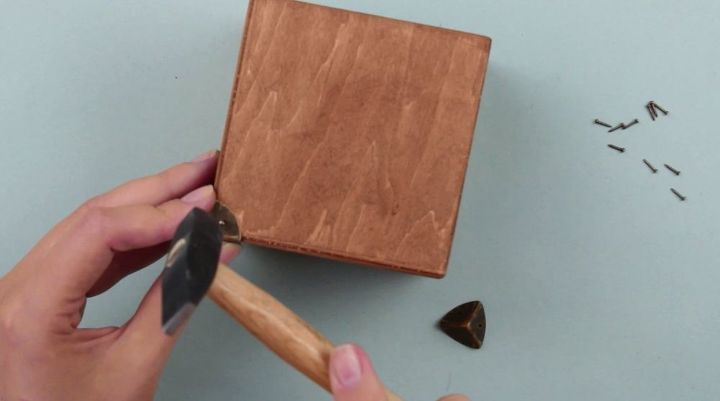
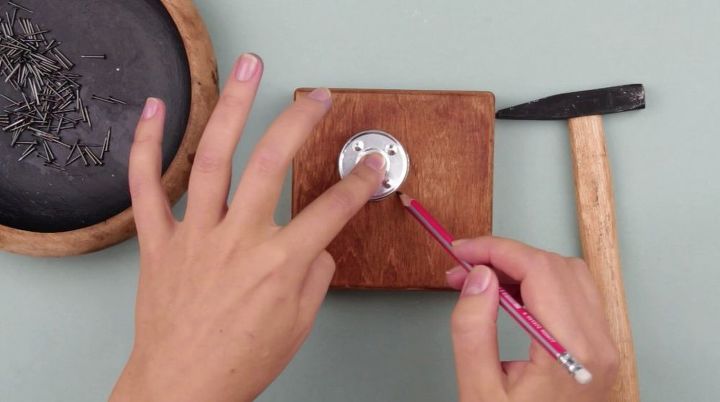
Embellish the box corners with metal caps. You can buy some in handmade supply shops.
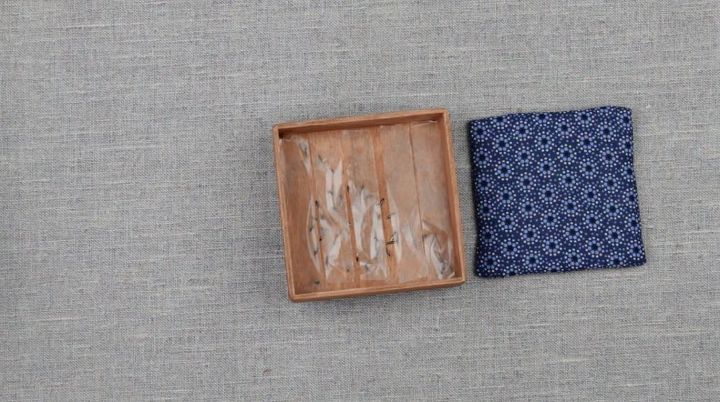
Decorate the lid from the inside as a finishing touch. We have hammered to bend the sticking up nail ends.
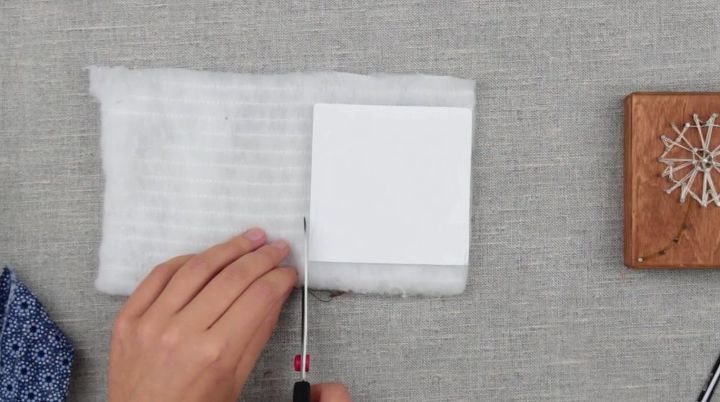
Choose a fabric piece to match the string art pattern.
Take a piece of soft polyester and cardboard.
Trace the box on the cardboard as it fits the lid inner size. Cut out the pattern.
Place it on the polyester and cut out.
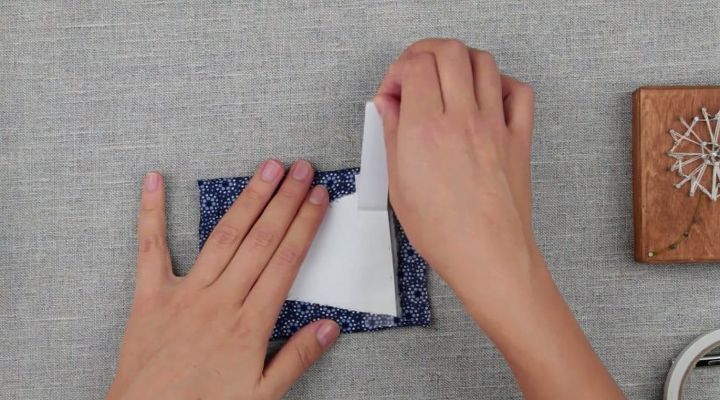
Put the polyester on the cardboard and wrap with the cloth.
Attach the fabric with a double-sided tape. Stick it across the opposite sides of the cardboard.
Remove the protecting cover.
Attach the cloth pulling up a little.
Cut out the excess fabric at sides leaving the extra space for attachment.
Fasten the cloth across the sides in the same way.
We’ve got such a neat pillow.
Attach it to the lid with the tape.
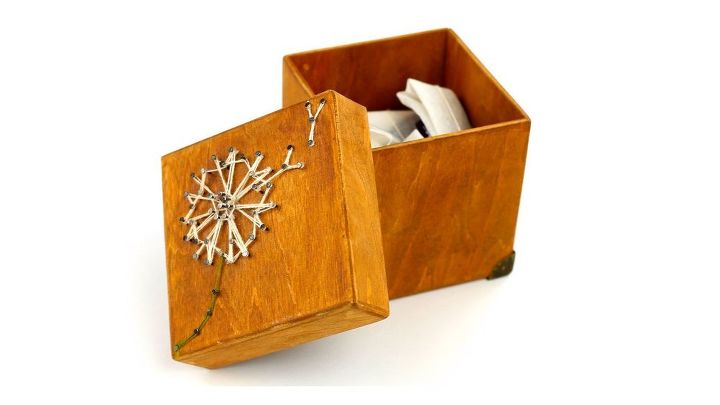
Done! This smart box will perfectly keep dry tea or tasty homemade biscuits.
If you're like this project, check out our YouTube channel: https://www.youtube.com/troomtroom OR our super cool website: http://troomtroom.com
Thanks so much for reading/watching!!!
Comments
Join the conversation
2 of 6 comments
-
So cute....I love the dandelion puff! I have done some things with those tiny 5/8th inch nails. My trick for installing them is to hold them with a curved hemostat. Saves hammered fingers, and you might put your lid over a piece of wood to hammer on. You won't collapse the lid that way.
-
The corner caps really finish it off. What a sweet little box, thanks for sharing!


Frequently asked questions
Have a question about this project?