


Foam Cornice/Valance on a Budget!
8 Materials
$40.00
1 Day
Easy
Hi everyone! Thanks for reading! Another DIY project, slightly modified after reading a few Pinterest tutorials. This was cheap (about $40.00 for one very large window and two "less large" windows (but still quite large). This would have been less money had I used a solid fabric to cover the foam, but I chose one with print... if you sew at all, you know how that goes! I fell in love with this print and had to have it. As a result, it took more time, more money and patience (not my greatest strength!!)
If you want quick, easy and cheap, choose a solid fabric and either paint with fabric paint or add some trim (glue gun would work fine)
Note: as V Smith pointed out, in one of the comments below, styrofoam on fire creates toxic fumes!!!! Something I didn't consider when I posted this project-
For safety measure, if you are going to hang this anywhere near lighting (as you see in my kitchen window/the canvas/nailhead trim) make sure you have LED Lighting, since it doesn't get hot, it won't be a fire hazard!!!

Styrofoam insulation cut to fit window
I measured my window and marked the styrofoam. I used a utility knife to cut through. I cut two side pieces. This can be any "depth" you like. I cut mine at 3.5 inches. It just looked right for my window.
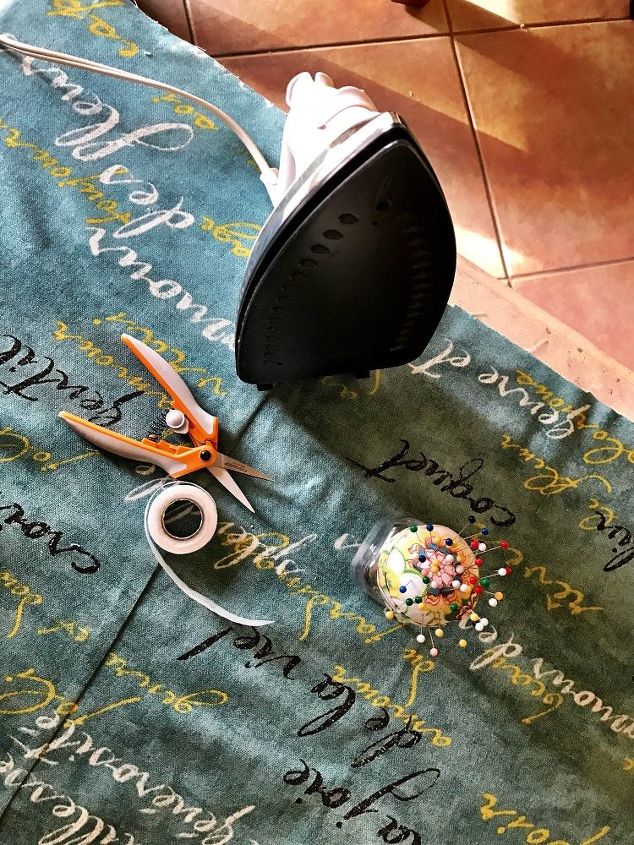
Prepared the fabric
Flat on a table, I joined the fabric using no sew tape (melts into fabric with iron). Very simple but took a little more time than I wanted! As I said, patience is not a strength of mine. I really love the print, but not sure I would do it again.
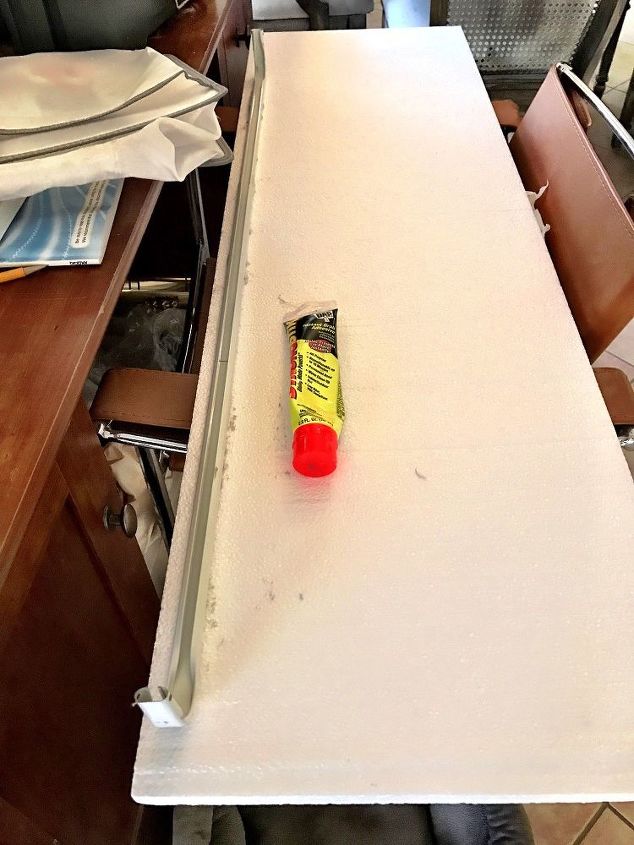
All purpose glue to secure "rod"
- I don't even know what it's called, LOL but you can see it. I glued the "rod thing" directly on to the foam. I used "DAP" brand glue. It's white and was dry in ten minutes. I didn't do this with the other ones- It was an after thought! For the other two, I used finishing nails. I just nailed them into the wall and literally stuck them through the foam. These are so light weight, it was easy. We will see which holds up better!!
- I am still getting used to taking photos of each step, so please forgive me! I missed a couple. The next step was to add the sides to the flat piece of foam. All of the tutorials said to use hot glue, etc. Glue didn't work for me! I used pins. Lots of them. I stuck them through the front so they poked out of the back and pushed the sides right in. Edit: I found out that DAP glue works great for the sides!! Just plop it on. The styrofoam will be uneven, that's just how it cuts... But if you use this glue, you will only need a few pins! I think this stuff is becoming my "go to glue" for these projects!
- I used packing tape to secure them a little more. I was a bit worried about this, because it seemed flimsy, but once I attached the fabric, I was able to "pull and pin" tightly, which secured them even more.
- I used the cheapest batting I could find. I purchased this with my fabric, at Walmart. They have a great selection of waverly fabric, absolutely the least expensive place I could find! The batting was about $5.00 for a big roll (it stretches so it goes far) and the fabric was about $4.00 a yard.
- The tutorials said to use spray adhesive to attach the batting and fabric. I bought it and never even opened the can. Instead I pinned. They were right there in front of me and it just seemed easier. I was inside and really didn't want the fumes in the house. I was too lazy to take it outside!!! (Plus my neighbors are probably pretty tired of all of my DIY projects! The last one involved spray paint and I'm pretty sure each neighbor has some color they didn't ask for, that the wind carried to their patios!!! Lesson learned: don't spray paint when it's windy outside!!!!

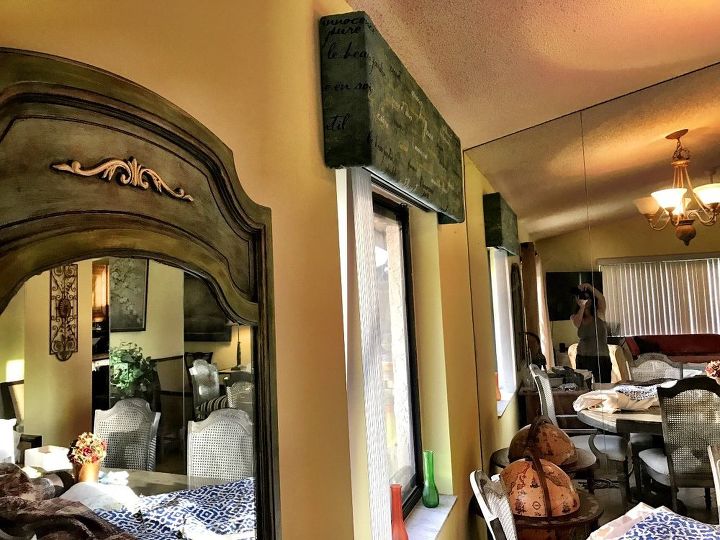
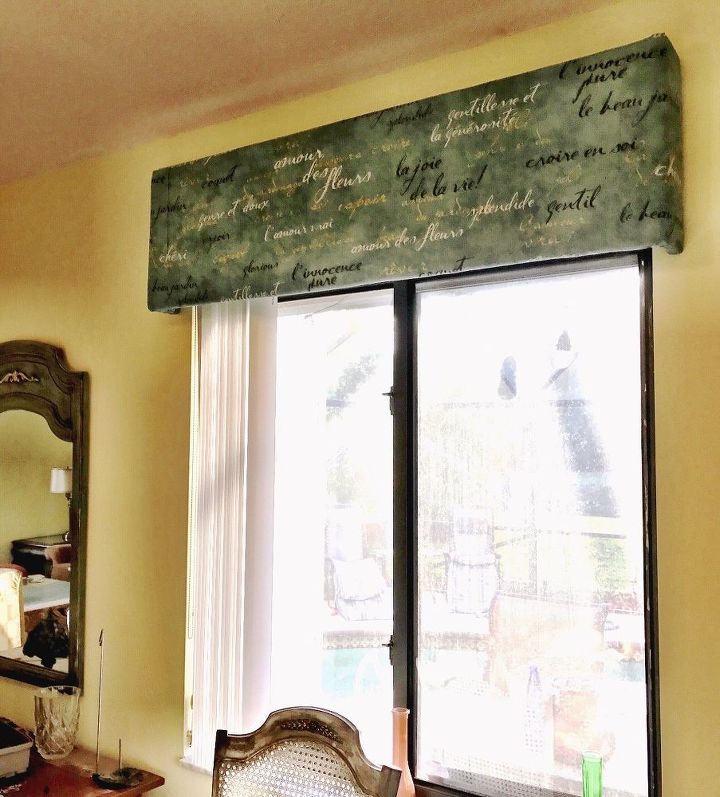
Here it is!!
First window, done!! Please excuse the ugly 80's mirror and vertical blinds! My house is a work in progress! We bought it in April and have a ton of updating to do!
A little more light
If you have any questions at all, feel free to comment! This was easy and really made my home feel more "finished", even with all of the updating we have to do!
Latest
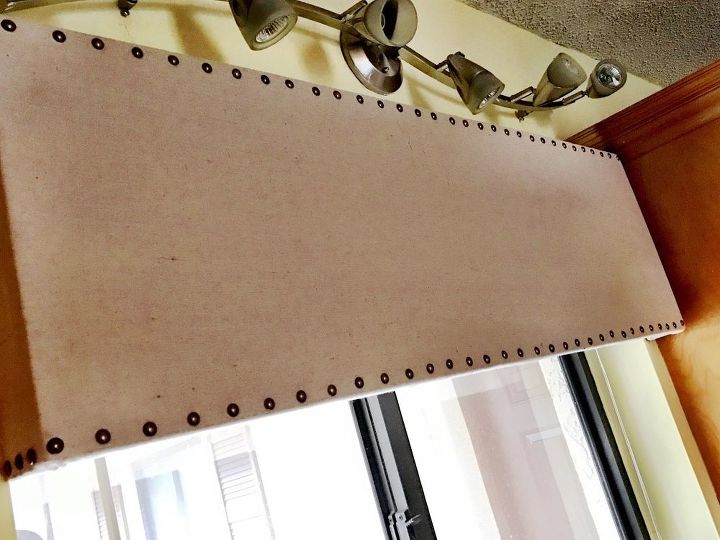
had one more to do! Figured I would post it, since it's a little different.
Drop cloth and upholstery nails- love it!!
Resources for this project:
See all materials


Any price and availability information displayed on [relevant Amazon Site(s), as applicable] at the time of purchase will apply to the purchase of this product.
Hometalk may collect a small share of sales from the links on this page.More info

Want more details about this and other DIY projects? Check out my blog post!
Comments
Join the conversation
2 of 128 comments
-
Great ideas. Thank you so much for the share.... I will definitely try this.
-
Love this. I work at Lowe’s and lots of people have been buying the drop cloth for curtains. Going to try it !!


Frequently asked questions
Have a question about this project?
How high and deep were the dimensions of the cornice?
I have 50” width windows but are only 27” length. I just want to do about a 12” drop valance. Enough to cover top of blind. Do you think this would be a good option to do? Would I be able to find styrofoam in that length?
Is the curtain rod you glued to the foam for stability?? What did you use to mount it to the wall??