


DIY 'MOSSY' AND AGED TERRA COTTA POTS
6 Materials
$7
1 Hour
Easy
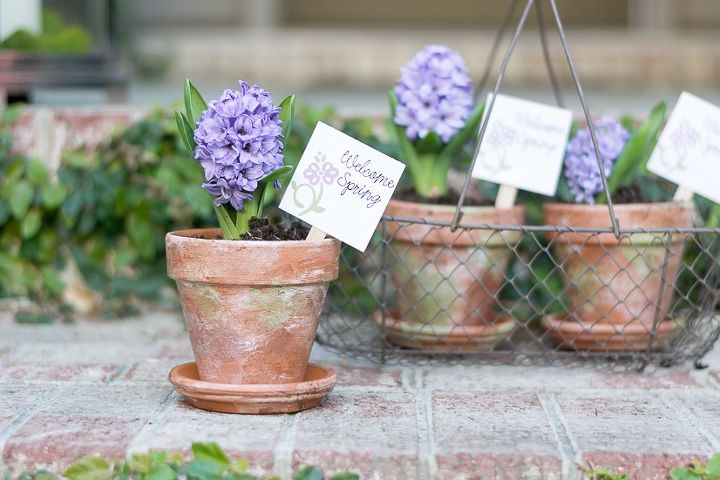
I was looking for a way to make some very simple Spring-themed gifts for friends, neighbors and family, came up with an idea and love how it turned out. If you are anything like me, this time of year you are yearning to soak up all growth that this season brings.
Flowering spring bulbs are a great way to do that and so I knew I wanted to go that direction. If you start soon enough, you can force some bulbs indoors. But if you’re like me and don’t always plan ahead, you can always find a pot of bulbs at your local hardware store that are just starting to bloom and divide them as needed.
I picked up a pot of 5 Hyacinths that were just about to start blooming for less than $9.00. While at the hardware store, I also picked up 4″ terra cotta pots and saucers. The total for each pot set was less than $5.00.
Using some paint I had, I was able to make each of these gifts for less than $7.00 each and under 1 hour. The majority of that one hour was drying time, hands on painting was probably 5 minutes total.
I do love terra cotta as is, but since I’m all about channeling moss and greenery this year, I wanted to give my pots a little treatment to make them look aged and mossy.

What I used to make ‘mossy’ and aged terra cotta pots
Americana Glazing Medium
American Satin Acrylic Paint in Coffee Bean
Terra Cotta Pots
Paint Brush and Paper Towels
How I made my 'mossy' and aged terra cotta pots
This is really so very easy-peasy and also quick as the acrylics dry so fast.
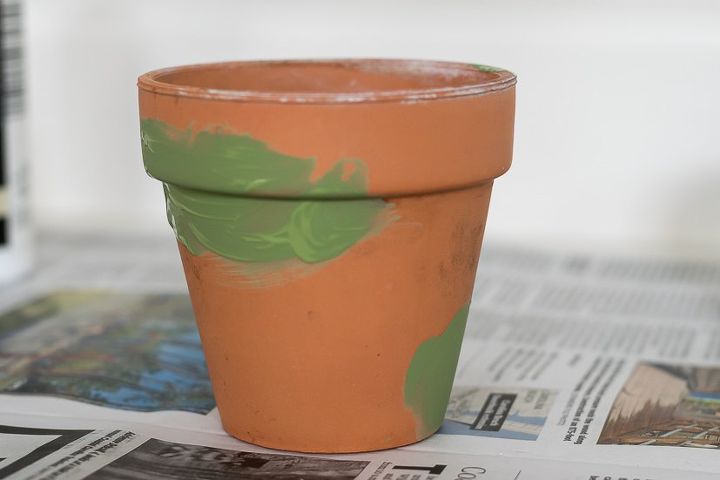
With your green, just put a few patches of ‘moss’ in a couple of random places
Let it dry for about a half hour.
Water down the white chalk paint…about 75/25 water to paint.
Use a paper towel to dab the white on and then immediately wipe it off, more in some places…just very haphazardly.
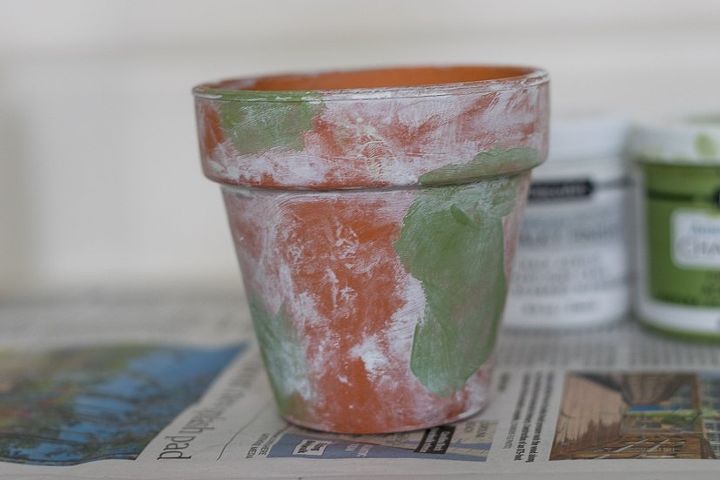
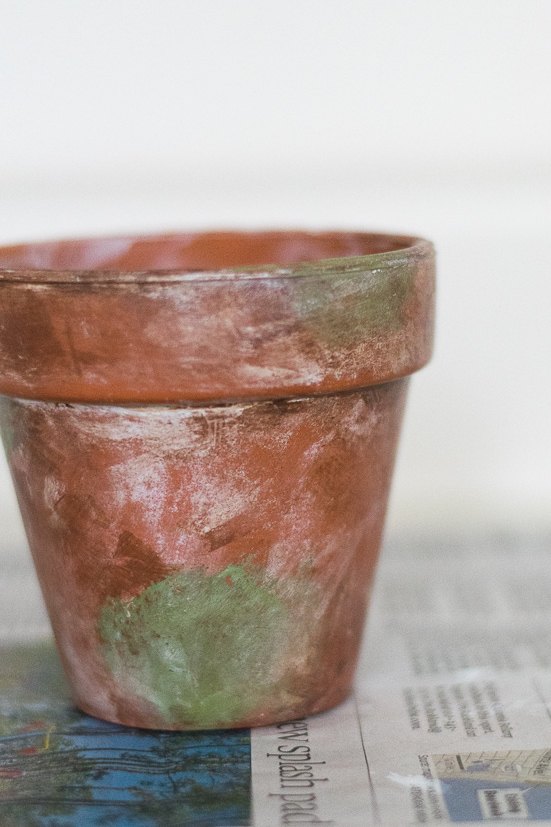
Use about the same 75/25 ratio for the glazing medium/brown paint and dab it on with a paper towel and then immediately rub it off in places, again, without a pattern...just here in there.
And don't forget to age the saucers too!
Here's a wee little video showing how I aged terra cotta pots. Note that in the video I used more paint than I recommend in 75/25 ratio for both the white and the brown glaze. The still pictures in this post reflect me using closer to the 75/25 ratio.
{
"id": "3807184",
"alt": "",
"title": "",
"video_link": "https://www.youtube.com/embed/8f89JusjEVU",
"youtube_video_id": "8f89JusjEVU"
}
{
"width": 634,
"height": 357,
"showRelated": true
}
I tucked the hyacinths in the pots and added a little sign using my Cricut Explore Air. The sign just finishes the gifts perfectly. You can see how I made the signs over on my blog.
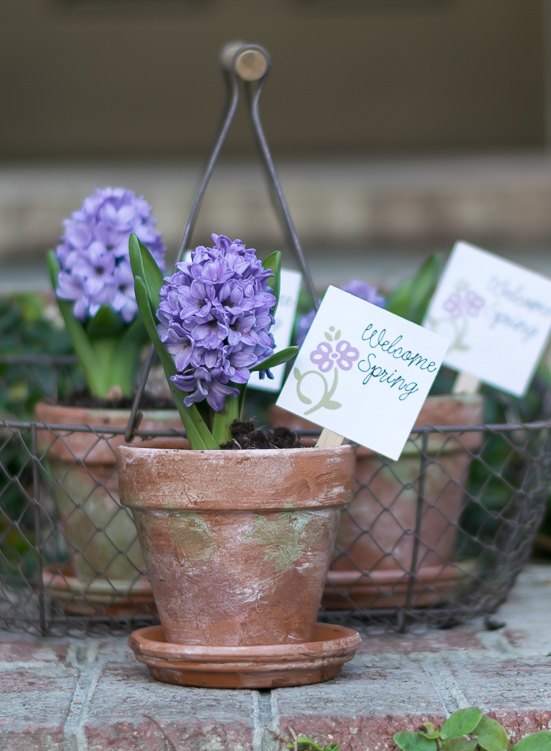
This was such an easy and economical gift, and one that I really enjoyed gifting. And I'm pretty sure I'll be aging more pots very soon.

Want more details about this and other DIY projects? Check out my blog post!
Comments
Join the conversation
2 of 12 comments
-
Lindinhos!
-
Really nuce


Frequently asked questions
Have a question about this project?