


Easy to Make Vintage Electric Go Kart for Your Kids

4 Materials
$300
10 Days
Medium
I would like to present You the electric go kart project which I've made for my son. Such car isn't very hard to built because it's made mainly from wood and from bicycles and scooter parts.
{
"id": "3807470",
"alt": "",
"title": "",
"video_link": "https://www.youtube.com/embed/lzjhxA2gNfg",
"youtube_video_id": "lzjhxA2gNfg"
}
{
"width": 634,
"height": 357,
"showRelated": true
}
So the first step is the design. I would not give You exact numbers because You will have to find it by Your own. Take Your child and measure them. Consider to measure following properties:
legs length - this will determine the chassis length
arms length - this will determine how far from the seat should be the steering wheel.
body size - this will determine the whole car size
kid weight - this will determine how strong the construction have to be and how big batteries You should use
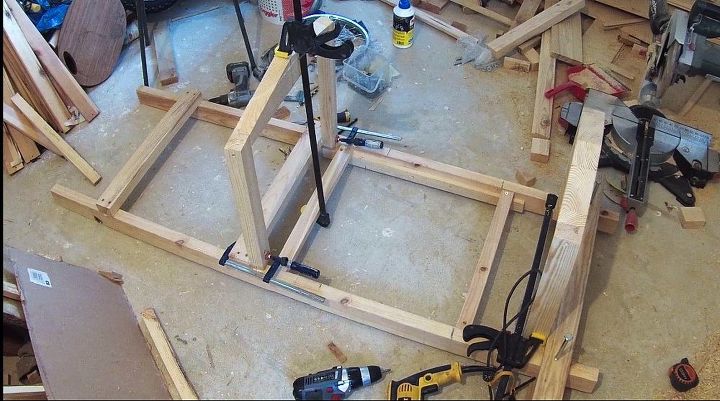
OK. You have dimensions, so You can built the frame. I've used the pine wood for frame. Mainly becouse it is the light and flexible wood. Flexibility is importantant because my electric car won't have any dampers (only wheels with tires-like in bicycles).
I also made more sensitive car parts from wood, but from stronger one like oak. So the whole front suspension is from oak.
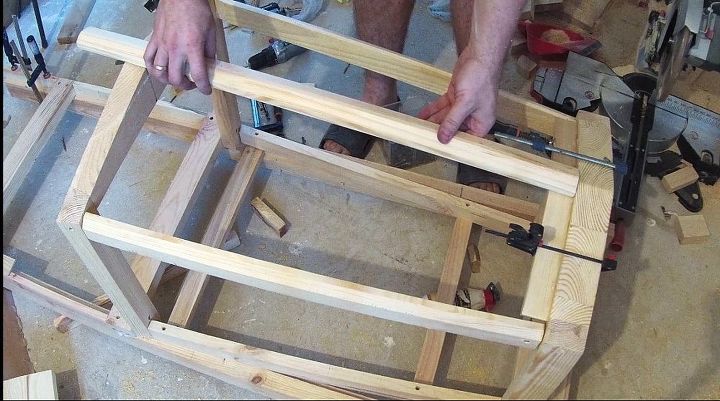
Car Body can be made from plywood. It's cheap, easy to work with (only saw is required) and it is strong enough. I only recommend to use thicker 1" wood for the sides of the car where. Those sides should be from more resistant material than plywood becouse they have to sustian gettin in and out from the car.
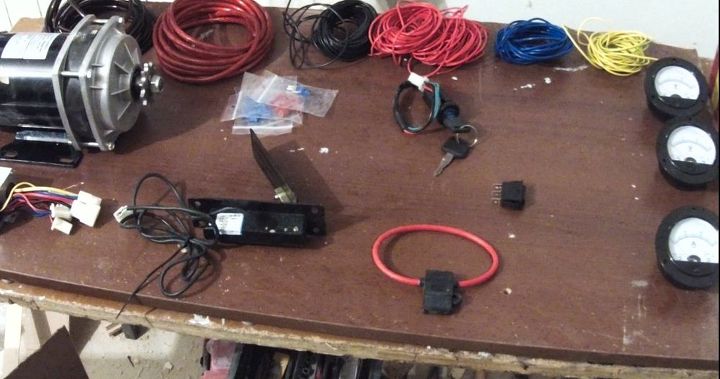
Electronics isn't very complicated thing.
First You have to choose the engine. I've used 350W 24V DC engine with built in gears reducing RPMs to about 600 RPM. It is enough to allow my son to drive with the speed of 9mph (15kmh).
Engine is controlled with the Chinese controller which You can easily buy on ebay. Controller is also connected with the ignition switch and with the gas pedal made from hallotron from electric scooter (those parts are cheap and also easy to find in internet).
Power is transmitted to the rear wheel by the freewheel. It's a gear which doesn't roll during riding down the hill. It's important becouse it stops generating the back currents. Such currents could destroy the controller.
If You think that all of that is a little bit tricky - don't worry. Just buy whole engine+gears+controller+gas pedal kits. There are such things on internet.
I've used two 12V 18Ah batteries (exactly same like in the real car). Those batteries aren't great choose for continuous load but there are cheap:) They provide energy enough to ride from 3 up to 6 hours.
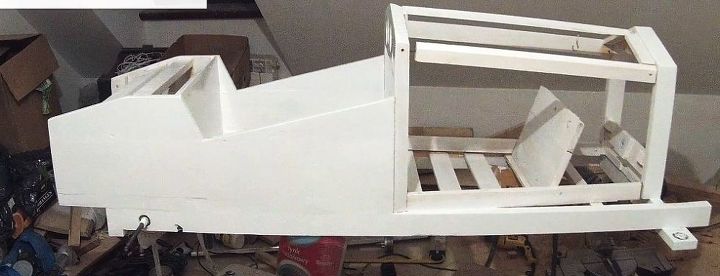
Painting the car is real easy. Few thing to remember. Before painting whole construction have to be sanded (with sandpaper). Use several coats - undercoat and then 2-3 final coats of final color. Do not use brush if You want to have smooth surface. I recommend paint rollers instead.

To do a final touch use Your imagination and search Your attic, workshop etc. As You can see on my video, I've attached bicycles lamps, luggage space and even horse statue at the front:)
That's all.
I encourage to build such car for You kids. Satisfaction is great and Your kids would be very grateful to You for such present:)
If You want more details ask in comments and subscirbe my youtube channel. I will make step by step video tutorial about this electric car.
Comments
Join the conversation
2 of 4 comments
-
This is FANTASTIC!!! You're very talented and creative. You did a wonderful job!!
-
Oh, thank You.


Frequently asked questions
Have a question about this project?