


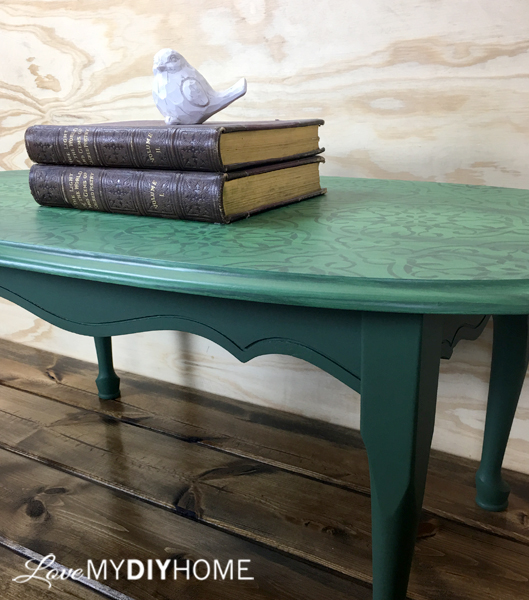
Coffee Table Goes Green - Literally!
3 Materials
$50.00
8 Hours
Medium
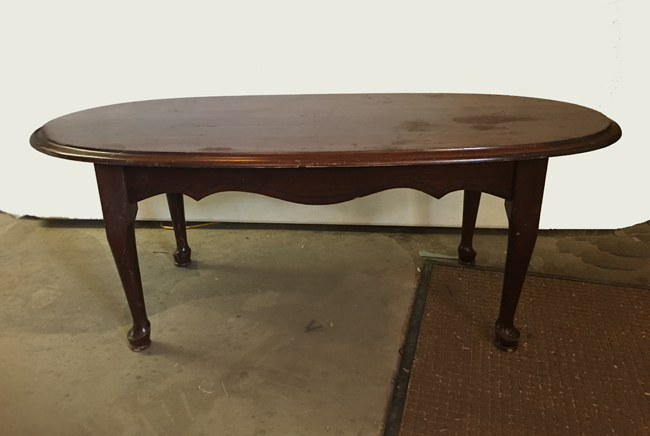
Named for my Mother-in-law, Bertha was in rough shape and sat in our storage shed all winter.
Bumps, dings and scratches made this out-dated coffee table flipping fodder. I needed to make her worthy of her name. To begin with, I was a little intimidated by the very dark stain. Bleed through can a problem and sometimes it doesn't show up until after the final topcoat. You hear horror stories all over the Internet about tannins bleeding through.
DH stripped it for me.
Stripping seemed to be the best choice for this table. A perk to keeping it natural by not using shellac to seal in the stain and tannins is that (aff link) Old Fashioned Milk Paint adheres best to porous surfaces, and in this case – raw wood since we decided to strip off the finish. The Old Fashioned Milk Paint Company provided the paint along with other materials - Thanks OFMP!
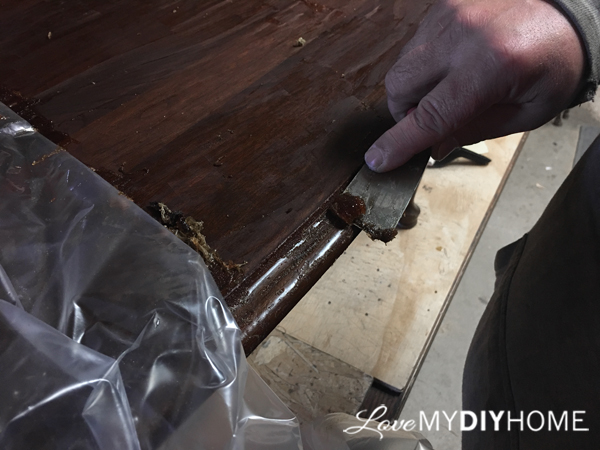
She was the perfect candidate to try out Soy Gel Stripper. We'd never used it before and were quite impressed at how well it worked.
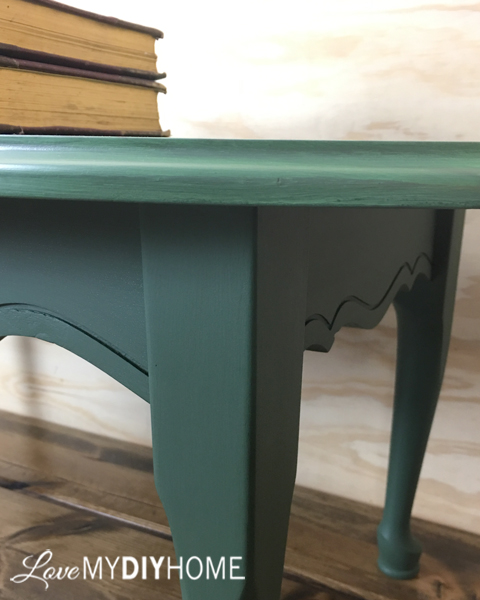
Since I wanted to try out the two OFMP greens, Lexington and Tavern, layering seemed the best way to go. The first layer was Lexington.
I added Extra Bond after a bit of research, since stain came off onto my sponge when I was cleaning in preparation for painting. The supposition is that the Extra Bond would seal in the stain if I mixed it into my first layer of OFMP. It covered well with not a hint on the dark stain bleeding through. So far so good. Next Tavern Green was layered with a sponge, unevenly, for a distressed affect.
Details Make All the Difference
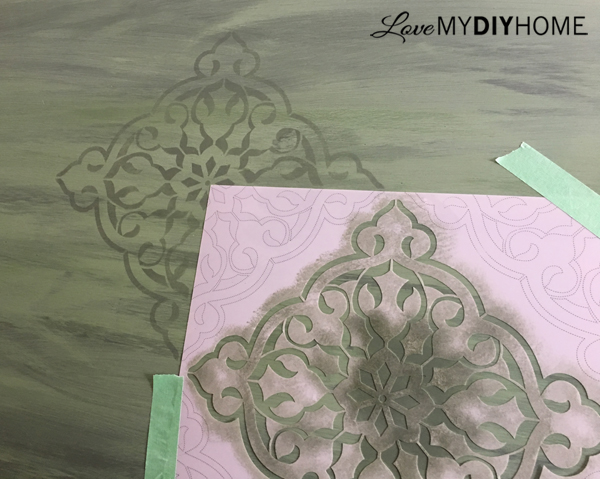
The layering and distressing is well and good, but detailing makes a piece unique. Stenciling the Lexington Green over the second color, Tavern Green, gives you a faded, distressed look without sanding because the paint used is the same as the base coat.
One thing I love about Old Fashioned Milk Paint is the varying of color. Whatever lighting you have at the moment will determine how the color reflects. Indoor lighting brought out more of a lime hue and then when the morning natural light came along the colors muted significantly.

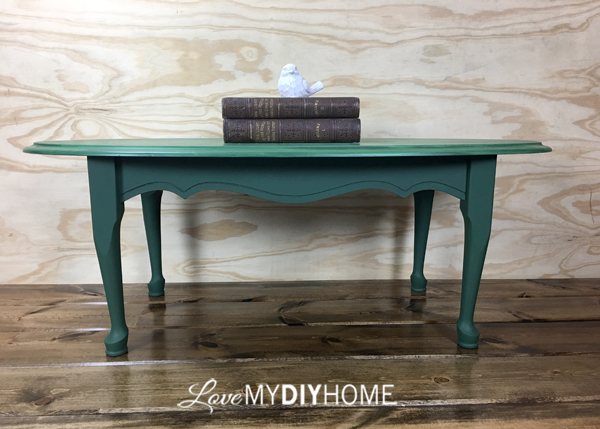
Polyvine Dead Flat was my last layer to give it a stronger finish. I started with the satin and then added the dead flat over that. To read more details and see more photos, go to Love My DIY Home at the link below:

Want more details about this and other DIY projects? Check out my blog post!


Frequently asked questions
Have a question about this project?