


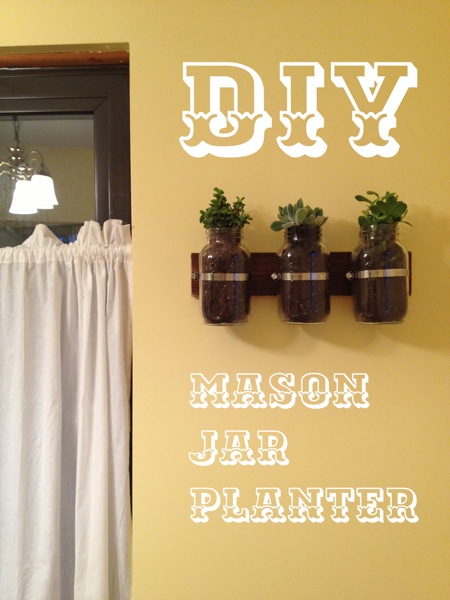
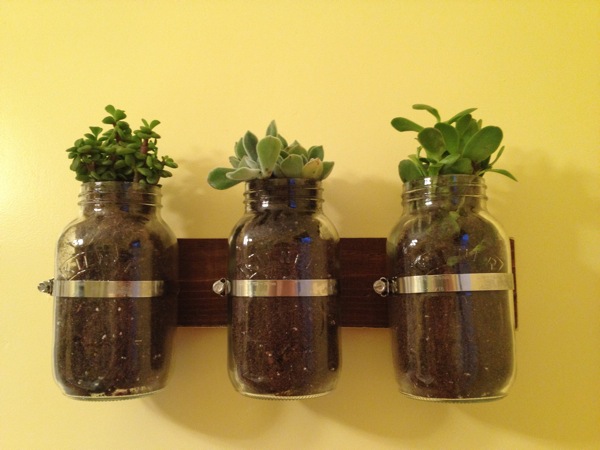
DIY Mason Jar Planters
$30
1 Hour
Medium
Use your mason jar planter to store utensils, keep dried flowers, or grow some little plants of your own. (The plants I used for this project back in May have since died because they were too big! I recommend tiny succulents!)
The first thing I did was spray paint the edges of my wooden board gold. You can decorate yours however you wish! I liked the brown stain that was already on my scrap wood, so I left that. In the future I might decide to do something different.
After the paint dried I got to work drilling many, many pilot holes. The nice old man at Lowe's told me I could "just drill right through" the metal clamp. Well, it wasn't quite that easy. I ended up using one of the slits that already exists on the clamp as my starting point for the hole that would hold the screw. You might have a better tool than a drill to get this project done. I used a drill bit because my attitude was along the lines of “whatever, it works.” (I’m the MacGyver crafting type!) Although it worked to drill through one of the slits in the clamp, it did wear out my drill bit a little! So take that into consideration when you make your own!
After the clamps were attached, I hung the board on the wall using anchors and screws. Now you can fill your glass jars with anything you like! When your jars are ready, fit each jar to its own clamp, using a drill to tighten the attached screw so it is good and sturdy. For more details on my process, I have linked to my post on Rental Revival!
For this project you will need:
1) Miracle Gro Potting Mix
2) Small pebbles or rocks
3) 3 glass jars
4) Wooden board of any kind (big enough for 3 jars to go horizontally or vertically)
5) 3 small plants for the jars
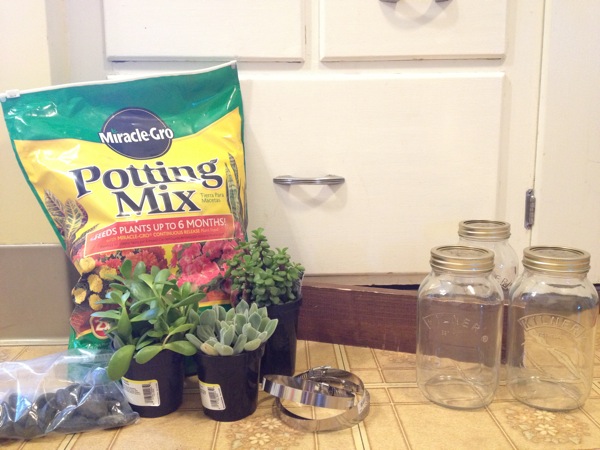
6) 3 stainless steel adjustable pipe clamps (I used the 3-1/16" -- 4" size)
7) Short screws for attaching clamps to wood
8) Long screws for attaching wood to wall
9) A drill with drill bits and screwdriver
10) Paint (optional)
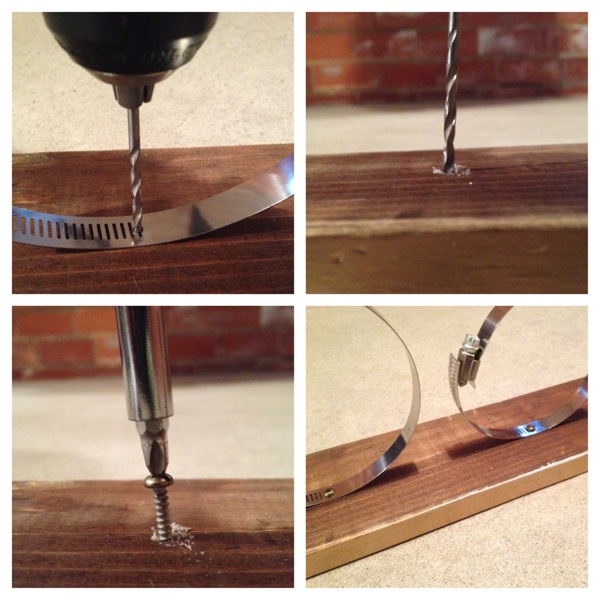
Top L: Drilling a pilot hole into the cl Top R: Drilling a pilot hole into the board; Bottom L: Making sure the screw was snug in the board so I didn't have to drill it through the metal; Bottom R: Screwed-in pipe clamps.
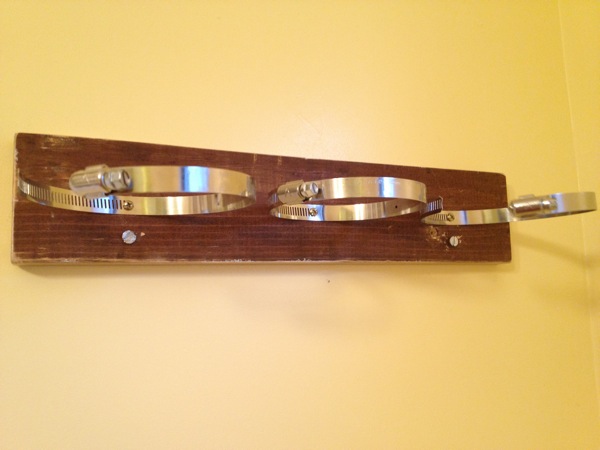
Make sure the board is securely attached to the wall!
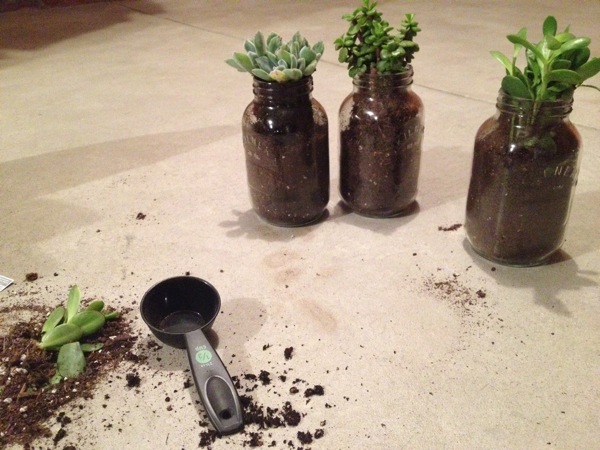
Fill the bottom of your jars with small rocks or pebbles to help with drainage. Never overwater your plants.
These plants ended up being too big! Use smaller succulents, or even dried flowers for your project. Good luck!

Want more details about this and other DIY projects? Check out my blog post!
Comments
Join the conversation
4 of 5 comments
-
Love it. How clever!
-
These are so cute!


Frequently asked questions
Have a question about this project?