


DIY Decorative Bird Cage

by
Troom Troom
How to make DIY decorative bird cage. This time we'll craft a paper cage with birds and flowers inside. Our beautiful cage will embellish the interior for a photo shoot, ceremonial event or a party!
{
"id": "3821345",
"alt": "",
"title": "",
"video_link": "https://www.youtube.com/embed/NWEf7G4WVWs",
"youtube_video_id": "NWEf7G4WVWs"
}
{
"width": 634,
"height": 357,
"showRelated": true
}
Check out the video above to learn how to make your own!
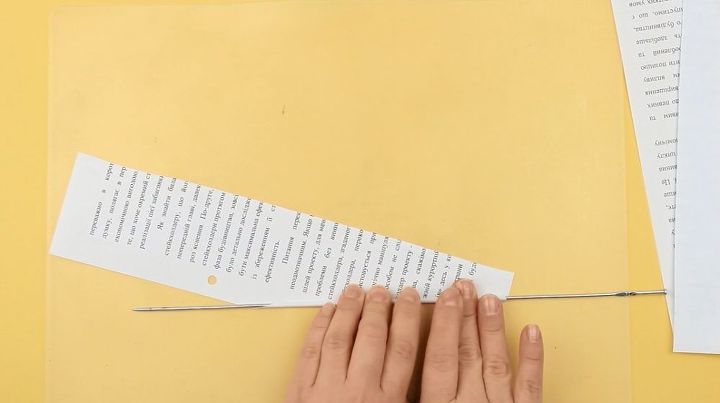
Weave the cage from paper tubes. We’ll take used office paper as it’s thick enough for the cage to keep shape.
Cut out the sheet along into three parts. Use a protecting cover.
We also need a knitting needle, and white glue.
Add a line of glue along the edge. Roll the paper onto the needle starting with the corner.
Press the end to keep in place. Remove the needle.
Make other tubes in the same way. We need a couple of dozens details.
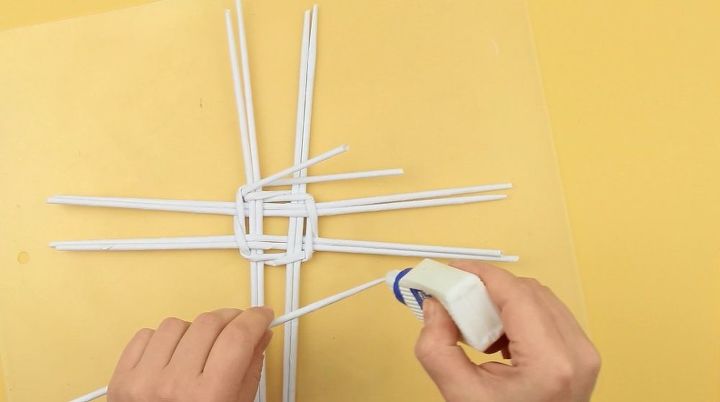
Take four pairs of tubes and place them to form a square of one inch side. Each pair should cross one pair over and the other one beneath.
The tubes should be crossed in the middle.
Make a tube longer putting one glued end into another one.
Bend the long tube in half and wind the far pair.
Cross the tubes changing the top and bottom ones and wind around another pair of stands.
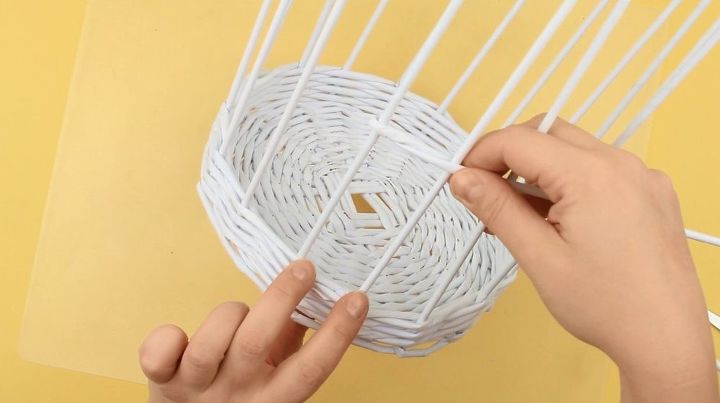
Cross the tubes again and proceed in the same way round the circle. Place the layer closest to the square sides.
Weave in the same way around until the end of the layer. Keep the square shape.
Make the second layer by weaving in the same way.
Make tubes longer as far as needed.
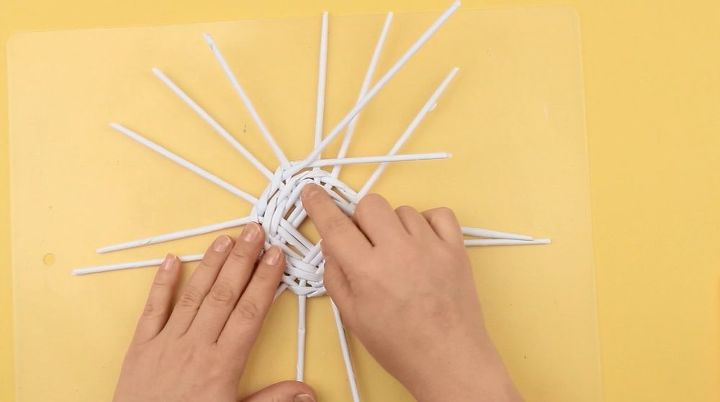
When the second layer is finished, split the pairs weaving around each stand.
Continue weaving 12 layers without changes.
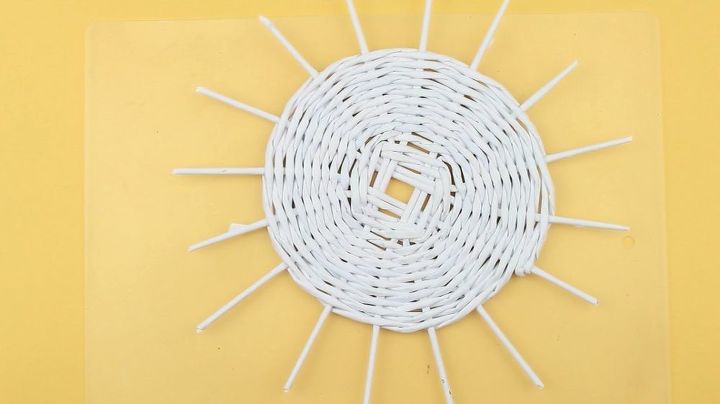
Attach the tubes near the last stand of the 12th layer with white glue. Cut out the excess.

Make all 16 stands longer.
Wind the last stand of the 12th layer around the next left one and turn upright.
Continue in the same way until the end of the layer.
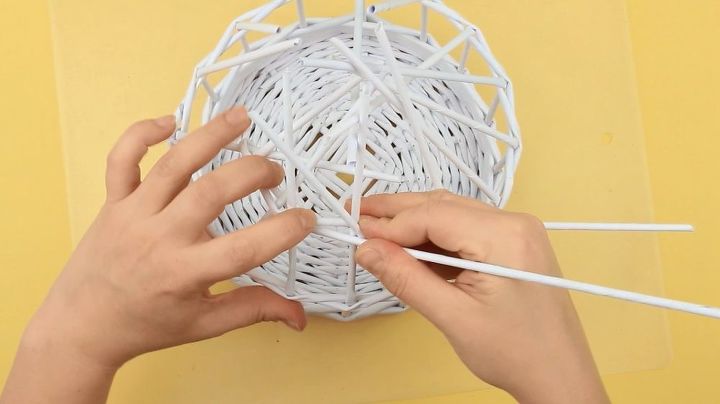
Take a folded in half long tube, wind around any stand and weave the walls crossing the tubes like you did when making the bottom. Make 4 layers.
Tuck the tubes near the last stand cutting out the excess.
Move 3 inches up and continue weaving.
Keep the same interval between the stands on top and bottom.
Secure the ends at the end of the layer, cut out the excess.
Bend the stands to the center to form a dome-shaped top.
Move 2 inches from the last layer, take two tubes and weave them over together.
Continue in the same way until the end of the layer. Try to make an even top taper.
Fix the weaving with a peg to keep in place.
Glue the tubes around the stand at the end of the 2nd layer.
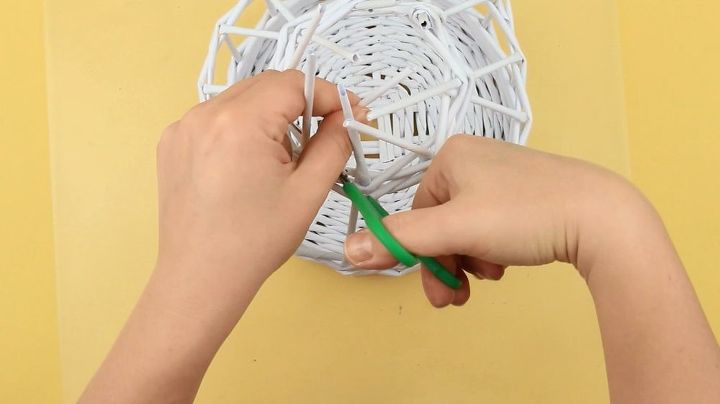
Cut out every inner stand from each pair.
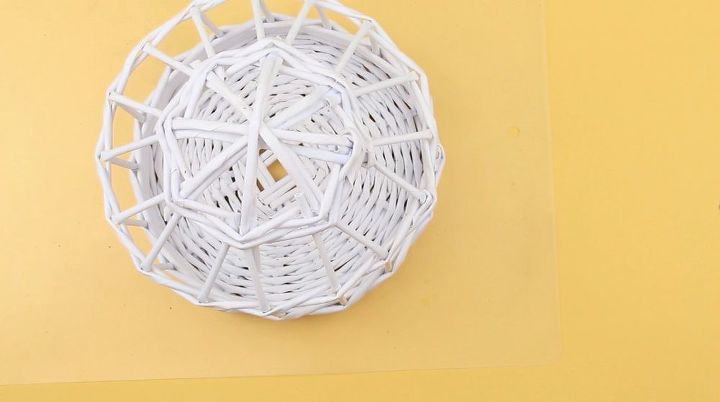
Bend a stand round and tuck its end into the opposite stand base forming an arch. Continue round the level.
Make the stand longer if needed.
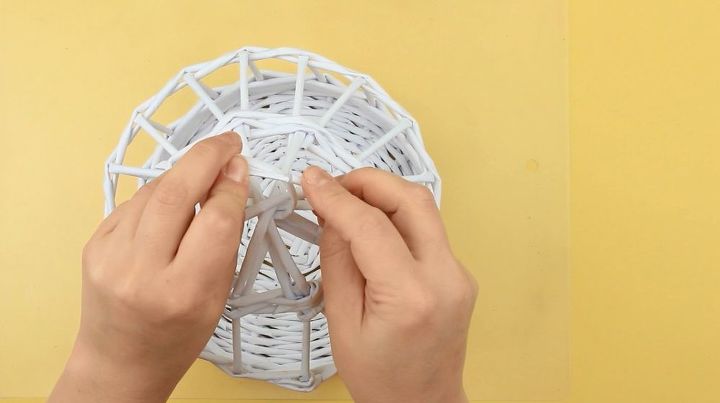
You should make a handle.
Bend another tube to form a ring.
Make two winds between the top stands.
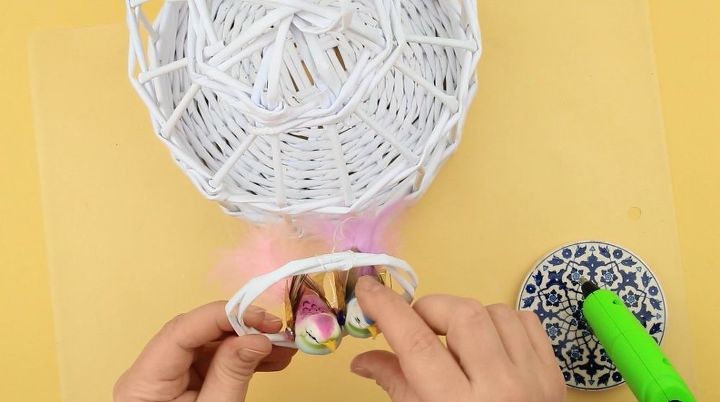
Bend a long tube to form a ring to make a perch for birds.
Wind a double ring. Attach the ends.
Secure a thread end on the ring.
Take two decorative birds. You can buy them in floral or handmade supply shops.
Attach a bird with hot glue. Stick the other one in the same way.
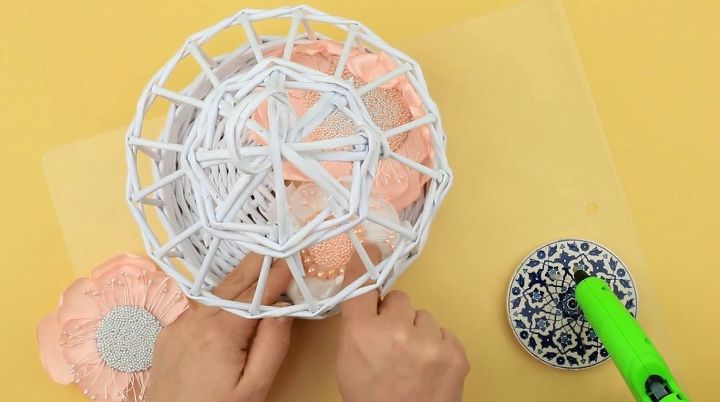
Decorate the cage bottom with artificial flowers.
Add hot glue to the flower back side and attach to the bottom inside the cage.
Stick other flowers in the same way. Hang the birds inside.
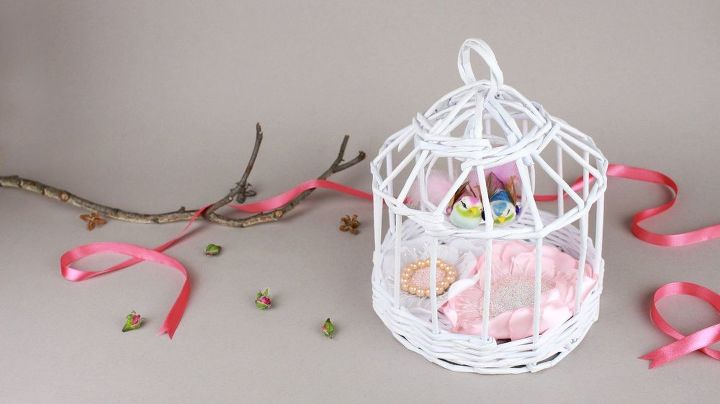
The fragile decorative cage will embellish the interior for a ceremonial event, a wedding, for example, or a photo shoot, and will certainly become a center of attention on a kids party.
If you're like this project, check out our youtube channel OR our super cool website
Thanks so much for reading/watching!
Comments
Join the conversation
1 comment
-
I would like to try that one day and would also like to make one of those and a basket using your pattern but from honeysuckle vines that grow prolifically at our house.


Frequently asked questions
Have a question about this project?