


DIY Copper Terrarium
1 Material
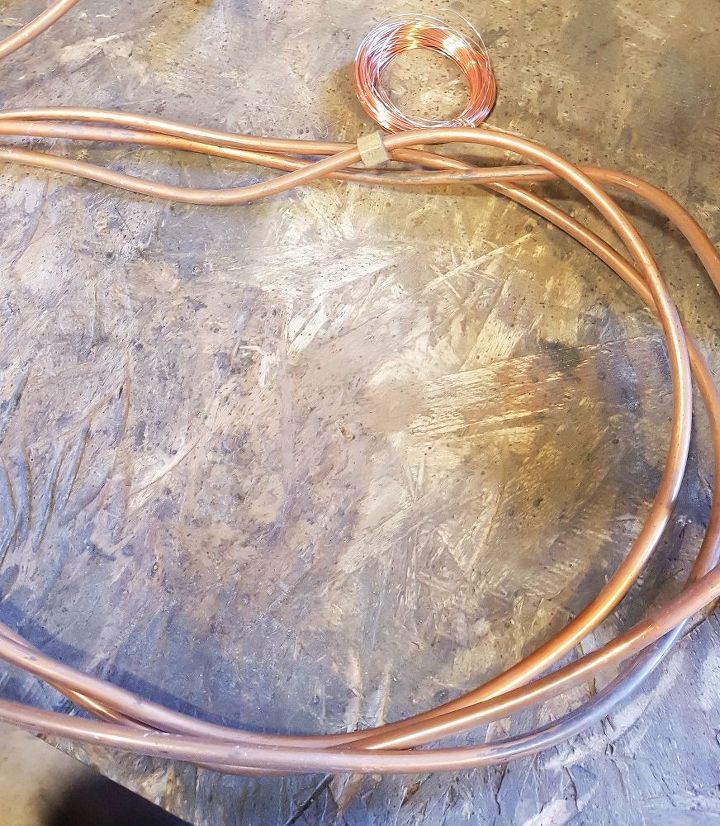
Have you ever worked with copper tubing? I absolutely love working with it (I will be hunting for more because I only have a tiny bit left – sniff sniff), it’s so easy to cut, to bend and it’s copper – hello! I first worked with copper tubing and made a pretty wreath that I am still madly in love with, I used the tubing as the wreath’s base. You can see more of how I made the whole wreath here.
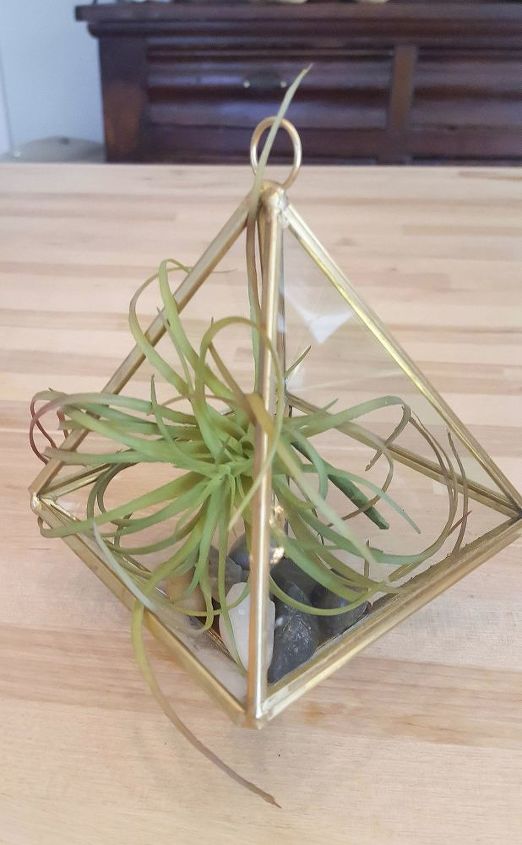
This time I decided to use what was left of the 1/4″ copper tubing to make a terrarium, a geometric plant holder basically, this little gold one was my inspo. I usually have a really good idea how a project is going to turn out before I start and what the process to build will be like, for this project though I was learning as I went along. I made some mistakes, still I’m very happy with how it turned out. It’s rustic, copper and just my style.
Materials you will need:
1/4″ copper tubing
bench vise
Sharpie marker
rubber mallet
dremel – with cutting wheels
measuring tape
painters tape (quick labels for cut pieces/holding cut copper pieces in place)
propane torch or blowtorch (preferred method for this project)
soldering iron
solder
solder flux
copper leaf (optional)
Safety gear – eye protection glassed, ear protection, gloves
Metal work surface for torching solder
Steps to make Copper Terrarium:
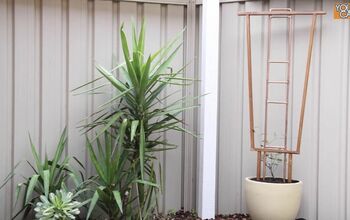
Determine geometric shape you would like your terrarium to resemble – I used an existing terrarium (Pictured above) as a guide, I measured each side of my guide and doubled the size for this DIY one.
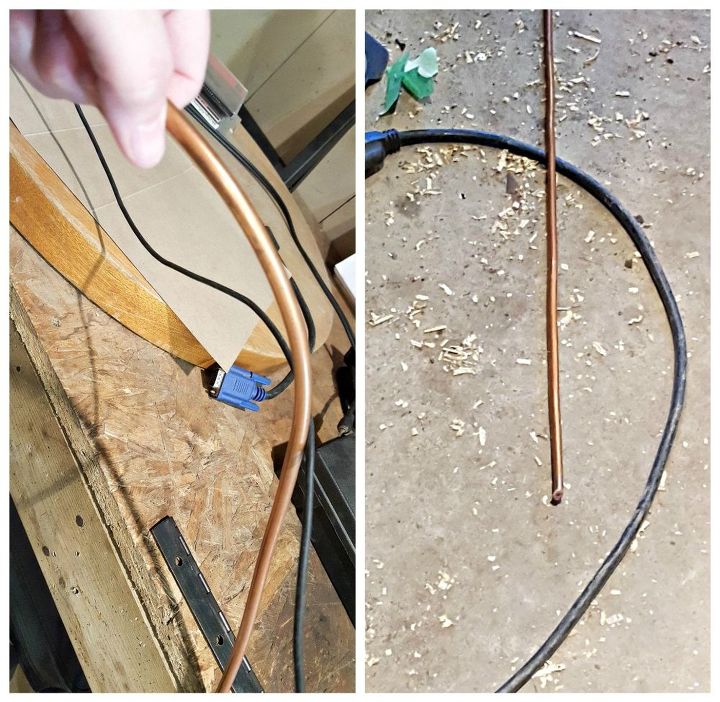
Straighten the roll of copper tubing by hand, this tubing bends nicely. Measure off the pieces you will need along the hand straightened copper and make the measurement marks with a sharpie.
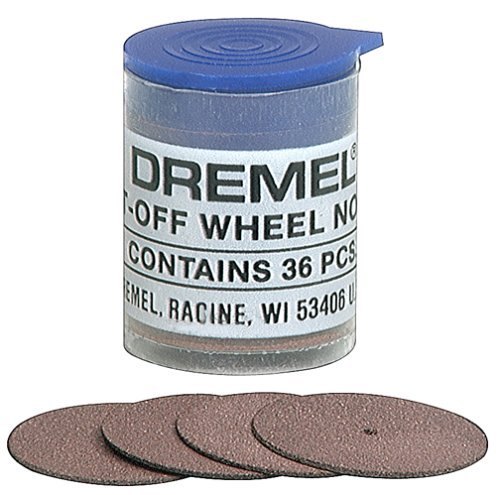
Cut the tubing on the measured sharpie markings with a dremel – using a cutoff wheel attachment. I used the bench vise to keep the tubing steady while I cut my pieces, worked like a charm and cut like butter.
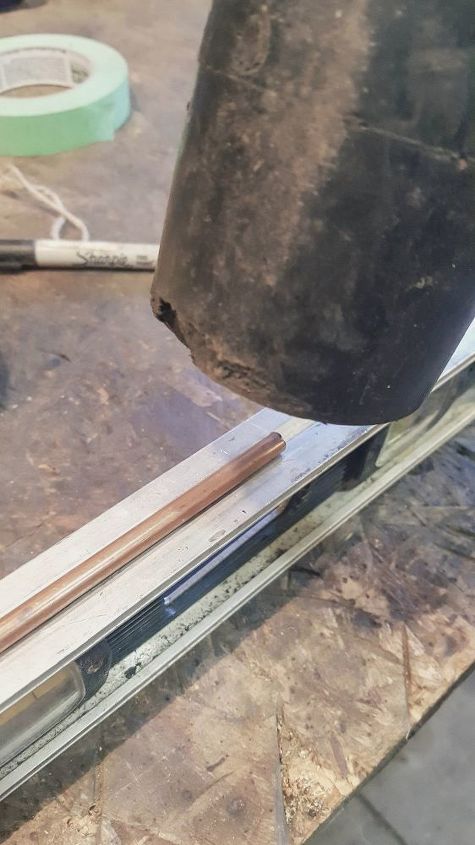
Once each piece is cut this is where you will use the rubber mallet to make sure each piece is perfectly straight (it is easier to handle the smaller cut pieces). I used the groove on the top of my long level. One by one I placed the individual cut copper pieces in the groove and gently tapped the copper piece with a rubber mallet until all the pieces were straight. This process didn’t take very long at all and straightened the tubing very well.
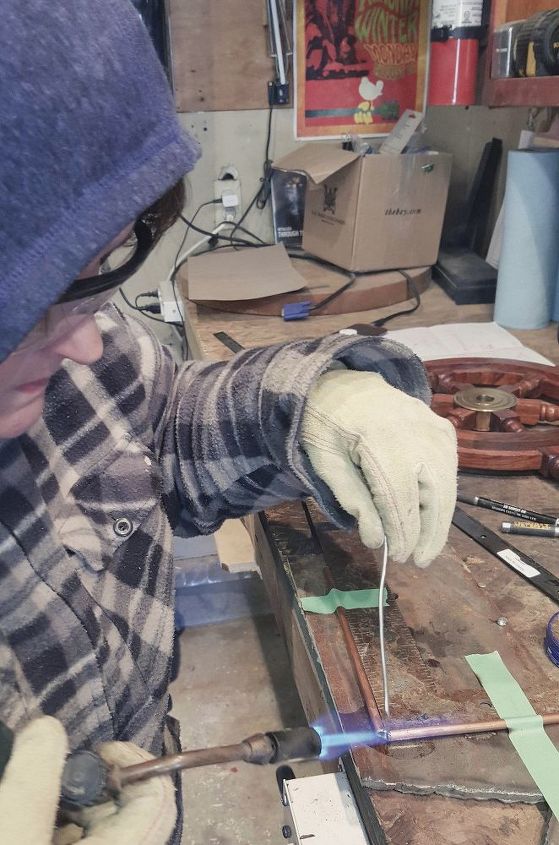
Next, assemble the center square, flux each tip and tape down the shape. Using the blowtorch and solder, solder the pieces together.
I get into much more detail on the blog, you can check out the step by step here.
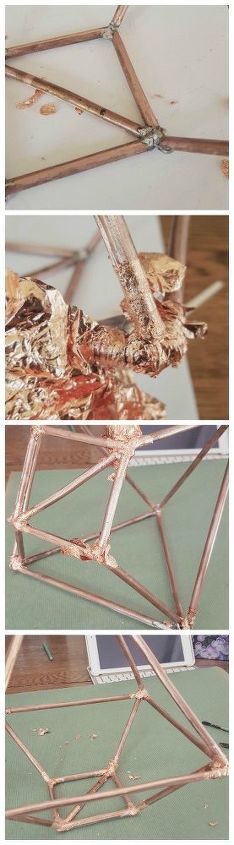
Once the terrarium was built, I didn’t love the blobby silver look of the intersections… I need more practice blowtorch soldering. I brought the terrarium into the house and an idea hit me… I had a stash of copper leaf and that’s what I used to “hide” the silver soldered blobs. It worked perfectly! I didn’t mind the “thicker” intersections, I actually love the look of this rustic terrarium and adding the copper leaf really finished it for me. I’m excited to practice this method some more… I’m thinking a light shade next? I’ll keep you posted.  I was so pleased with how this turned out I put my favourite plant in it and I lugged it all over the house until I found just the right spot. Hahaha
I was so pleased with how this turned out I put my favourite plant in it and I lugged it all over the house until I found just the right spot. Hahaha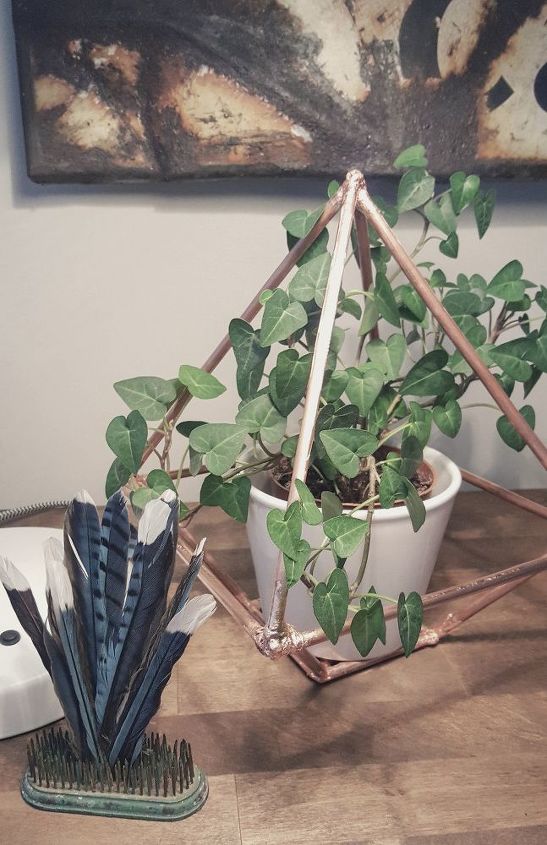
I decided the plain white Ikea pot needed a little something… I added a little something, something that really finished off this terrarium, come on over to the post for a visit and see where this baby ended up and how it looks today.
I’m a bit of a house plant fanatic, LOVE my plants! This little terrarium was a perfect way to show off my favourite plant (sweetheart Ivy – it’s a cut off from my wedding bouquet) and I thought it was a great project for Earth Day too, it’s upcycled and recycled – and plants very earthy! There you have it, I hope you like my rustic terrarium? If you’d like to make one for yourself and have any questions, just let me know, I’ll try my best to answer them.

Want more details about this and other DIY projects? Check out my blog post!
Comments
Join the conversation
4 comments
-
Yours looks better than the inspiration one. The copper looks better than the cheap brass. Great job!
-
Beautiful! Love copper too. Think yours is much prettier!


Frequently asked questions
Have a question about this project?