


DIY Floating Shelves

11 Materials
Pinterest made me do it but I have no idea what I am doing! If you have seen my kitchen makeover then you would know that we moved two cabinets from one wall to another. The reason why we did that was because I wanted a dishwasher. The original cabinets were in between the two windows in the kitchen and since there wasn’t enough room for a dishwasher, we had to move the whole unit from one wall to another.
{
"id": "3829368",
"alt": "",
"title": "",
"video_link": "https://www.youtube.com/embed/BWDAwV3n1h4",
"youtube_video_id": "BWDAwV3n1h4"
}
{
"width": 634,
"height": 357,
"showRelated": true
}
We installed new countertops to make it look seamless. Above we only had two cabinets but the wall had enough room for 3 cabinets. We just ended up making an empty alcove in the corner. The corner has been driving me insane, it looks so unfinished. I found a tutorial on floating shelves on Pinterest and thought that doesn’t look that hard. Let’s try it!
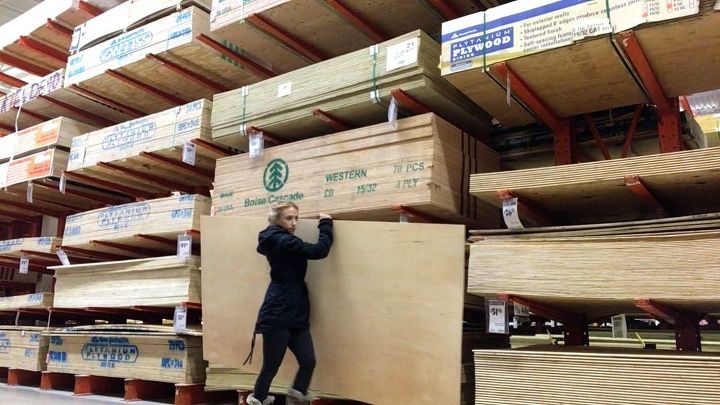
First thing was first, I needed to measure the alcove and it was 26×12, which means now I need some wood. I went to home depot to see what the had. I found some long 2×4 wood and had them cut them. These cuts are all with the 2×4 wood, two-24 inches, six-11 inches, two-26 inches, four-11.5 inches. Those cuts are going to be for the support system of the shelves and the outline of the actual shelf. I also, needed sheathing wood. The sheathing wood was for the top and bottom of the shelf. Confused yet? Don’t worry I will try to explain and use a visual guide as best I can.
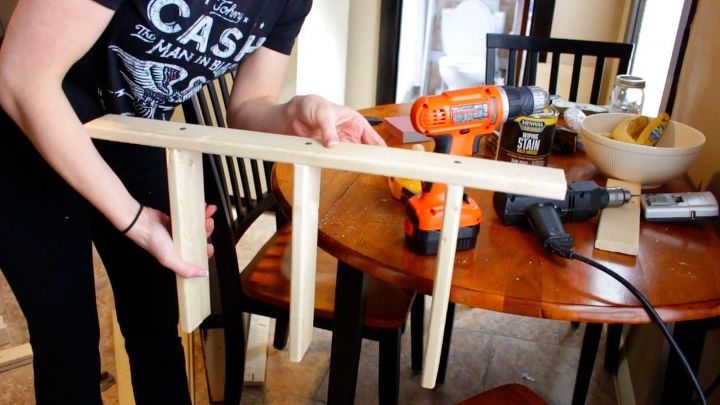
Once, I got home it was time to do a test run. I suggest doing a test run first with the 2×4 to make sure you are capable of doing it yourself but I assure you if I can do it, you can! Okay..now to make the support system grab the 24inches 2×4 and three of the 11 inches 2×4. Put the beams as equally apart as you can. I used 3 inch screws on all the beams for the support system. I am making two shelves so make that same thing one more time.
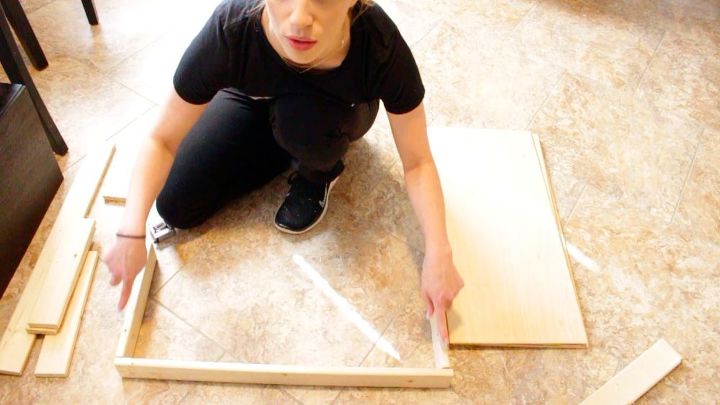
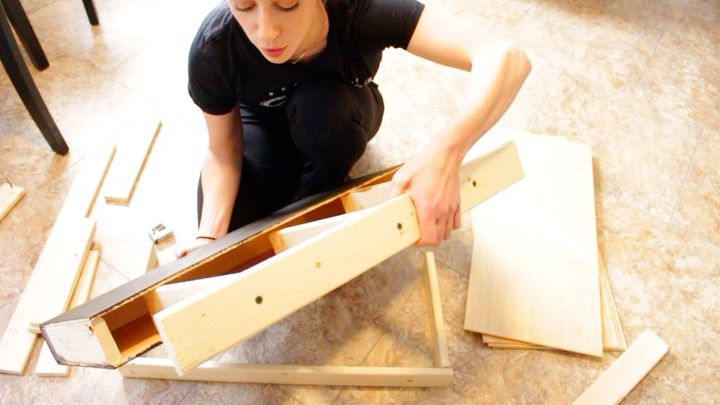
Now, its time to make the floating shelf. You will need your 26inch 2×4 (now remember my measurements might be different from yours, depending on the size you want your shelves) Grab you 26inch 2×4 and two 11.5 inch 2×4 make and outline seen above. You are going to drill the two 11.5 inch 2×4 into the ends of the of the 26 inch 2×4 that will be the outline.

Once you have your outline, you will take the sheathing wood and place them on the top and bottom of the outline, creating a box. I used 3inch screws for the outline and 1 inch nails to secure the sheathing wood. I cut my sheathing wood to be 26×12 because that is the size of the alcove.
Once the shelf/box is done you will screw the support system into the wall and then slide the shelf into the support system.

I wanted to make the front of the shelf to look more polished so I used trim to hide the construction of the shelf. I totally recommend this part. Taking decorative trim brings this project from nice to “WOW you made that”. Trust me. I cut the trim to be 26 inches and attached it by two simple nails at either end.
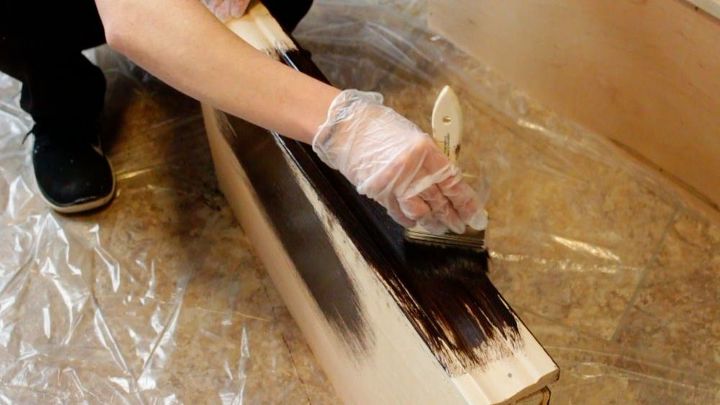
Then it was time for stain. Thankfully we already had the exact color of stain because we stain the cabinets will the same stain. We used Minwax Wiping Stain in Dark Roast. Tips when staining: 1. Wear gloves 2. Buy a cheap brush you can easily throw away 3. If you want to stop for a break then simply wrap the brush in tin foil, making sure the brush doesn’t dry out in that time.
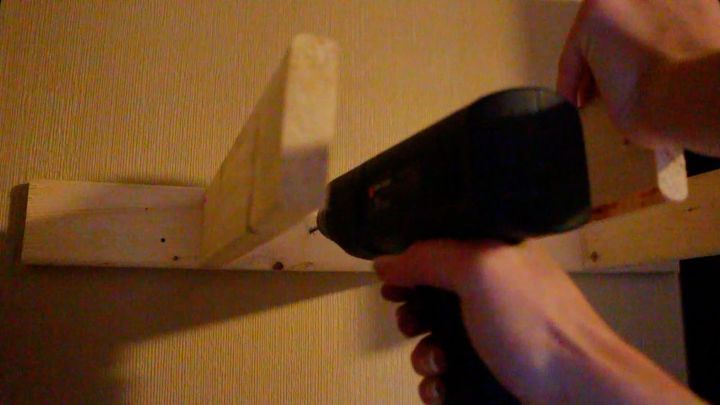
Wait 24 hours to let everything dry. Now it’s time to find the studs! Make sure you have a stud finder and a leveler when hanging up the support system. I used 4 inches screws to hang up the beams. You want to measure out the placement, in order for the them to be equal distance apart. Make sure it’s leveled! I used about 6 screws to make sure it was in place.
The hardest part is finding the studs because studs are never equally there. Make sure it’s leveled, use chalk on the wall to make places, chalk easily wipes away when finished!

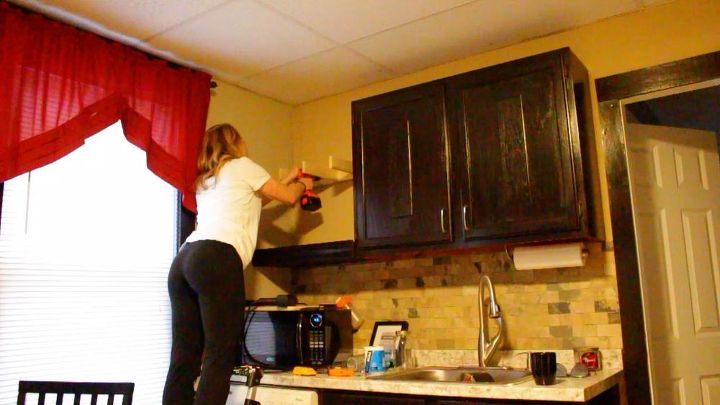
All you have to do is slide the floating shelf into the support system. You will also want to screw the top of the shelf into the beams, making sure the shelf can’t slide out.
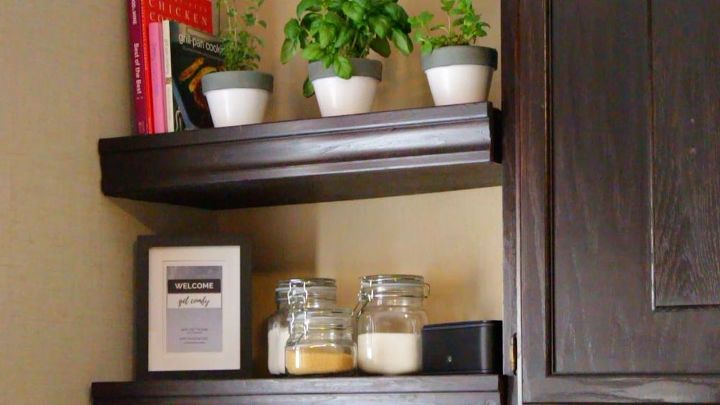
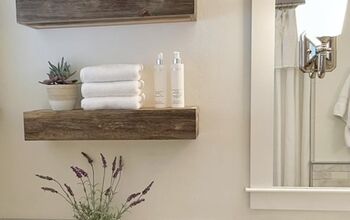
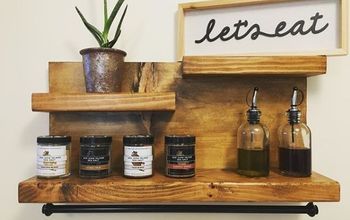
Now, it time to decorate! My favorite thing to do! I bought some jars, put flour in one, sugar in another, and raw sugar for some difference in color. I also made a welcome sign with the wifi password for when guests come over. On the bottom shelf I also bought a bluetooth speaker in order to listen to music in the kitchen. Good music makes me want to cook good food and cook more often.
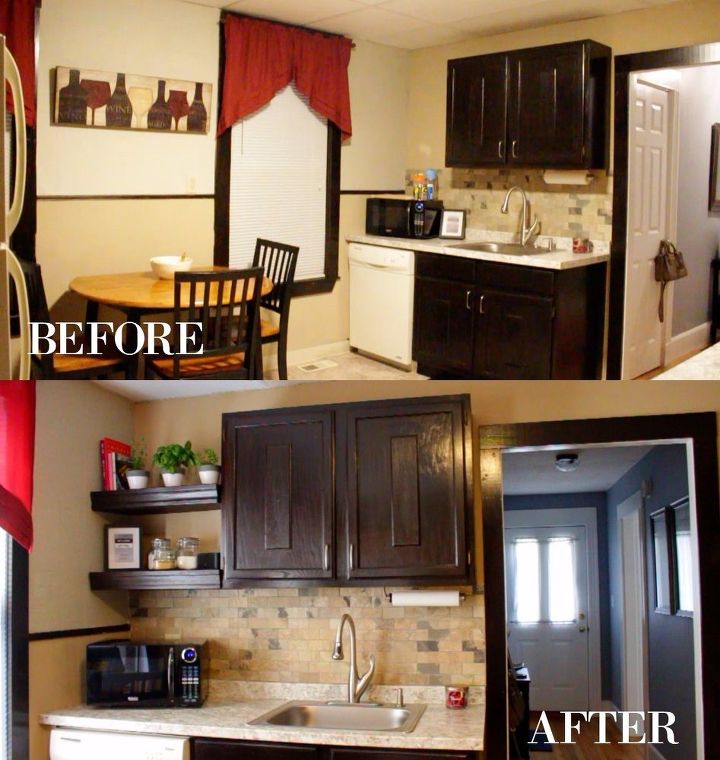
On the top shelf I put some herbs like oregano, basil, and sweet mint. I take them down every morning put them in the sun and then place them back once the sun is gone. I also put some cookbooks at the end because I mean where else would you put cookbooks. The kitchen finally looks finished with these floating shelves. I am so happy about how they came out. The best part is that I can change up the decor on the shelves based on season. I hope you like this post and it was helpful if you are thinking about making your own floating shelves.
Comments
Join the conversation
2 of 20 comments
-
It definitely changes the kitchen for the better, good color match! The shelves balance out the kitchen, gives more space and a well finished look. Your decorations are very nice too!

-
You improved the look 100% - Well done!


Frequently asked questions
Have a question about this project?
Are you sure it was 2x4 wood you used for the supports? I have studied all of the pictures and it only looks like 1x3 or 4. I only ask because I love this project and would like to try it myself, but it seems that 2x4's would make the support system very heavy and difficult to do for one person.
Great job, looks so much nicer but you might want to consider putting a couple of those rubber stick cabinet bumper pads on the ends of your shelves to keep your cabinet door from getting dinged since your shelves do hang a bit farther out then your cabinets do. Job Well Done!!
No question, well done!