


Heeerrreee Chippy, Chippy! (Guest Bedroom Makeover Project 2)

4 Materials
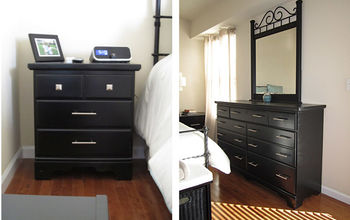
And on we go to yet another painting project for the guest bedroom I am making over. (You can see project 1 here) This is the dresser that the chalkboard will hang above in the room.
This dresser has been with me since.. well, according to my mother, since I was born! Making this gal over half a century young! (we are not using the 'o' word here because that would reflect badly on me, and I like living in denial! Ha!). This was part of my 'baby' furniture. We also have the baby armoire that goes with it, but that is at my mother's old house (where my brother still resides) and I haven't gotten my hands back on it yet...............give me time...
This poor dresser has moved every time I have. It's just one of those pieces that works everywhere. It's 'just the right size' , 'has good storage' and has remained in excellent shape even through all the moves. She was also one of the first 'chalk paint' projects I attempted. Not bad for a first try, but it's now years later, she's a bit bruised up (from moving her around the house, because I am a 're-arranger addict'.... yes I just made that up...) and was ready for something new. The dark grey didn't really work in this room, besides another Hometalker had just inspired me to try a new technique (rubs hands together with glee and laughs loudly) and this was a great excuse to try it!
Annndddd here it is!
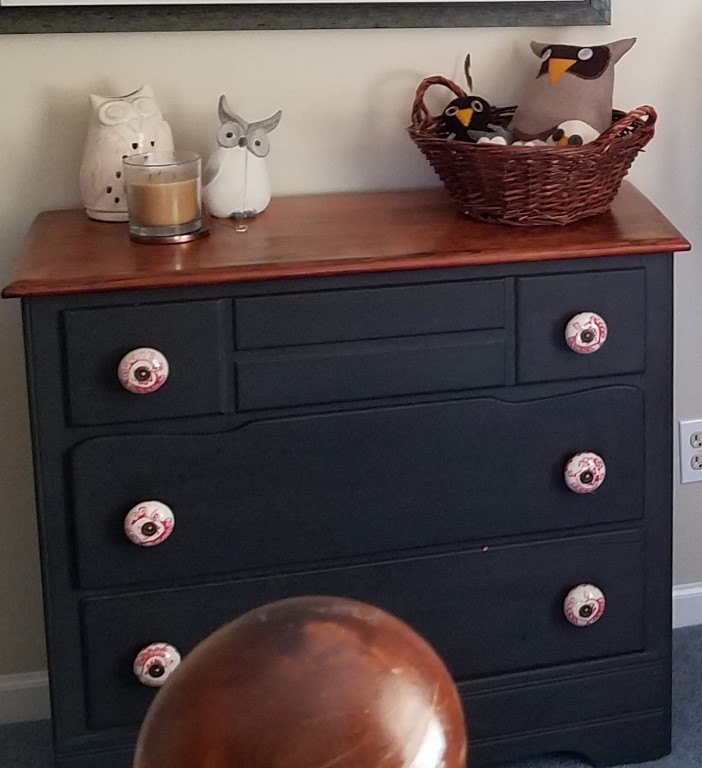
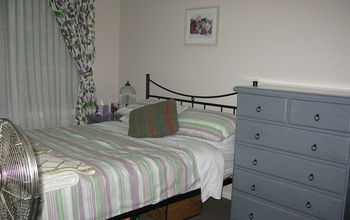
So, here she is as I first painted her. American Paint Co in the color Lincoln Hat. Not bad for a first timer : ) But you can see the bumps and bruises (chips) that had begun to occur. Those pulls, btw, were the first one's I ordered online. I ordered them from hobby lobby having NO Idea that they were so BIG! LOL I thought they added character tho, so I installed them. My mother and I always said they looked like big blood shot eyes! hahahaha This was originally in my entryway and would often inspire a quick rendition of "I always feel like somebody's watching meeeeee... !" 
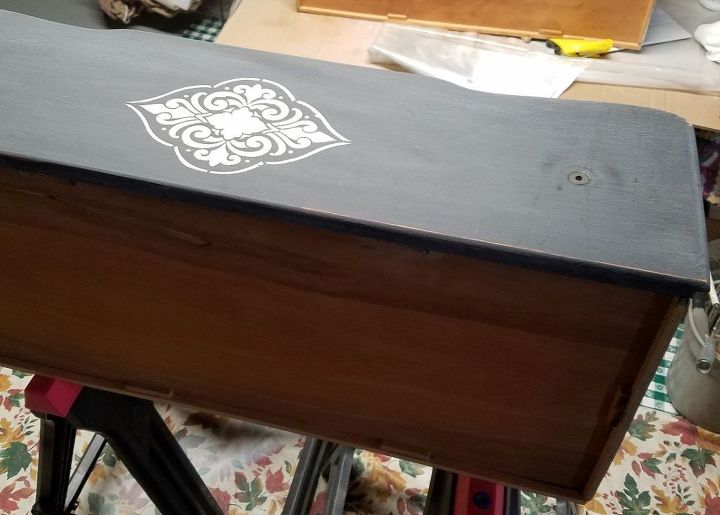
This is the middle drawer, which was plain and uninteresting, so it's getting a Wood Icing makeover. I just used my stencil from Deco Art (love their stencils) that I got from Michaels a while back.
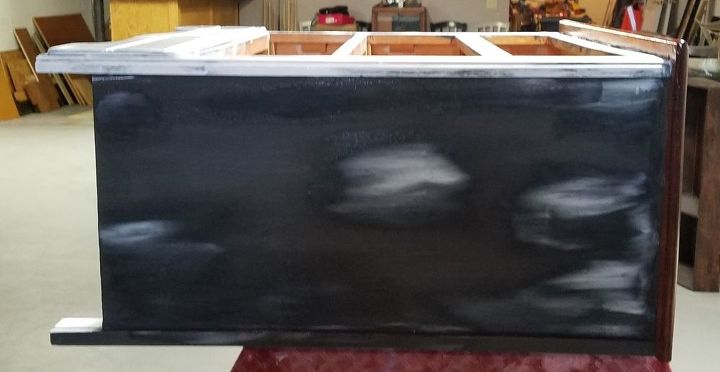
And now the fun part........................... This is a trick that I saw on one of the other poster's projects (which I know I commented on, but could not find again because I didn't save it :( boo hiss). You use PLAIN ELMERS GLUE! That's right, you just slather it on (I just used a paint brush) where you want the 'chipy' effect to happen. This picture shows where I put the glue.
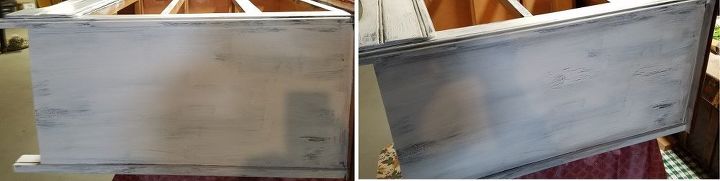
Since the original dresser was already dark grey, that based worked perfect for this. After I painted on the glue , I literally 'slapped' on Art Minds Simply White chalk paint and waited for the paint to dry... (insert on hold music here). Look at all that chippy goodness happening!
Tips: If you want big cracks, put the paint and glue on heavy. If you want smaller lines thin the glue a bit with water, and don't paint as heavy.
A wonderfully smart person pointed out that I should have added the following information:
- You paint directly over the wet glue. It is the drying of the glue that causes the crackling effect : ) Do not over work it. Once you paint over it, don't go back over it , that could ruin the effect.. Also , make sure you pour your paint in something because you don't want to contaminate the whole jar of paint with glue : )
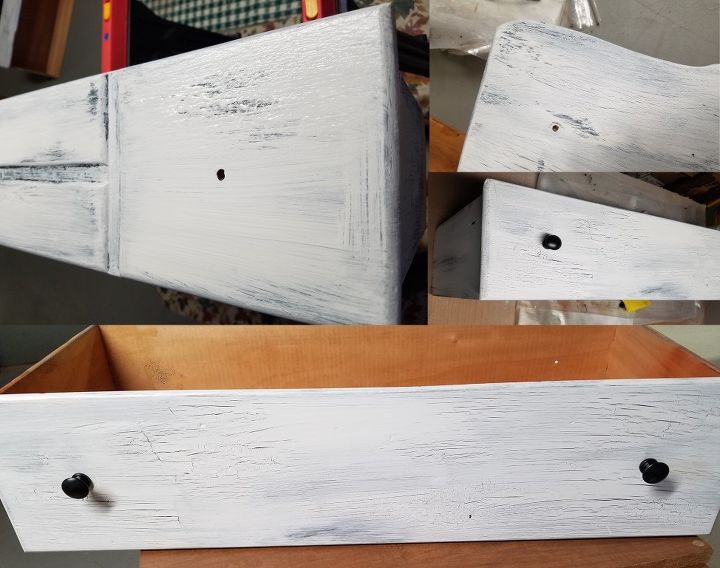
Here are some pictures of the drawers during and after! Some serious sqeeness happenin' here folks!!
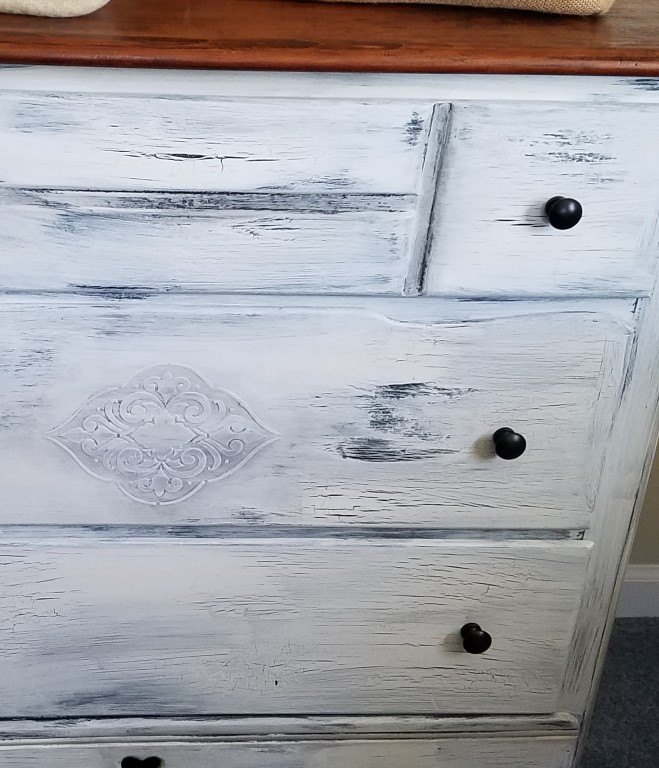
Picture of the middle drawer medallion. Since this was not first painted dark grey, I added black wax, then dry brushed white over it.
The whole dresser was then coated in clear soft wax and buffed when dry.
I LOVE the top wood of this dresser, so the only thing I did was scuff it and coat it with three new coats of wipe on satin poly.
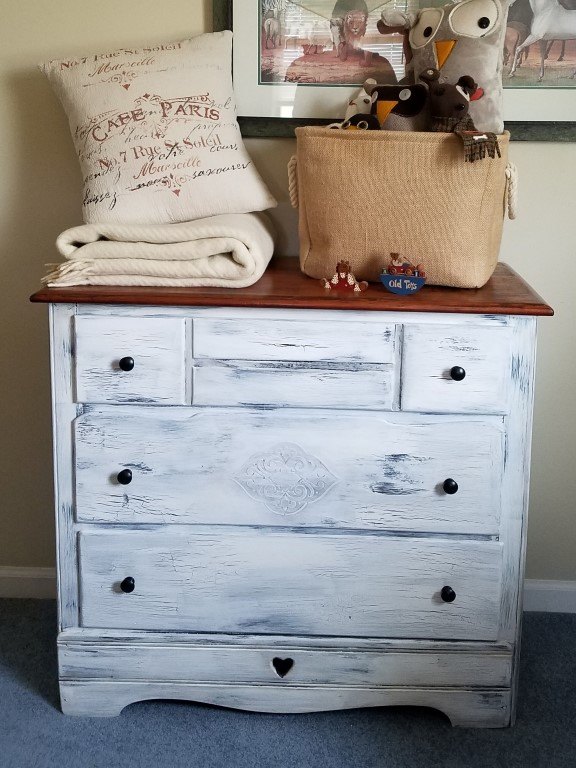
Here she is! I think the 'age' lines look spectacular on her and give credence to how long she's been around (now they match mine , which are natural and not painted on! ha!). And no more 'eyes'!
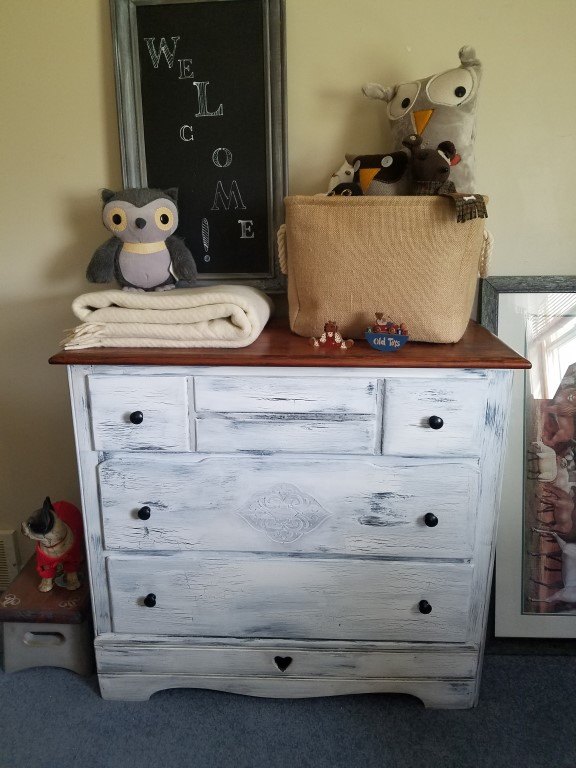
Here she is with her new chalk board welcome sign (from my first project). Remember me mentioning the 'Owls' in my first project!? lol (All the 'toys' in the basket, I actually made, so in this pic I mostly have myself to blame hahaha).
Hope she inspires you to make something chippy!
Comments
Join the conversation
4 comments
-
I liked it better before. But hey, you have to love it & thats all that really matters.
-
Stunning transformation!! LOVE how it looks


Frequently asked questions
Have a question about this project?
Probably a dumb question but.... did you wait for glue to dry before applying paint or paint over wet glue?