


How to Screen Print a Custom Tea Towel
$30
1 Hour
Medium
I love tulips. I always have, and probably always will. However, I rarely have them in my house or even grow them (true story). Part of the reason why is because I live in North Carolina, and it’s nearly impossible for them to get what they need (extreme cold in the winter, etc). The other part is just plain forgetfulness. After the parade of spring blooms that have awoken in my backyard, and the hot, dreadful days of summer have seemed to pop up practically the next day (soooo typical in NC!) my attention span and memory for these gorgeous flowers becomes non-existent. And that my friends, is why I wanted to create and show you How to Screen Print a Custom Tea Towel with my favorite flower or whatever you’d like to customize your own for!
Thankfully this process is SUPER easy.
SUPPLIES
- Tulip SVG Cut File (go to the link below for this FREE design!)
- Vinyl
- Transfer Tape
- Silhouette CAMEO and Mat
- Print Screen (this kit includes: screen, squeegee, and the ink)
- Screen Printing Ink
- Squeegee
- Foam Brush
- Painter’s Tape
- Flour Sack(s)
STEPS
- Cut out your design on your Silhouette CAMEO (or Cricut if you prefer–this tutorial works with either or). Need help cutting out this file? Check out this tutorial for assistance!
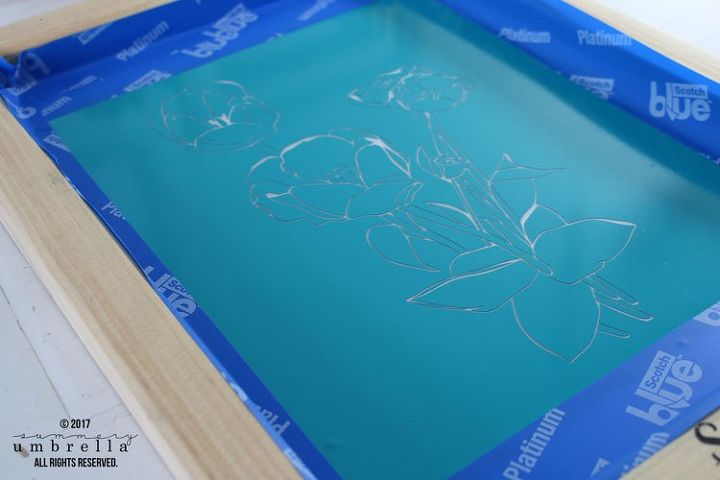
- Apply your transfer tape to your vinyl, and then pick out all of the pieces of your vinyl that you want to be painted.
- Attach your vinyl stencil to your print screen with your squeegee and remove your transfer tape
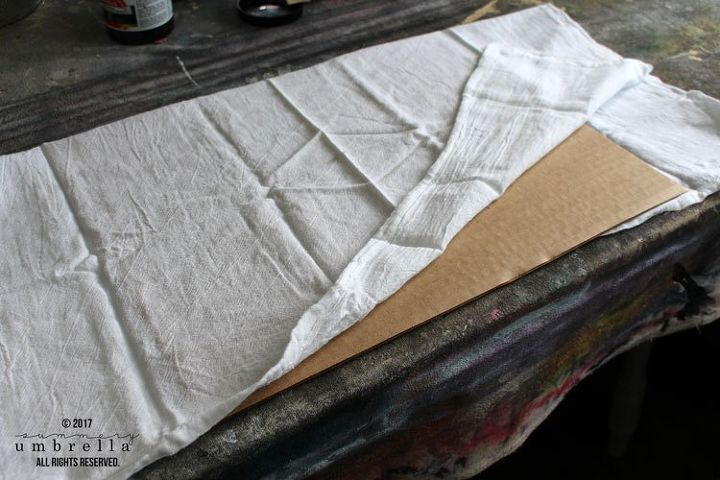
- Next, open up your flour sack and put a piece of cardboard in between your bottom and top layer. This will prevent the ink from soaking into the bottom layer of your flour sack.
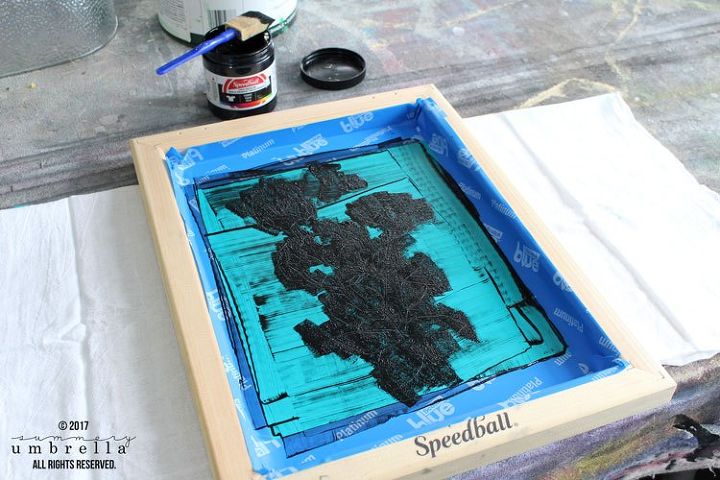
- Place your print screen on top of your flour sack where you would like the design to appear.
- With your foam brush lightly dap enough ink into your design that it covers with a little excess on top.
- After your design has been covered take your squeegee and run it back and forth over your design several times.
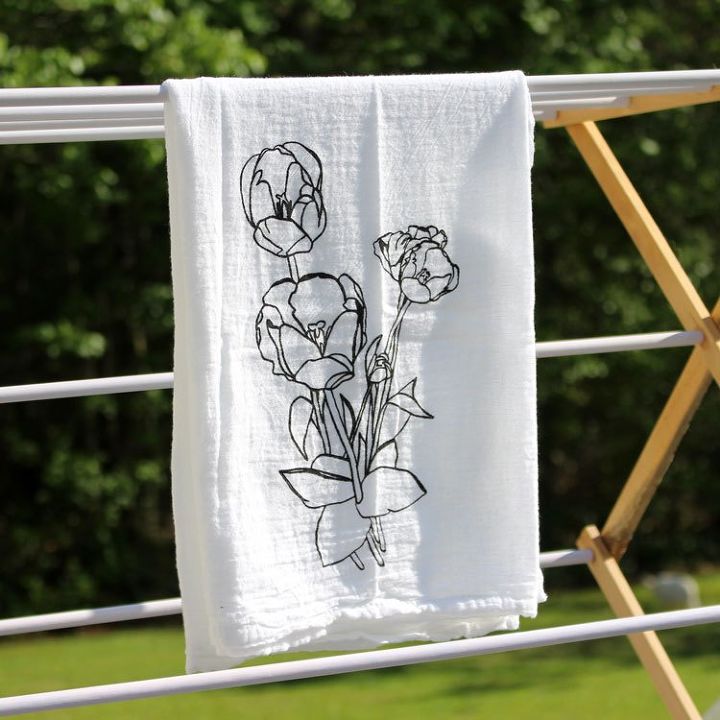
- Then, slowly lift your print screen off of your flour sack.
- I still can’t get over how easy this was to make!!
- Then, let your design and ink dry.
NOTE: It's so hard to calculate the exact cost for a project like this. The only thing I didn't have on hand is the flour sacks which I bought at Walmart. So... for me, it was a $5 project since I had everything else on hand. My $30 calculation is based on my "assumption" that you probably have half of the supplies on hand if you're a fellow crafter--like me ;)
Would you like to see a video tutorial of this project? Check out the link below for not only a video, but the FREE design file as well. Happy crafting!

Want more details about this and other DIY projects? Check out my blog post!
Comments
Join the conversation
2 of 3 comments
-
This is sooo cool! Looks wonderful :)
-
Let me start with saying that your towel is gorgeous, looks very high-end and the instructions are perfect. Now here comes the "but"...but I had to laugh when I saw your comment, "Thankfully, this process is SUPER easy!"
I've been married to an artist for 45 years. He says the same thing about drawing and painting. A gracious and encouraging man, he insists anyone can be an artist. Nope. I'm a great crafter, but a lousy artist.
You also gave yourself away when you said you had all the supplies on hand. 😂
So when you wrote that, I knew your final result would be beautiful because you lean on the Art side of Arts and Crafts. ❤️


Frequently asked questions
Have a question about this project?