


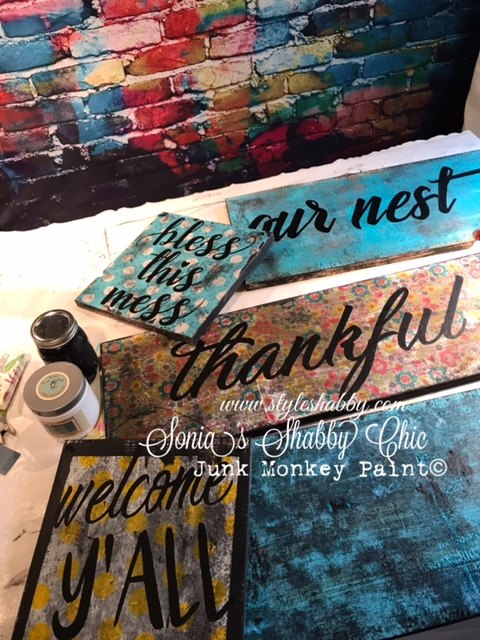
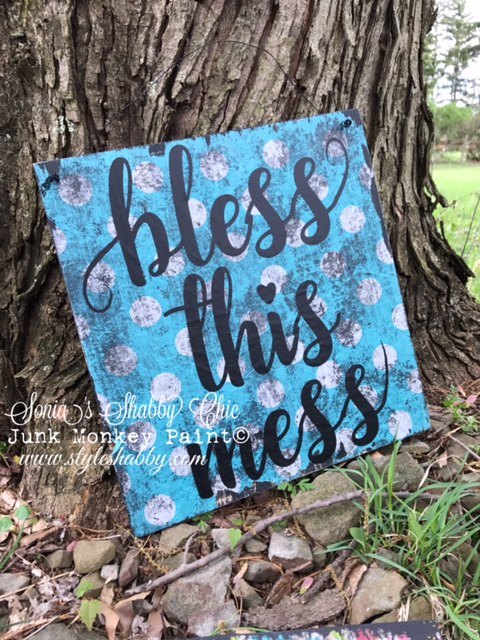
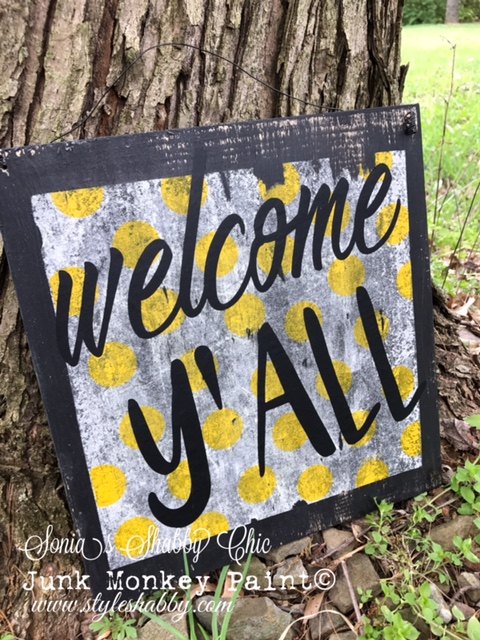
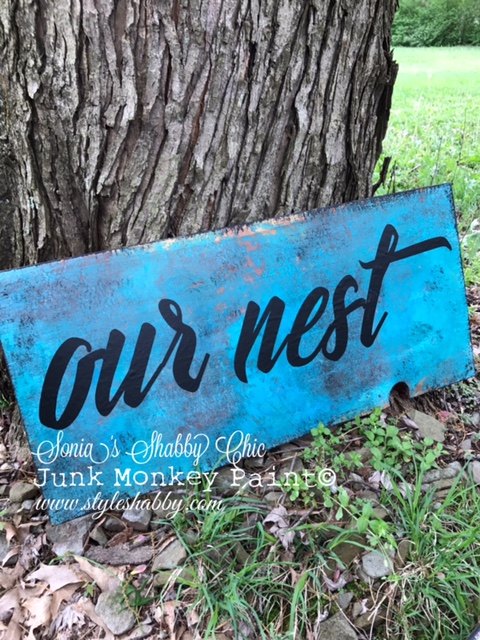
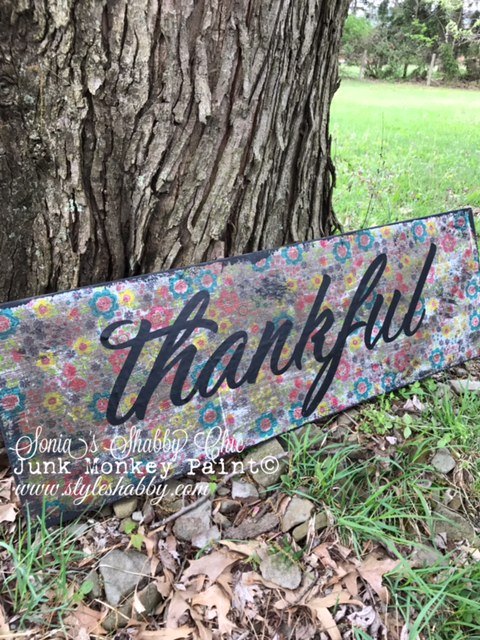
Distressed Wooden Signs With Napkins!


Comments
Join the conversation
-
These are so cute! I am going to have to go find me some pretty napkins so I can give this a try.
-
Added ideas/thoughts:
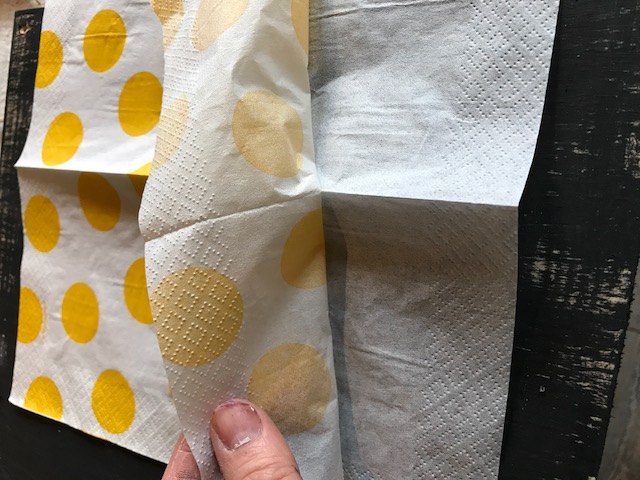
1. If you need a bigger sign, you could either use the top layer of more than one napkin next to each other of the same design, or even say use a solid color piece in the middle, and surround with a print, like flowers, circles/dots, or even stripes, or vice versa! You could also alternate stripes & circles, make a zig-zag w/the stripes, &/or just cut the size napkin pieces you need to get the pattern/size you want.-w/the distressing, you could make it look almost like a handmade quilt!
2. Would be cute to do something similar, even could be holiday, season, event, or birthday-related, using holiday/birthday/event napkins, & put the wire through the top like she mentioned to hang on a door.
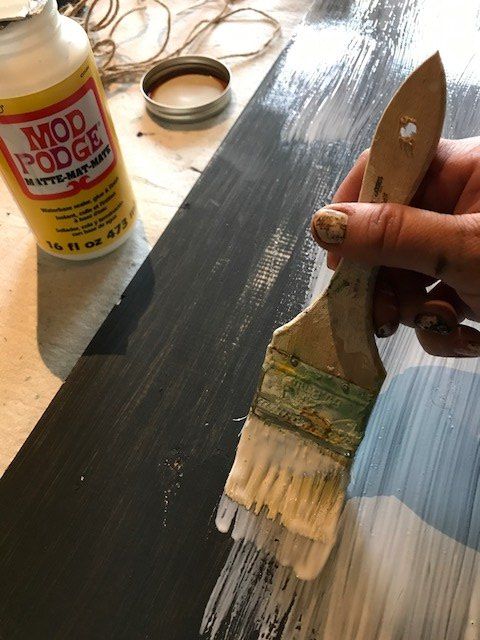
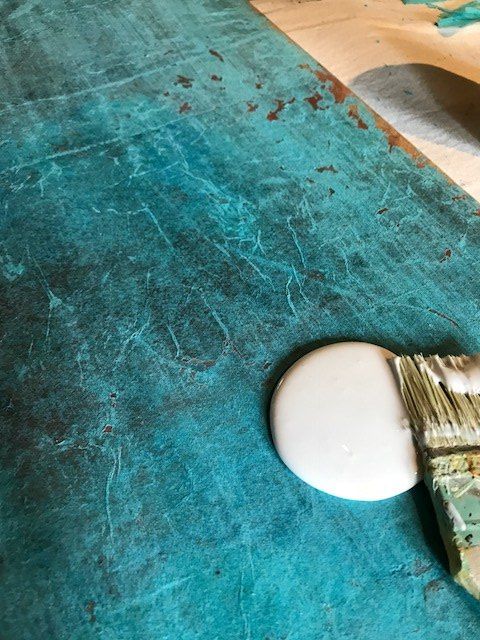
3. She didn't say exactly, but I would cover the entire board w/the ModPodge to seal the whole thing, protect it from dirt, rain, mold & mildew, etc. Although it dries clear, don't put it on too thick, or it will end up drying thicker, & appear white & streaky instead!
4. This would be a GREAT IDEA to use for a gift!
a. Housewarming/wedding-maybe put the family's name, yr. they got married or yr. they move in-perfect to put on a door. if you're throwing a wedding shower/party at someone's house or a housewarming party, you could do the sign, hang it up as a directional sign, then give it as a gift to the family/couple after!
b. If you're throwing a baby shower, find out the baby's name (if the couple's decided), expected date of arrival (or known b-day if mom's having a c-sect., sched. delivery, or you're having a party after the bIrth!), & you could put the proud parents' names, month/yr. of birth, hosp., city/state-take your pick of what you want to use! Use either a napkin from the baby shower, or napkins that are the colors of the baby's room! Hang it on the door or mailbox out front for the shower to direct pple., then give to the mom as a shower gift that she (whichever family/friend is available for this task!) can hang on the house front door to announce the baby's birth w/some helium-filled balloons, & then hang up in the baby's room or on the door to the nursery to decorate!
c. Esp. if this is a gift for a new baby, a newly married couple, an anniversary gift, or a housewarming gift, get a good picture of said couple/family/new baby! You can enlarge it to the size desired, put it on the sign where you want it, then Mod Podge right over the top of it when doing your final sealing layer! Do this preferably while the layer before the picture (or at least in the area where it will be) is still wet to help it stay in place, then seal w/the last coat of Mod Podge. This makes a beautiful gift for someone!
5. **If you're watching an older sibling after a baby's born, try to catch a family pic that's relatively decent at some point w/the new baby. Actually, for this part, one of the older sibling holding the baby might even be better! With or without the pic, then do the project with the older sibling's help, & let the older sibling give it to Mom (to the BABY!) as a gift wnen she gets home from the hosp. if she hasn't yet. If she has already, give it at a time when Mom has baby down, can catch a breather, & older bro/sis needs some TLC from Mom. Making it keeps the sibiing occupied, out of Mom/Dad's hair so they can maybe catch a quick nap/shower between feeds/ changes, & from waking baby up. Presenting it as a gift to/for the BABY from the Big Brother/Big Sister to hang on baby's door/in the rm. is also a great way to keep the older one feeling like he/she's a part of things, "helping", "giving", makes him/her feel talented, appreciated, let's him/her have fun/do something "special" that "nobody else gets to", learn something new, make a "special surprise for mommy & the baby", & enjoy a bit of pride in the "I did it myself!" moment (with adult help & supervision! **great for a memorable activity to do with a grandparent, aunt/uncle, or godparent!**) & love in the smiles/hugs/kisses from mom when she gets it! If the pic is of the Big Brother/Big Sister holding the baby, it can be used as a reminder to them of their love for each other, & that the older one will always be there protecting the younger one (hopefully!). The older sibling will always love showing off what he/she made, Mom will remember her baby shower if you use one of her shower napkins as the base, & she'll be so proud of her little ones! She'll also treasure the few minutes alone/tenderness with the older one when he/she gave her the gift, & smile with pride.
Sorry so long, but the ideas just came to me, & I had to share it! Wish I had known how to nust do a separate one! I did a similar project using a clear glass plate, Mod Podge, paper lace doilies, & a pic of my stepfather holding my newborn nephews (Grandpa/grandson). He loved them!!! They still sit up in the living rm. I thought the added ideas/project variation/gift ideas might be something someone else could use. Even relatively simple/inexpensive for a tween/teen/college student w/limited funds/time to make/give for a greasured gift!


Frequently asked questions
Have a question about this project?
Did you put sealer on again after the words were added?
Can cotton fabric squares be used in place of napkins?
can you do this technique on the front of dresser drawers that are stained and have a poly top coat, would monkey paint stick to those or would I have to sand them down first?