


How to Transplant A Large Ponytail Palm
Time to move it into a larger container – this is all about how to transplant a large Ponytail Palm.
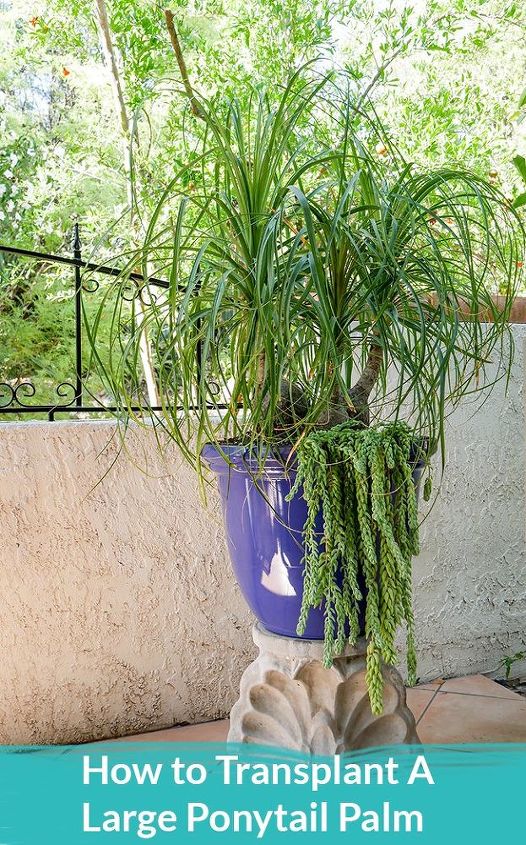
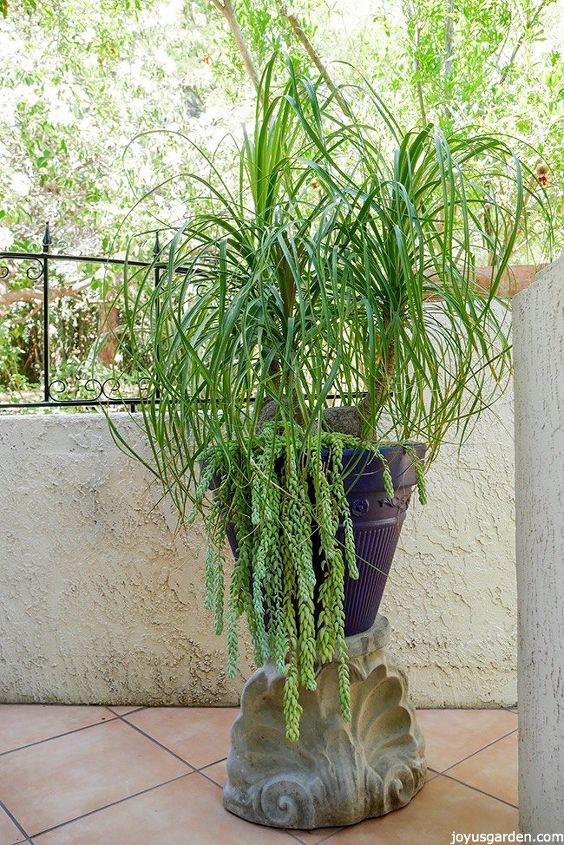
I love my 3-headed Ponytail Palm which I bought in a 6″ pot at the Santa Barbara Farmers Market years ago. But boy oh boy has it grown! I’ve repotted it twice and the last time was 2 1/2 years ago. It lives outdoors year round on my covered patio here in Tucson and thrives in the heat. Time to move it into a larger container – this is all about how to transplant a large Ponytail Palm.
This same method of transplanting would also apply to a smaller Ponytail Palm. They can stay potbound for quite a while and like most plants, they’ll just stop growing. Even though was as potbound as can be, it still looked fine. It was starting to put out a big surge of spring growth so I definitely wanted to get this done before May rolled around.
{
"id": "3839854",
"alt": "",
"title": "",
"video_link": "https://www.youtube.com/embed/gy4DmPL-XII",
"youtube_video_id": "gy4DmPL-XII"
}
{
"width": 634,
"height": 357,
"showRelated": true
}
Materials I used:
23″ Resin Chantham Planter in cobalt blue. This is a very lightweight yet durable & attractive (not to mention inexpensive!) container so it gets 2 thumbs up.
Succulent & cactus mix. Ponytail Palms need excellent drainage so this is key. I used 1 from a local company but I recommend this mix succulent & cactus mix if you can’t find 1 locally.
Potting soil. I threw in a bit of potting soil in because I’m in the desert & want it to hold moisture in the hot summer months. You can plant a Ponytail Palm in potting soil but you have to be very mindful not to over water it.
Organic compost. I always add local compost into everything I plant, both in containers & the ground. Here’s a good organic compost.
Worm Castings. What can I say, this is my favorite amendment.
Here’s the pot it was in prior to this transplanting. The new planter is a good 5″ deeper & 4″ wider. There’s quite a bit more room in the new 1 because it doesn’t taper down as much.
Steps I took to transplant the Ponytail Palm:
Drill drain holes in the bottom of the pot.
Tie up the ponytails into “top knots” (watch the video & you’ll see what I mean). Remove the decorative top-dressing & the Burro’s Tail Sedum.
Loosen the root ball away from the pot. I used a trench diggers shovel (or ditch spade) but you could use a regular shovel. A pruning saw if long enough, would do the trick also.
Turn the pot on its side & pull the plant out of the pot. Mine came out with no problems at all.
Massage the root ball to loosen the tight roots.
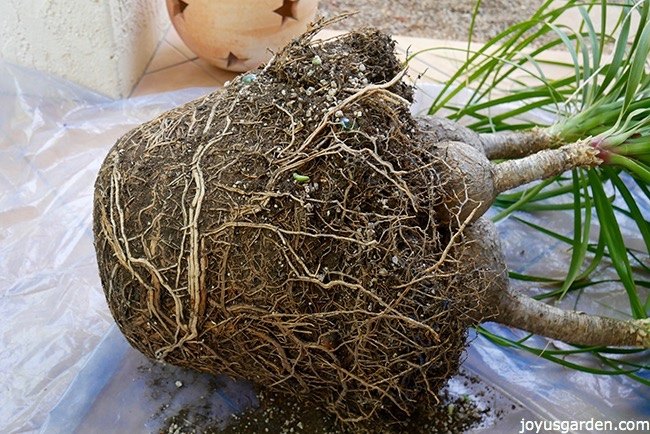
The thick roots at the bottom were really tight.
Cover the drain holes with a coffee filter to keep too much of the lightweight mix from washing out.
Fill up the bottom of the container with succulent & cactus mix, potting soil & compost.
Put the plant in the pot so the top of the root ball sits about 1/2 – 1″ above the top of the container. The weight of the root ball & plant will pull it down in the lightweight mix.
Fill in around the sides with succulent mix & compost. You want to use much more mix than compost – too much compost can burn the roots of a plant. Pack the mix in a bit to make sure it’s all the way down on the sides.
The Burro’s Tail Sedum went back in. Sprinkle the top with a 1/2″ layer of worm castings & more of the mix. You could use an organic all purpose fertilizer if you prefer.
Let it stay dry for about a week. Then, water in well.
After the plant settles down in the pot, add more mix & top that with compost.
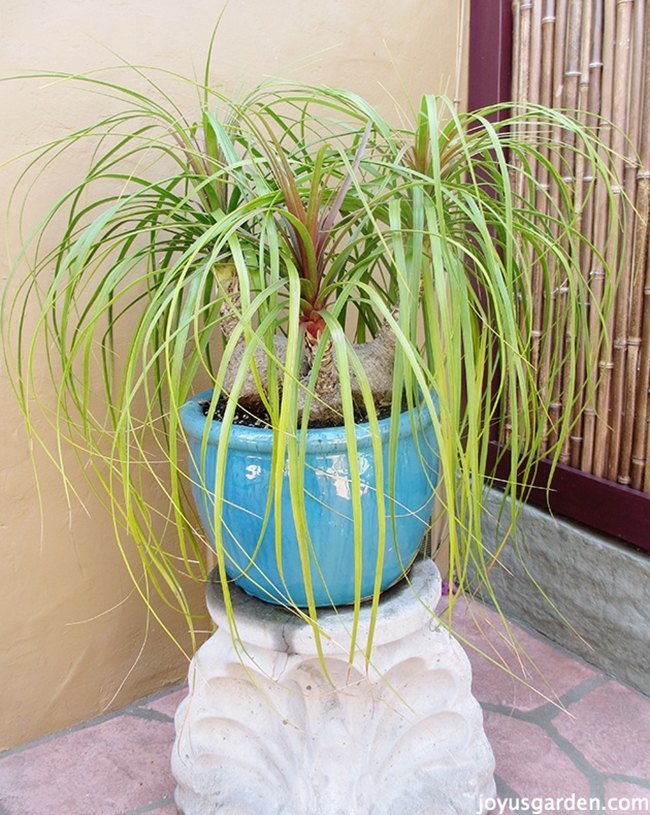
Here’s how this Ponytail Palm looked on my back patio in Santa Barbara a few years after its 1st transplanting. It certainly has gotten bigger!
I could have easily divided this Ponytail Palm into 3 plants because there was a bit of separation between each bulbous base and each had substantial root growth. To me, the 3 heads in 1 pot are much more appealing so I left them be. Ya gotta love Ponytails because they’re so very fascinating but a breeze to maintain!
If you’re crazy about Ponytail Palms like I am, then be sure to check out our houseplant care book, Keep Your Houseplants Alive because this groovy plant is in it. If you’d like 1 of your very own, here’s a source for small Ponytail Palms.
because this groovy plant is in it. If you’d like 1 of your very own, here’s a source for small Ponytail Palms.Happy gardening & thanks for stopping by,
Nell

Want more details about this and other DIY projects? Check out my blog post!
Comments
Join the conversation
2 comments
-
Love that blue!! Looks great :)


Frequently asked questions
Have a question about this project?