


Shiplap Wall for Under $50
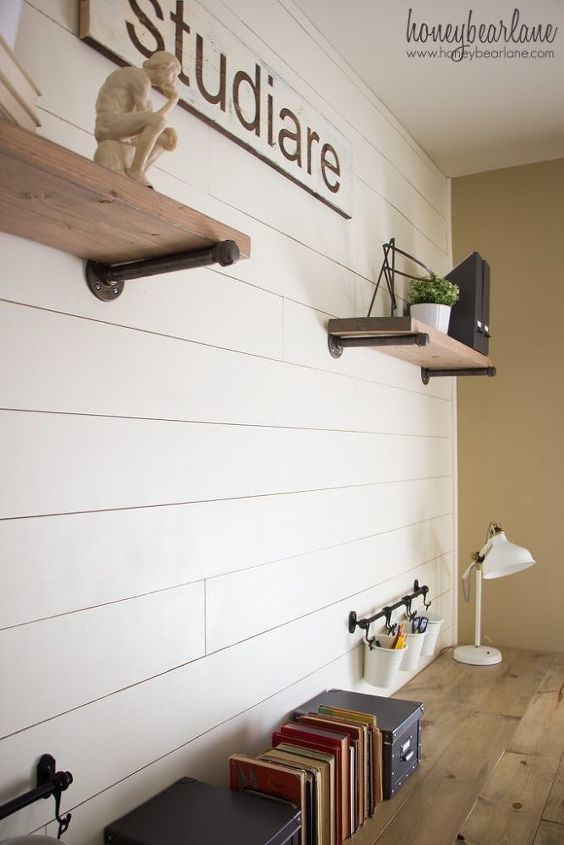
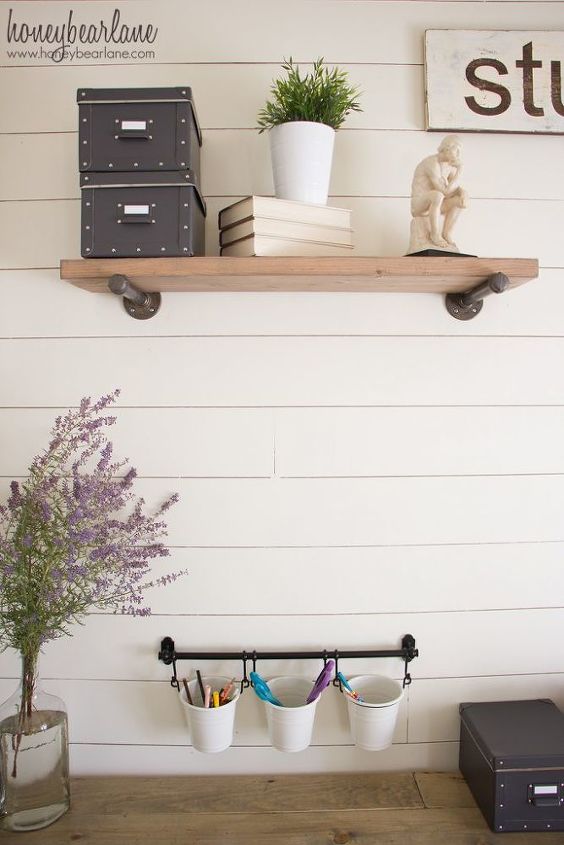
We recently completed a home school (or home office if you will) room in an industrial farmhouse style. We decided to make a shiplap wall and it’s seriously the easiest project. There are a million different tutorials on this but I feel like this is a pretty surefire way to go. This method of ‘shiplap’ is very cost effective and will produce a more rustic, farmhouse style planked wall.
I’ve done it with masonite (that dark brown very thin and cheap cardboard like material) and while it is achievable, it’s just a tad too thin to be held up with brad nails so you end up using glue on the back which is not ideal. I’ve also done it with tongue and groove which I really liked but you end up with a ‘V’ groove in between and the wider planks are a great deal more expensive. I like the narrower 1/4″ tongue and groove planks for small spaces like bathrooms or whatnot. I feel like large walls need wider planks.
You could buy 1/4″ plywood as well but it was about twice the price of underlayment and since you’re painting it, you really don’t see a difference anyway.
Supplies:
(Affiliate links below–see disclosure)
- 1/4″ underlayment ripped to 6″ strips
- Sand paper
- Nail gun
- Stud finder
- Quarter Round
- White paint
- Nail hole putty
- Level
- Jigsaw
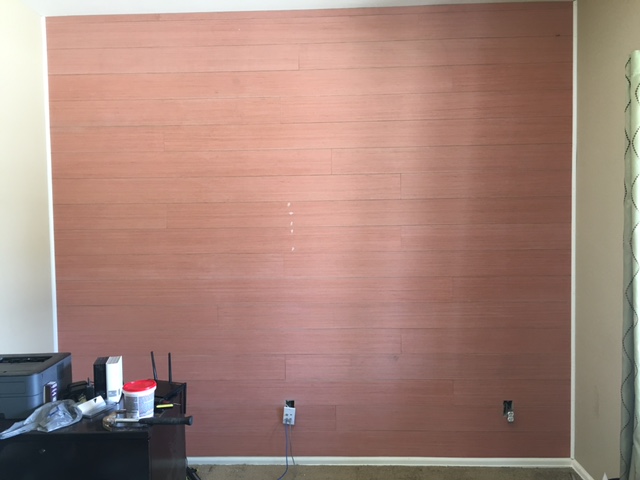
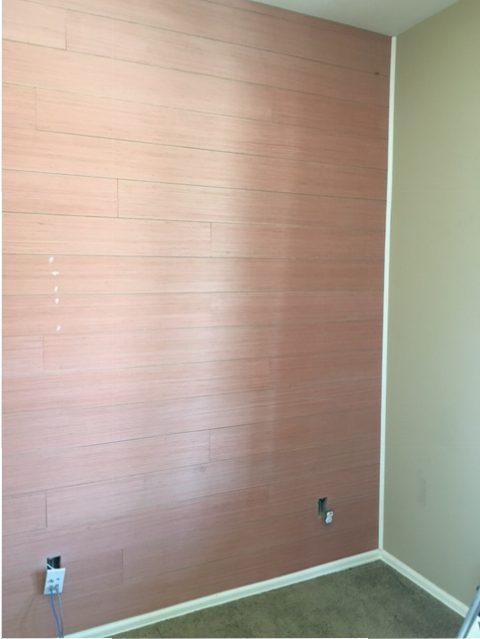
First got our supplies by having Home Depot rip 3 sheets of 4×8 1/4″ underlayment to 6″ strips. We actually almost only needed two but couldn’t quite make it. Underlayment is kind of a ugly pink color. We had everything else on hand so it might cost you more if you have to buy the other things. But then you’ll have them for the next time! You can never have too many tools.
When we got home, we sanded each piece on the edges so they would be smooth. Then we started at the bottom and made sure it was level. We removed each outlet cover and pulled the actual outlet out a bit so it would sit out more. We marked all the studs and then shot nails into the studs.
We used a jigsaw to cut around the outlet, close enough that the planks would slide under the outlet plate. We used nickels as spacers. When we reached the top we had to rip the top piece a little bit narrower to fit. You might want to take this into account and start at the top rather than the bottom. We used quarter round to hide the uneven edges, then my friend filled nail holes, painted it white and another wall.
It can be tricky to paint shiplap because of the gaps so here are a few tips:
- Try using a paint sprayer to spray all the gaps first.
- If you don’t have a paint sprayer, just use a smaller brush to brush the gaps.
- For any places where the paint gets thick and stuck in the gaps, use a skewer to smooth it down.
- Use a foam roller to achieve a smooth finish.
That’s it! It goes up pretty fast, the longest part is painting. I’m getting ready to do this shiplap wall treatment in my dining room and I’m super excited!

Want more details about this and other DIY projects? Check out my blog post!
Comments
Join the conversation
2 of 4 comments
-
Great tip about starting at the top. I wouldn't have thought of that.
-
It's a good idea to measure before you start your project. Determine the length of your install (flooring) or the height (walls) - divide that measurement by the width of your boards. By doing this, you can determine if you are going to run into a 'narrow rip' on your last piece. A pro told me that you never want your last strip width to be less than one-off the width of your other boards. He suggested that if you see this is going to be the case that you should rip your FIRST piece what ever amount you need to so that the LAST piece is at least one half the board width. Doesn't matter whether you are starting at the top or bottom, measure first!


Frequently asked questions
Have a question about this project?