


Make a Decorative Storage Container From a Drawer Box
by
Kasey
$15
2 Hours
Easy
If you’re revamping an old kitchen or building a new one, why not buy an extra drawer box and make yourself a decorative storage container for your kitchen or for alfresco entertaining? Alternatively, you can make a container or two from scratch, using leftover wood, and use them for informal entertaining or make them as a special gift for a friend.
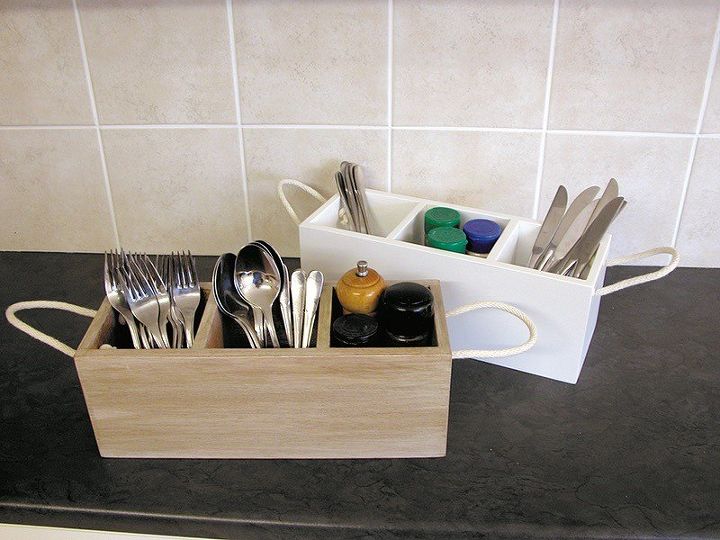
A perfect weekend DIY woodwork project that one person can easily tackle alone, these two portable cutlery boxes can be made from medium density fiberboard, (MDF) laminated particleboard, or solid wood. If using a drawer, you won’t have to assemble the basic box. All you do is cut wood to create the compartments and slot these in, gluing and pinning as shown below. The procedure for the rope handles is exactly the same whether using a cabinet drawer or making from scratch.
An ideal drawer for this project would have a depth of 15 inches (about 380 mm) and typically would be made with half-inch (12 mm) wood, though the base might be a thinner quarter inch (6 mm). Choose one to match you kitchen cabinets.
Because drawers don’t usually come with ready-made compartments, to add these you will need inside measurements of the drawer:
· From the base to the top of the drawer
· From side to side
Ideally use the same type of wood or board for these dividers, or give them the same kind of finish as the cabinet drawer.
What You Need to Make a Decorative Storage Container
Materials for one of the portable cutlery boxes shown above include suitable board or wood, rope for the handles, panel pins and wood glue, and paint, wood sealer, or whatever you need to achieve your chosen finish. Depending on the materials used and finish required, it might be easier to apply paint or sealer before you start assembling the storage container. Then when you have finished, you can neaten up any scuffed edges.
MDF, particleboard, or wood:
· 2 x 350 mm x 130 mm or about 13.8 in x 5 in for the long sides of the container. This would be the depth of a drawer.
· 1 x 330 mm x 110 mm or about 13 in x 4.3 in for the base
· 2 x 130 mm x 105 mm or about 5 in x 4 in for the two ends
· 2 x 120 mm x 105 mm or about 4.7 in x 4 in for the inside dividers
Please note that metric measurements were used for this project. If using imperial measurements you will probably have to trim and/or sand edges for accuracy.
Additional items:
· 500 mm or 20 in sash cord or other suitable rope, halved
· 32 mm or 1¼ in panel pins
· Wood glue
· Paint or sealer
Minimal tools are required, and if you enjoy DIY woodwork you’ll have everything you need in your existing toolbox:
· A retractable steel tape to measure your wood prior to cutting.
· A pencil to mark the cutting lines.
· A saw to cut the wood. Power saws make the job easier, but a fine-toothed tenon saw will also enable you to cut accurately.
· A carpenter’s square to keep corners at right angles.
· Clamps (optional).
· Hammer.
· Drill and wood drill bits. The size of the bit will depend on the thickness of your rope.
· Fine grit sandpaper.
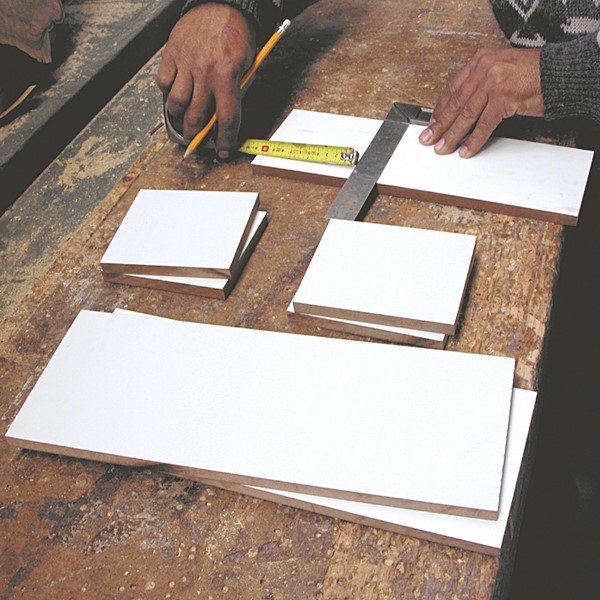
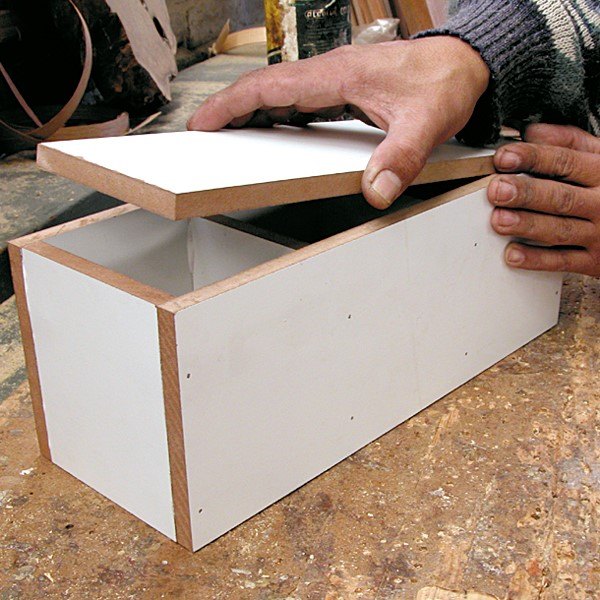
STEP 1
Measure and mark the wood with a pencil to create a guide for cutting. Use the carpenter’s square to ensure that all corners are at right angles (45 deg). It is a good idea to also mark the position of the inside dividing pieces on the two long sides.
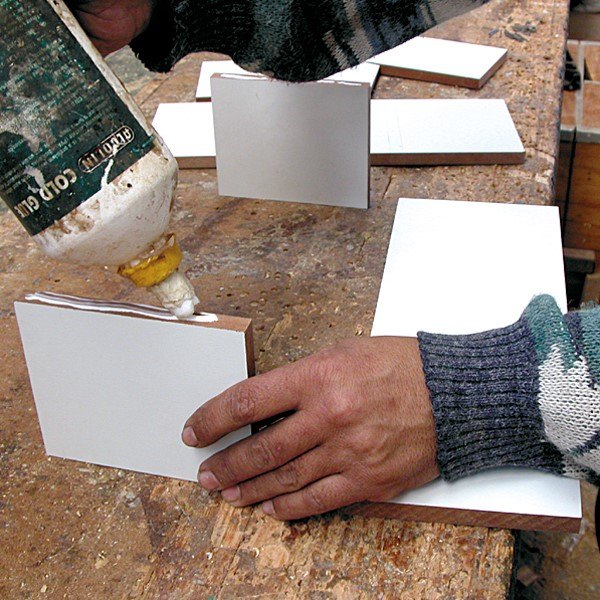
STEP 2
Squeeze glue onto the edges that need to be attached. You will need to do this progressively otherwise it gets messy and the glue will start to dry. Start by gluing the two ends to one of the long sides.
STEP 3
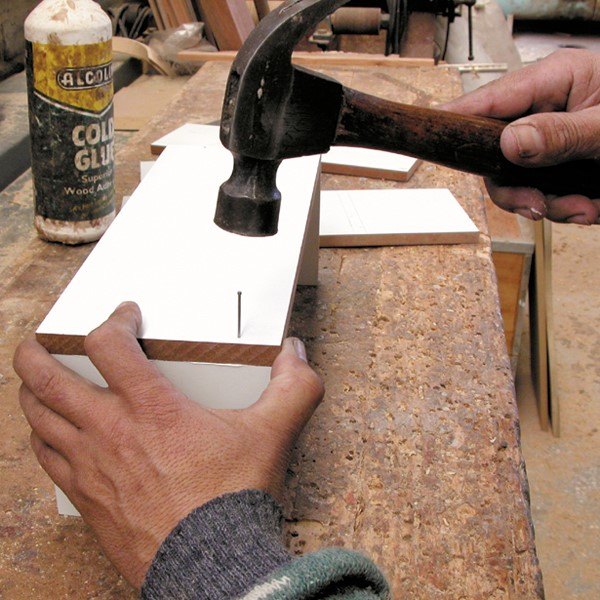
You can clamp the pieces if you wish, but it is much easier to simply pin the pieces together as you go. Just be sure to keep everything level and square. Hammer the panel pins in along the edges, and wipe off any excess glue before it dries.

STEP 4
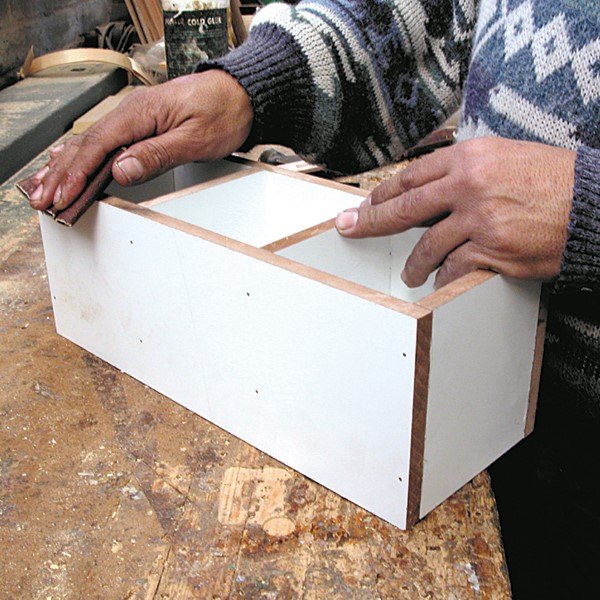
Now attach the two shorter dividing pieces to the sides, ensuring that you create three compartments that are the same size as each other. This will be a lot simpler if you marked their position at the beginning of the project. Note that the two shorter dividing pieces must be positioned so that they are flush with the upper edge of the outside ends and sides of the box.
Turn the box over so that the side is flat on your workbench, and then glue and pin this side too.
If you are using a ready-made drawer, apply glue as described above, and then slide the dividing pieces in and hammer gently until firmly in place. Use two or three panel pins along each of the three sides to keep in place.
STEP 5
Turn the box so that you can attach the base. Providing you cut the base accurately, and all the glued and pins corners are square, the base will slot snugly into the box. First, squeeze a little glue along the edges of the two dividers; then push the base into place. Hammer in panel pins as before.
STEP 6
Sand any rough edges.
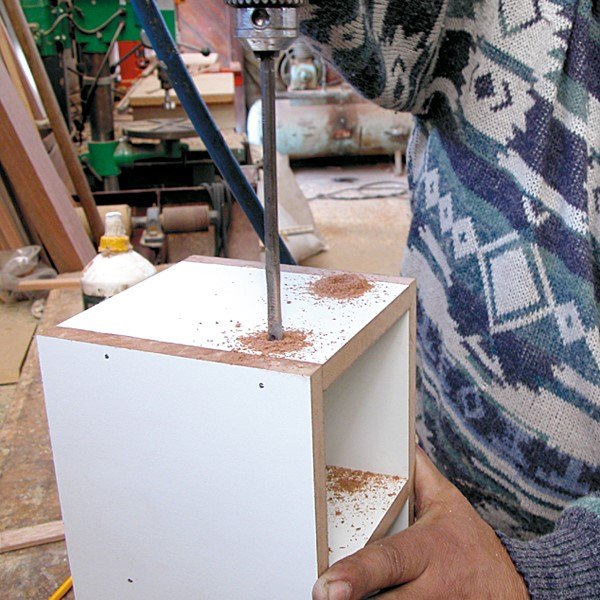
STEP 7
Drill two holes in each end of the box. Clean the holes and if necessary complete any paintwork and/or seal the box.
STEP 8
Push the rope through the holes to create a looped handle at each end. Knot the ends to secure the rope.
Now all that’s left to do is put your decorative container to work. Use it for informal entertaining when you don’t want to lay the table, or keep it in your kitchen and use it for storage or display. Enjoy!
Comments
Join the conversation
1 comment
-
These are great! I love the rope detail :)


Frequently asked questions
Have a question about this project?