


Homemade Marble Envelopes

by
Ariel
7 Materials
$10.00
15 Minutes
Easy
Want to send someone something special, but don’t want to spend a lot on a pretty card and envelope? Maybe you just want to add a personal touch to make your pen pal smile or to make your girlfriend happy when she checks the mail?
Say no more!
Today I’ve got an affordable way to customize paper with a cool marbling effect and a way to make an adorable envelope from a simple piece of paper!
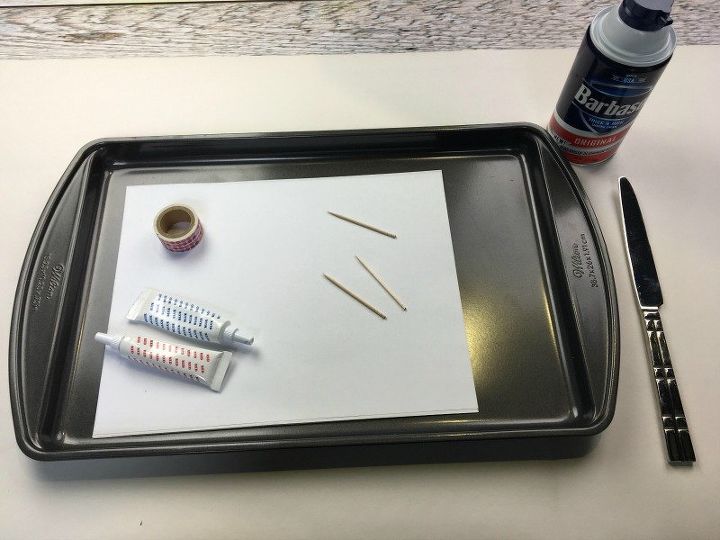
You won’t need much for this project, all you need it toothpicks, shaving cream, washi tape, food coloring, a baking pan, and a butter knife.
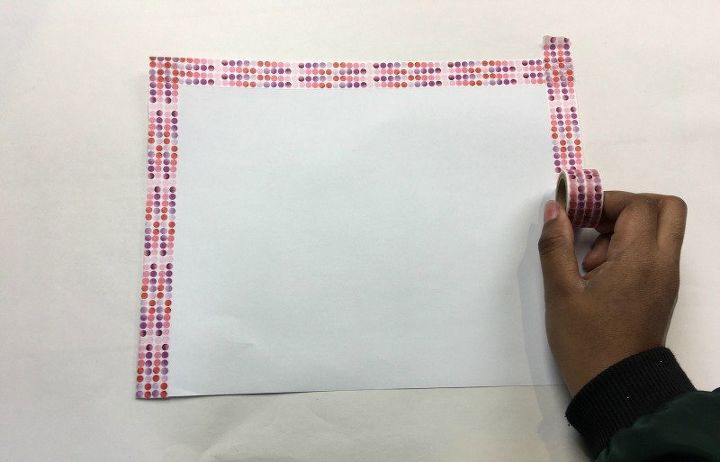
Begin by apply washi tape around the edges of the paper.
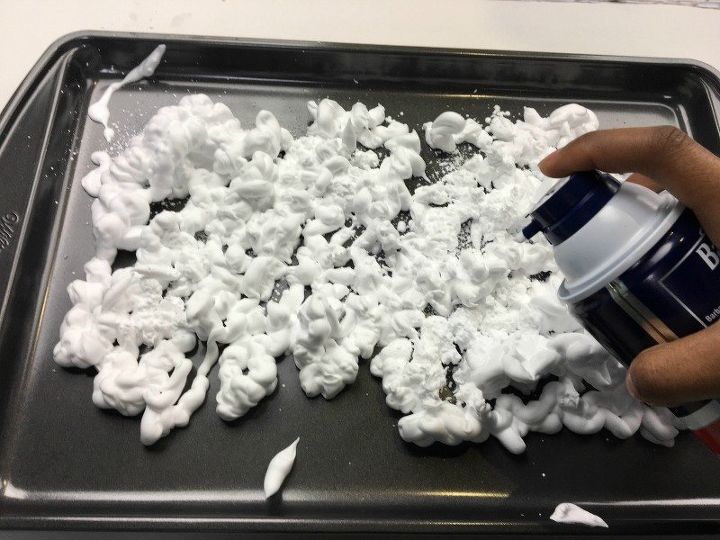
Then fill the baking pan with shaving cream, the amount you apply in the pan depends on how many pieces of paper you will be making. Filling up the entire pan will give you at least 10 marble pages.
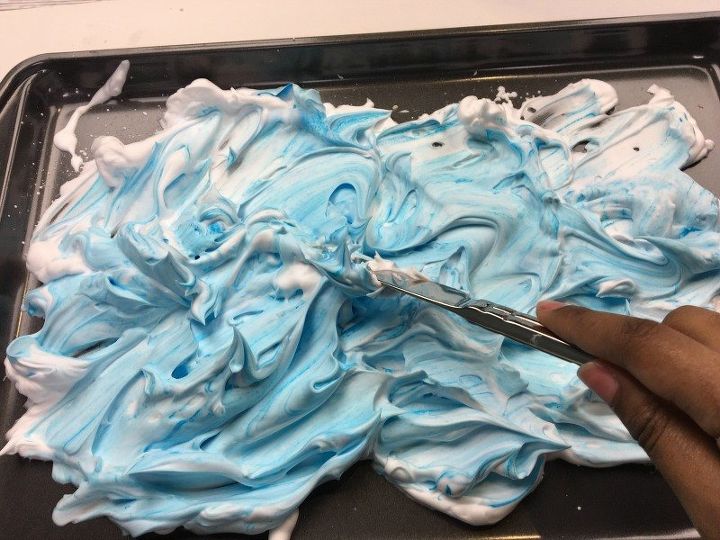
Next, drop your main color for the effect throughout the shaving cream and use your butter knife to gently mix the cream. It is like you’re mixing batter when you do it.
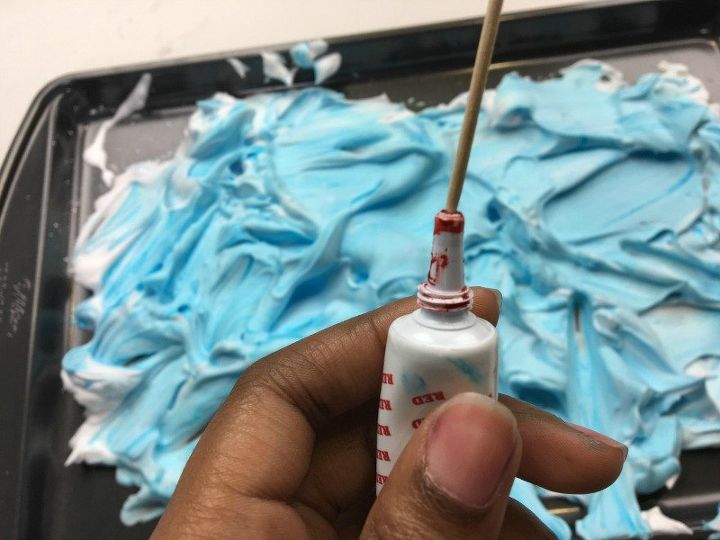
Then, take your toothpick and dip it into the second color for your marble paper.
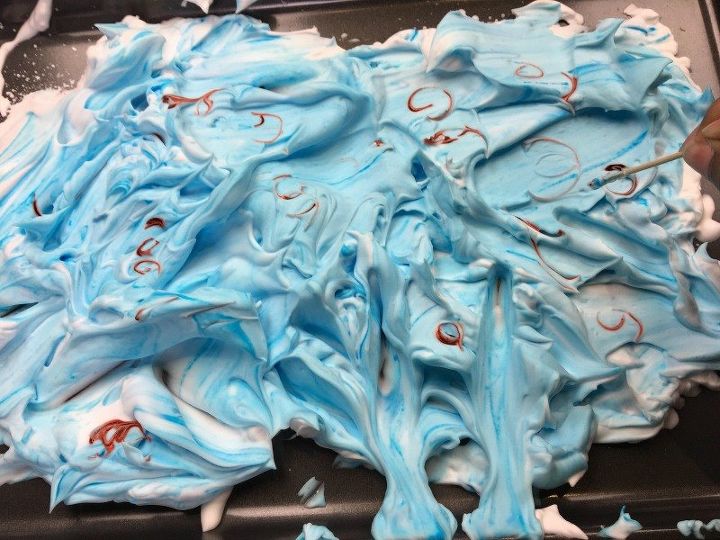
Once your toothpick is coated in the color, begin to swirl and poke the color throughout the shaving cream. You can make swirls or you can strike your color through. Any design you want! I just swirled mine in random spots.
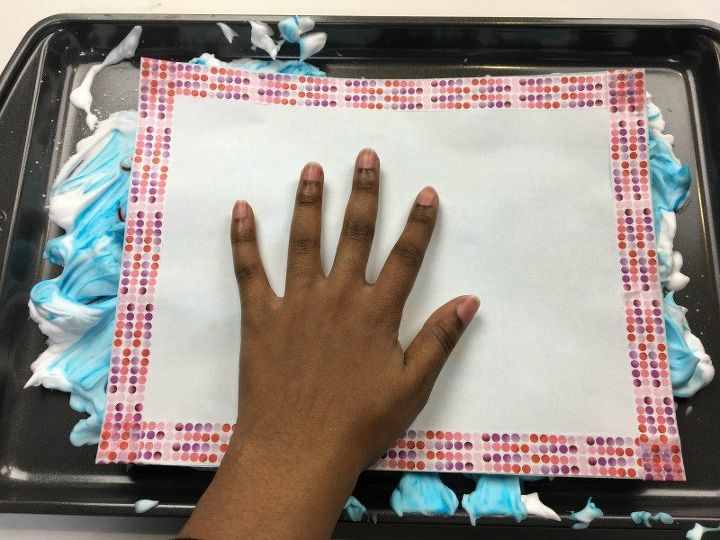
Now, just simply take that washi taped paper and press into the shaving cream marble mixture. Smooth your paper into the mixture so your page is totally coated.
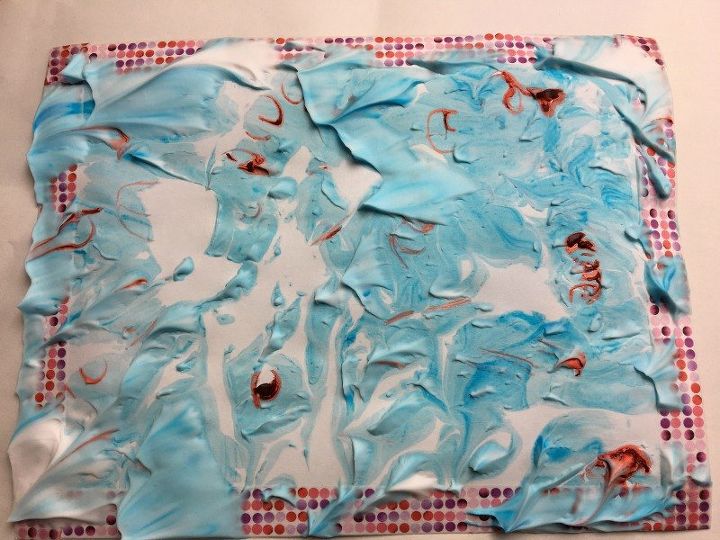
When you peel out the paper, it should look like this. You can already see the marble effect happening.
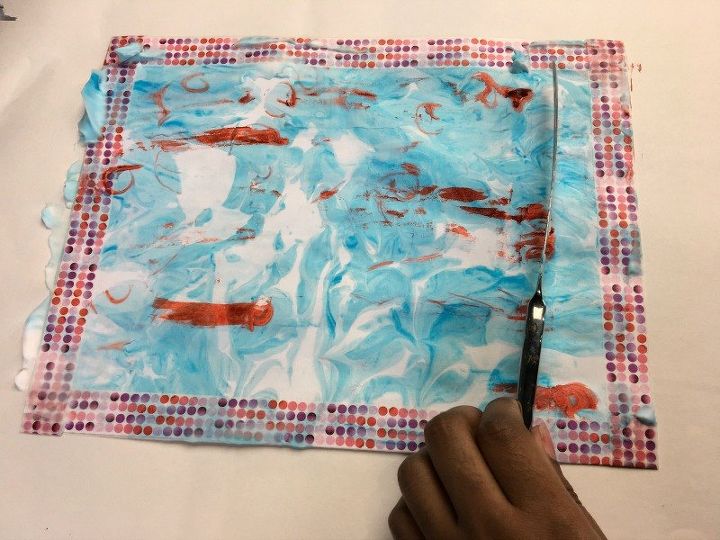
Take your butter knife, and tip it on the smooth side (not the side with the blade, the back part) and shave off the cream. You’ll see the color being coated on the paper and you see the second (or how many other colors) you add being smeared in. It looks so cool!
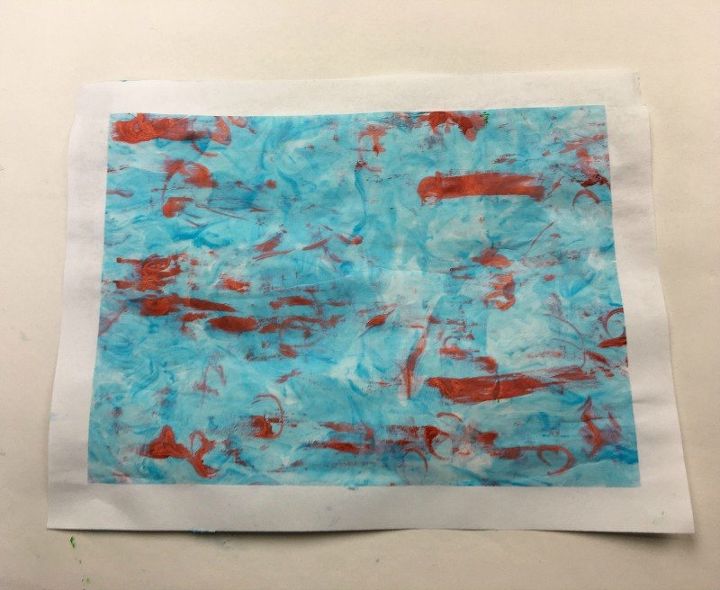
Once you slowly and carefully take off the washi tape, your paper will look like this! Artistic looking, no!?
Now for the ORIGAMI part! Yes, cause that paper isn’t going to turn into an adorable envelope by itself!
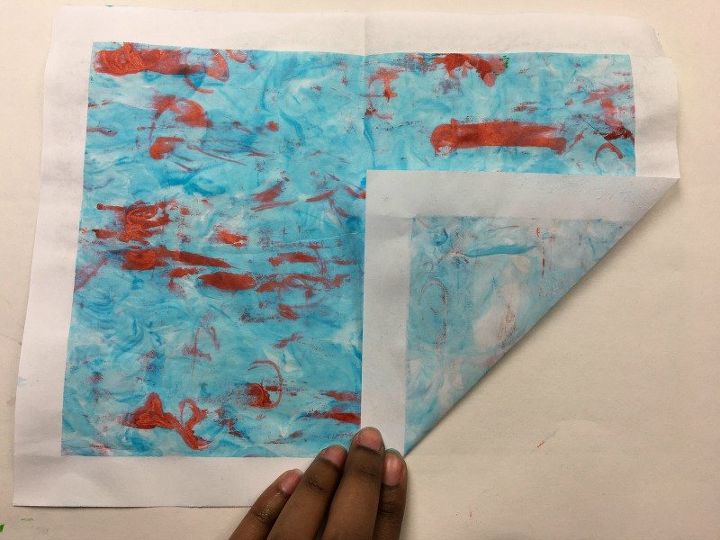
Begin by folding your paper in half and make the edges meet. Just simply fold like you would any normal piece of paper. And unfold it so it is flat and has the crease through the center of it.
Next, take the edge of the paper, and fold it to the center where the middle crease is, so you have a triangle.
Do the same to the opposite side of the paper.
Next, take the other half of the paper that isn’t folded, and fold it into the middle crease.
Do the same to the other side too. Your paper should look like a clean cut arrow or an envelope that is open.
Next, where the pointed section is, open up the middle.
And lightly press on it, and you’re going to do that for each of the two folds in the middle of the point. It will look like this when you press on the opened middle of the point lightly.
Now, open up the middle and fold it forward.
Turn the paper over, opposite the folded side you just did, and take the edge and fold it into the center crease again. Making a triangle like this, and do it for the other side too.
Once you have a triangle, you bend it down to show you the envelope!
If you had trouble following along with this, you can always search "Origami Envelope" on YouTube if you are a visual learner :)
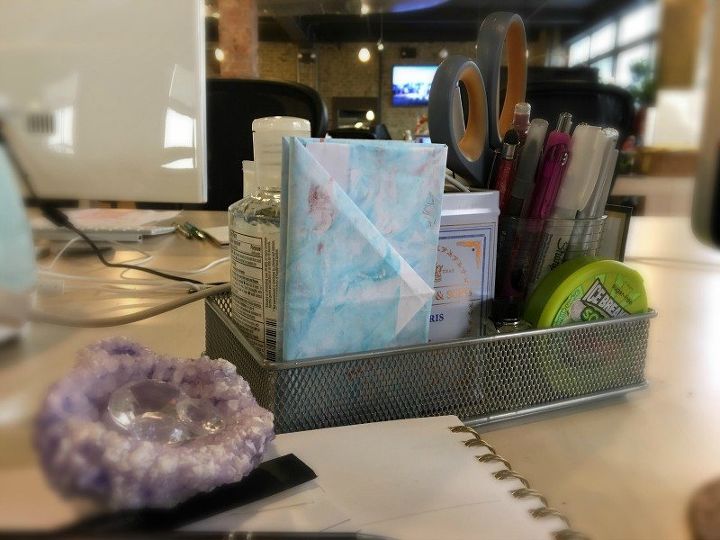
VOILA!
Now you have a pretty marble envelope to send in the mail to friends and family filled with little notes and cute goodies!
Comments
Join the conversation
2 of 72 comments
-
Oh how pretty. Thanks for sharing.
I have to try this now.
-
beautiful


Frequently asked questions
Have a question about this project?
I asked a mail carrier at the post office if I could make my own envelope out of construction paper and the answer was no! Has this actually successfully been mailed?
What is washi paper and where do I find it?
Can one use painter’s tape instead of washi tape?