


Trendy Concrete Bowls

by
Lisa Kettell
5 Materials
$20
1 Hour
Easy
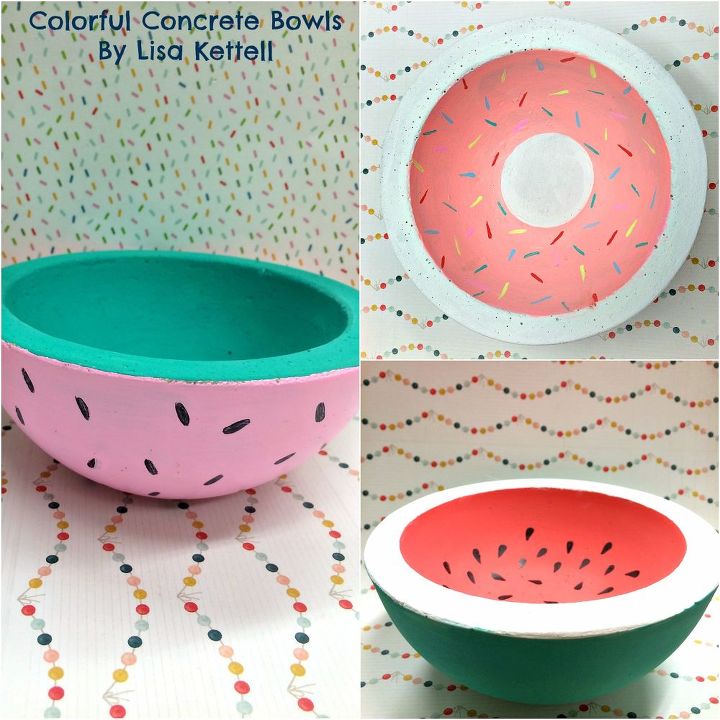
Currently the hottest trends in several industries are tropical, summer fruits such as pineapples and watermelons. Some desert spice with cacti and succulents. Don't leave out galaxy magic with stars and geometric shapes. Enchanting 80s icons such as rainbows, unicorns and confetti. Tasty treats liLe popsicles and donuts. In today’s post I'd like to share with you a series of painted concrete bowls that I created.
The beauty of this project is you can use Plaster of Paris or Paper Mache if Concrete isnt available. 2 sized bowls instead of a bowl mold. Even get inspired to paint the outside of glass bowls with glass paint to resemble these... Now all you need to do is sit back, relax, grab a cuppa and get inspired. You're concrete adventure is about to begin. I warn you, watermelons, strawberries and donuts may appear causing a sweet tooth craving....Don't say I didn't warn you...Lets get started…..
Materials
- Fast Setting Concrete (Rockite or a Bag of Fast Setting Concrete of Your Choice)
- Bowl Mold, Slump and Hump Mold or Set of Plastic Nesting Bowls (grabbed mine at Walmart under $8)
- Acrylic Craft Paints; Salmon, Teal, Neon Lights Line-Deco Art Brands
- Black Sharpie Pen
Tools: Pencil, Popsicle Stick, Paint Brush or Craft Palette Knife, Mixing Bowl, Measuring Spoon, Spatula, Water.
Making the Bowls
Step One
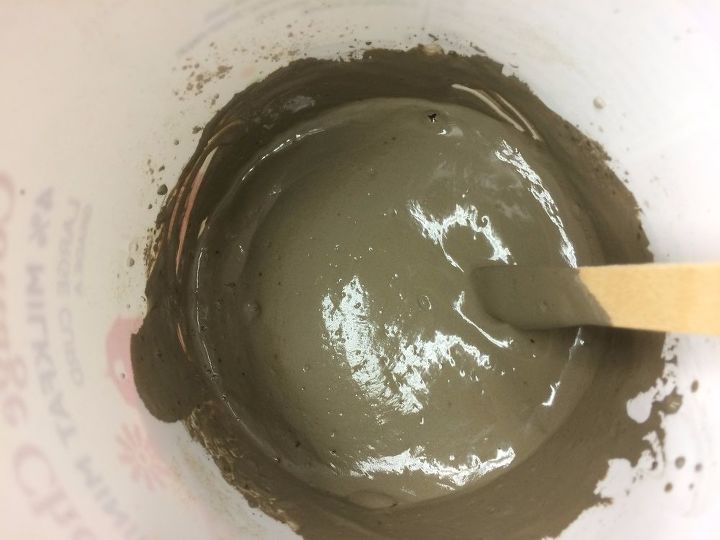
Mix one cup of concrete with 5 1/2 Tablespoons of water in a medium sized plastic bowl, until well blended. It should be the consistency of brownie batter.
Step Two
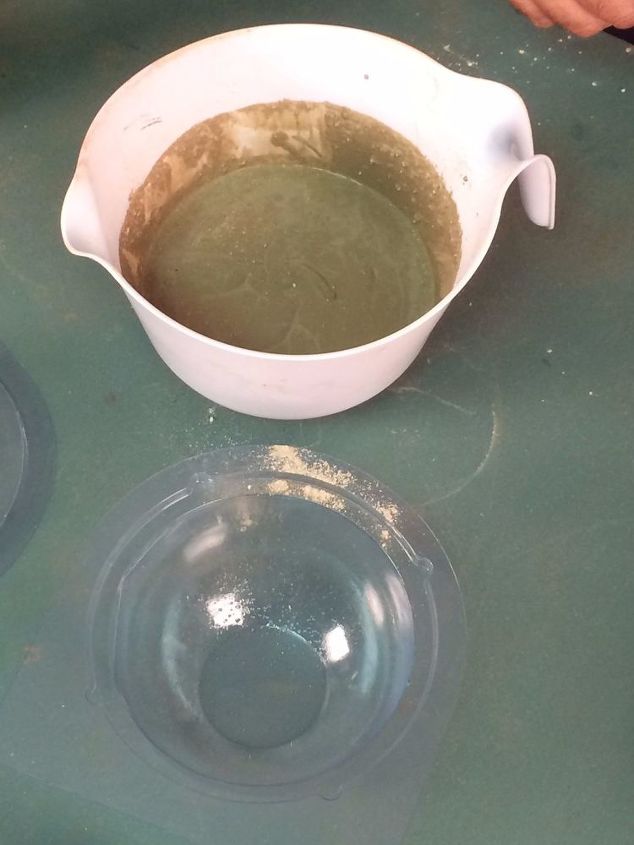
Grease a two part round bowl mold with some cooking spray or brush on some oil into it.
Step Three
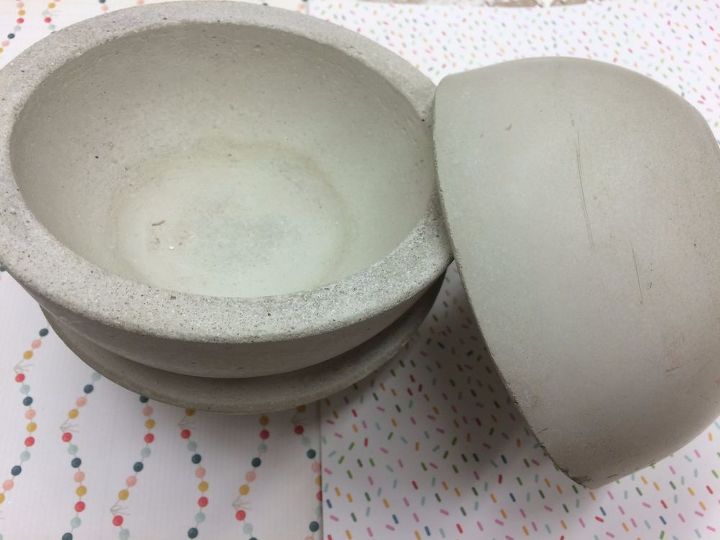
Fill the larger round mold with the concrete a little more then half way. Place the second part of the mold into the first mold, press until the concrete reaches the rim. Press closed and place a book or the concrete container on top of it to hold in place until it sets for at least 30 minutes. If you have any extra concrete left over fill the remainder into another mold so you don’t waste it. Let all pieces completely dry for 12 hours, preferably 24 hours before painting.
If using 2 different sized bowls or nesting bowls instead of mold: Use 2 plastic nesting bowls (I found a really inexpensive set at Walmart For under $8, and it's always reusable for more bowls). Grease the inside of the larger bowl with Pam spray, pour mixed concrete into that bowl to the rim. Then grease the outside of the smaller size bowl, press into the concrete. Fill smaller bowl with stones to hold it down. Let cure overnight!
Step Four
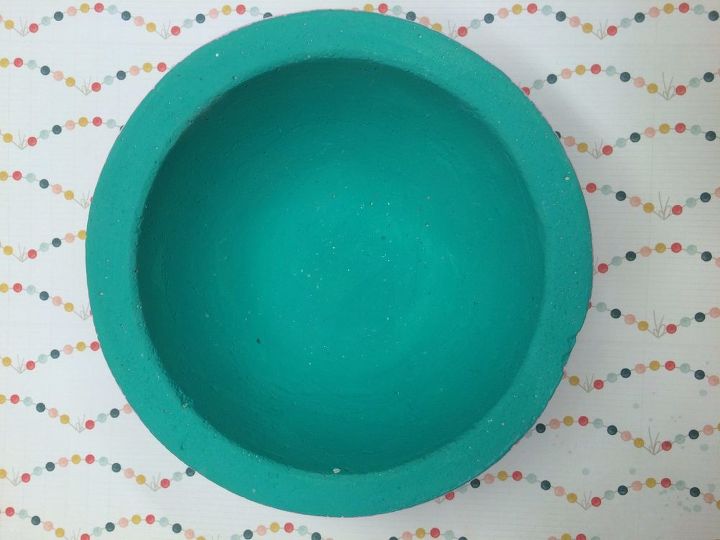
Once your concrete bowls are dried, they are ready to be painted.
Painting The Watermelon Bowl
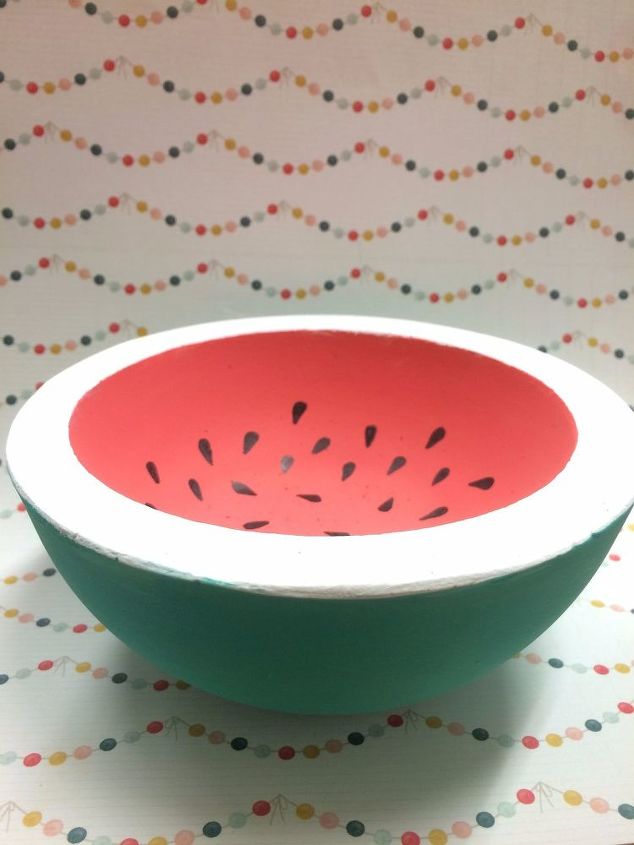
After its dried pop out the dried concrete bowl from the mold and begin adding the acrylic craft paint. For the Watermelon bowl I painted the inside of the bowl salmon, the outside teal and the rim white. Once dried I added tear drop seed shapes to the salmon color using a black sharpie pen.
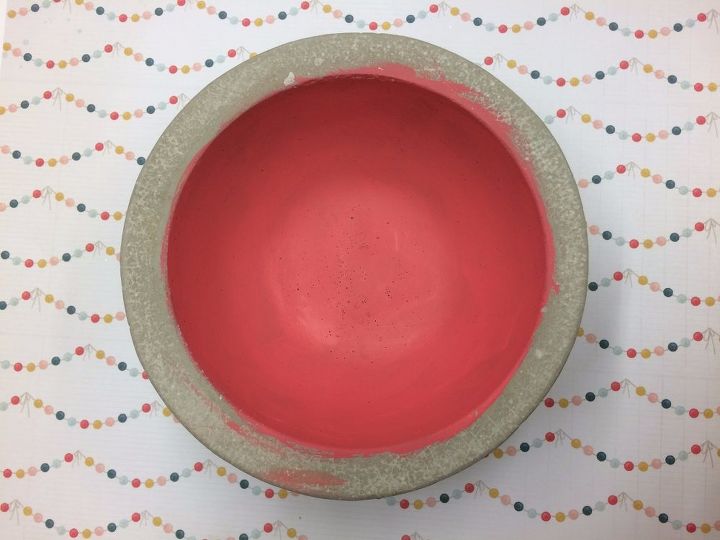
Painted the interior of the watermelon bowl with salmon paint.
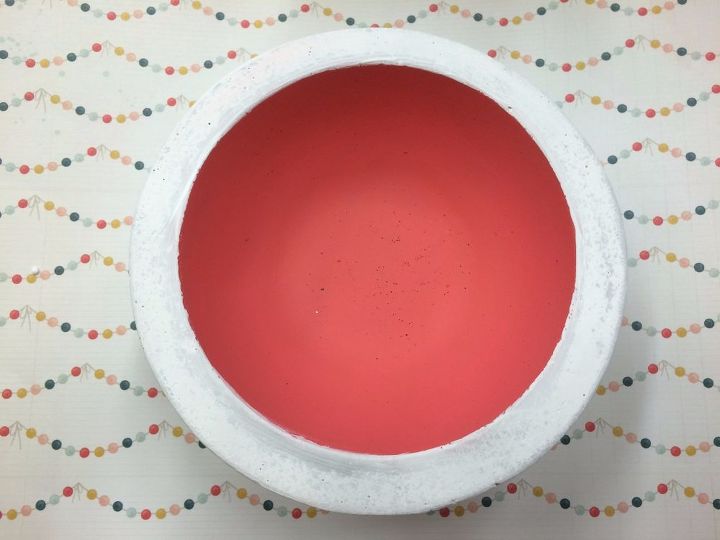
Then painted on the white rim.
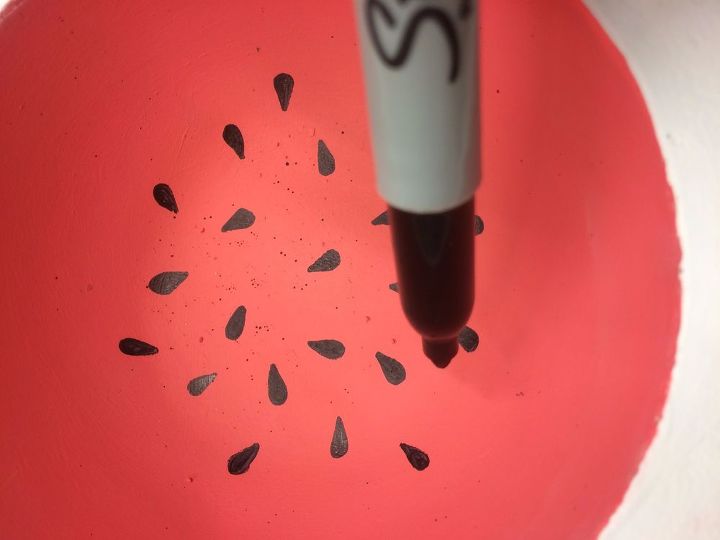
Added tear drop shapes with a black sharpie.
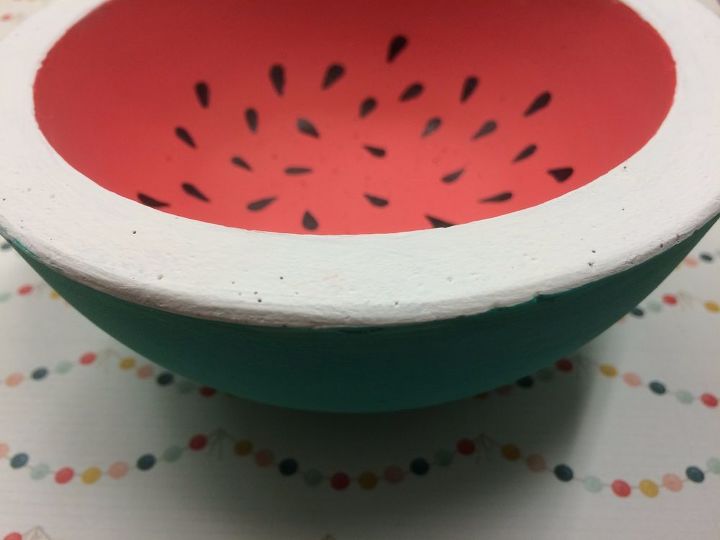
Finally painted the outside of the watermelon bowl with teal paint.
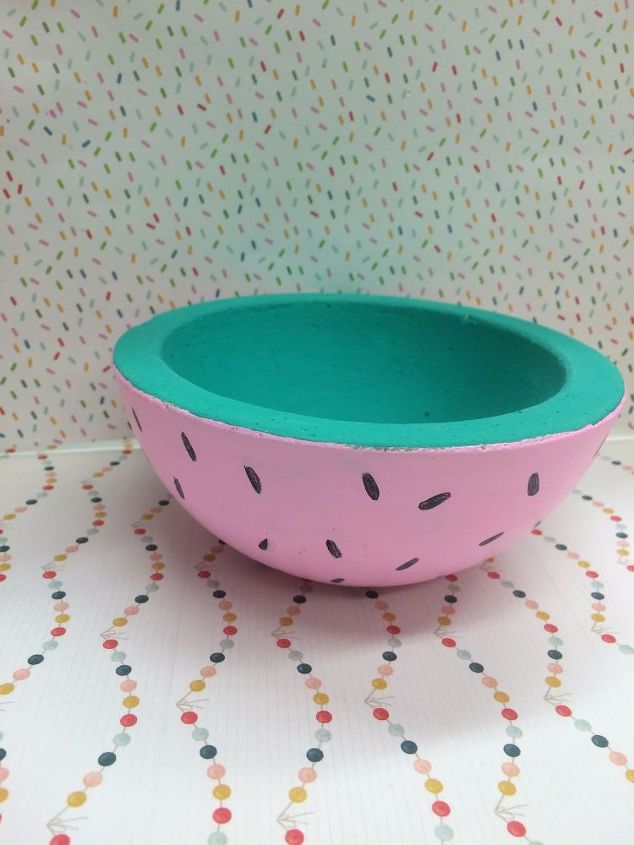
Painting the Strawberry Bowl
For the Strawberry bowl I painted the inside of the bowl teal, the outside of the bowl with pink explosion. Once dried I added sprinkle shapes to the pink explosion color using a black sharpie pen.
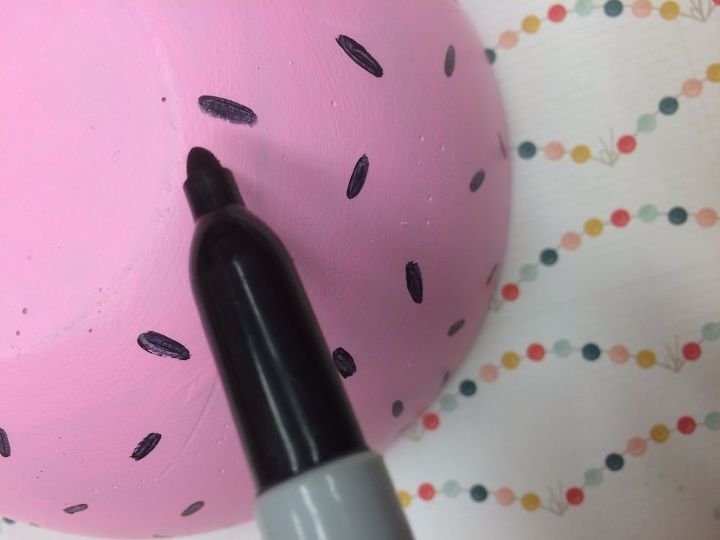
Outside of the strawberry bowl is painted with pink explosion and I drew tear drop shapes into it with a black sharpie.
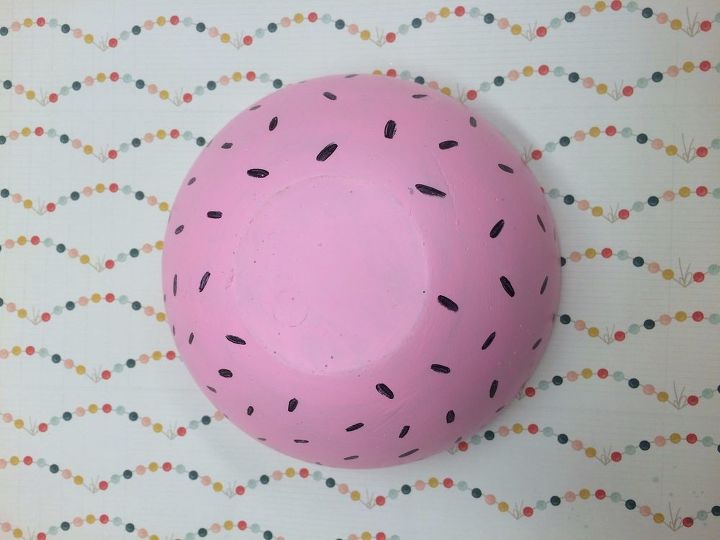
The full pattern of painted tear drop shapes.
Inside of the Strawberry Bowl is painted teal.
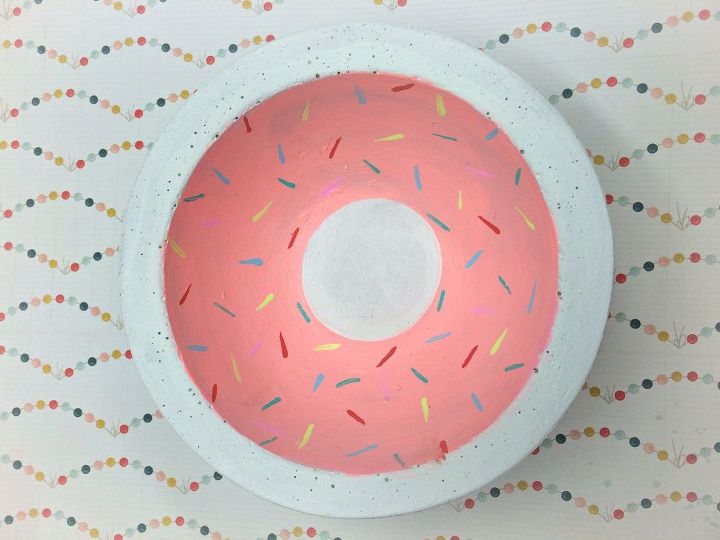
Painting The Donut Bowl
For the donut bowl I painted the inside of the bowl pink explosion, the outside of the bowl white. Once dried I added sprinkle shapes to the pink explosion color using a variety of paint colors. (You could use sharpie pens or paint pens for this)
This project costs around $20 and will give you around 10 to 12 medium sized bowls.
Additional Sources:
-Try using slump and hump 2 part bowl molds by Mayco! They have all shapes and sizes. Perfect for additional bowl styles.
-I used two different size plastic bowls as my mold set.
-Try nesting bowls as an alternative from Walmart.
-Fast setting concrete dries fast, sets fast. I used Rockite! But you could try Quick Crete, Buddy's Artisan, as well.
Want more details about this and other DIY projects? Check out my blog post!
Comments
Join the conversation
5 of 46 comments
-
Awesome!
-
These concrete bowls would also make great cactus/succulent planters if you put a hole in the bottom before hardening!


Frequently asked questions
Have a question about this project?
Any ideas on where to get the two-part plastic bowl mold?
Cute...What do you use them for???
Like this! But what do you do with these?
Hi!
Thanks for the great host, but are these food safe? Decorative only? What was the approximate weight of the bowls you showed us? Thanks for all the info!