


How To Create Transfer Tape Labels. Amazing DIY!
I love having everything as organized as possible. Don’t you? That’s why when I learned about this DIY, I was so excited to try it. A few month ago, I finally got my crafting cabinets organized and couldn’t be happier with them.
Don’t you just hate it when your things are not as organized as can be? Well, this month, I’m a mission to label all of my baking containers since I managed to organize that cabinet too. Why go buy labels when you can make them yourself? I love learning about DIY hacks that work and are super easy too! Why pay for labels if you can make your own! You are going to love this one!
This is the type of plastic canister I’m talking about. They are perfect for housing all of my baking goods and they stay fresh and clean too! I love the lids that snap on. Everything stays so fresh and lasts so much longer too.
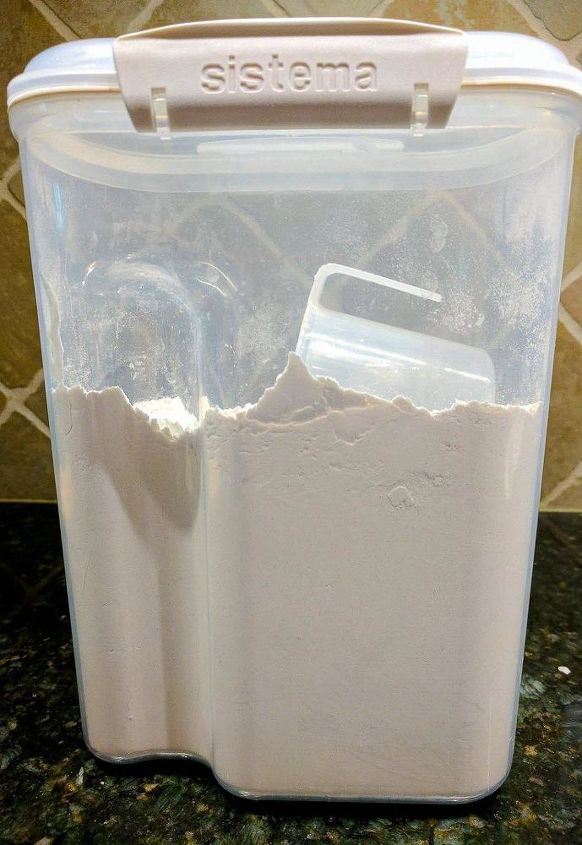
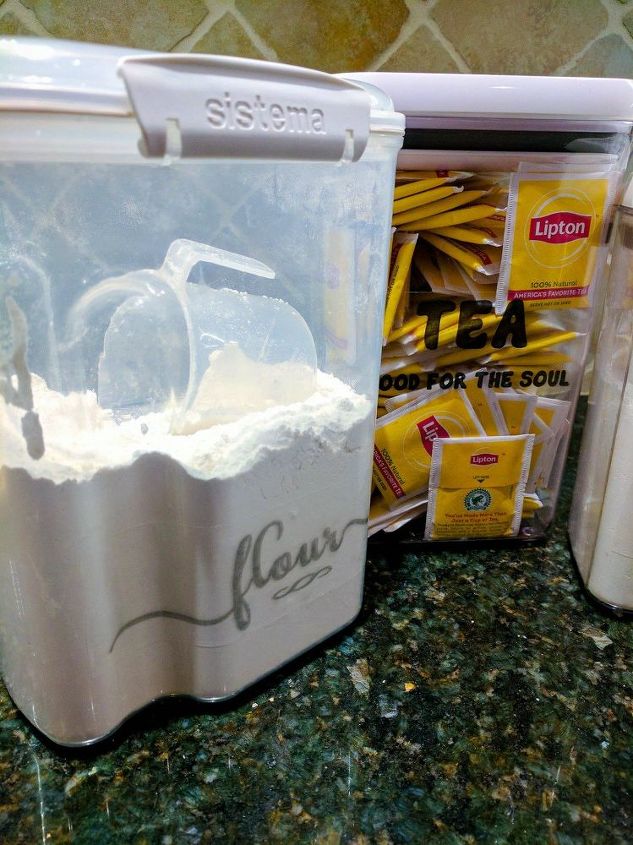
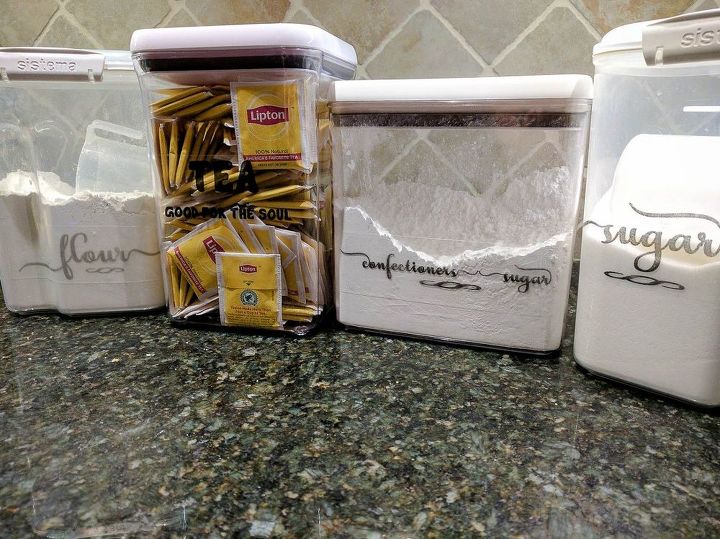
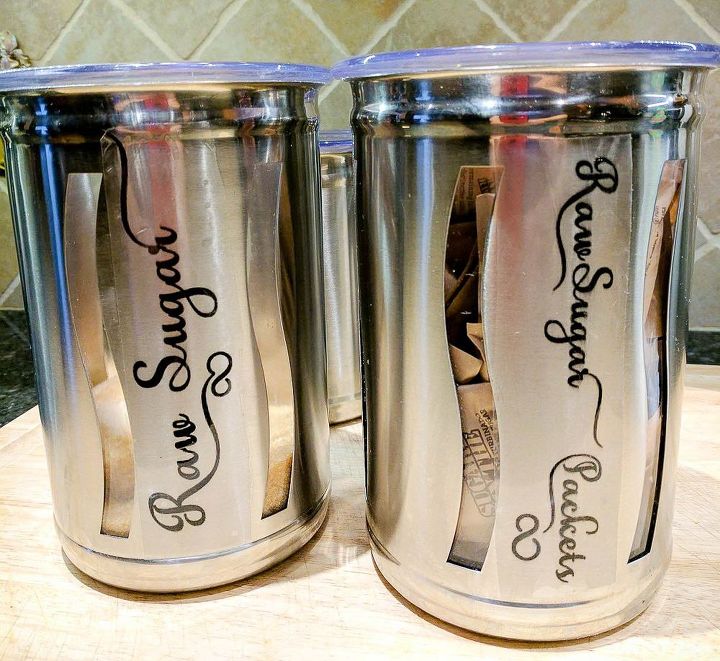
In my kitchen, I have many canisters for various reason. I have my display canisters that sit on top of my counters and they are the most expensive and prettiest too. Then, I have canisters and plastic containers to store things like flour, sugar, and other condiments I use for baking. This is where I started labeling. Since they are hidden inside the pantry, I thought it would a good way to test the waters and see what style, color, and typeface I wanted to use for the rest of them.
This was my first attempt at making these transfer label, and I learned a lot about the do’s and don’ts so it was a good lesson for that I was excited to pass along to you too! Let’s get started with the instructions!
The first thing you will need to do is:
1 – Decide what you want to label. Get them all organized.
2 – Clean the surfaces of all debris. You don’t want to place the labels on greasy canisters.
3 – Have a program installed like Adobe Photoshop, Microsoft Word or any text editor that you can print from.
4 – Once you have it ready to go, decide which canister you want to label first and choose the wording that you want it to say.
5 – Don’t get too wordy – something short and sweet to describe the contents of the canister.
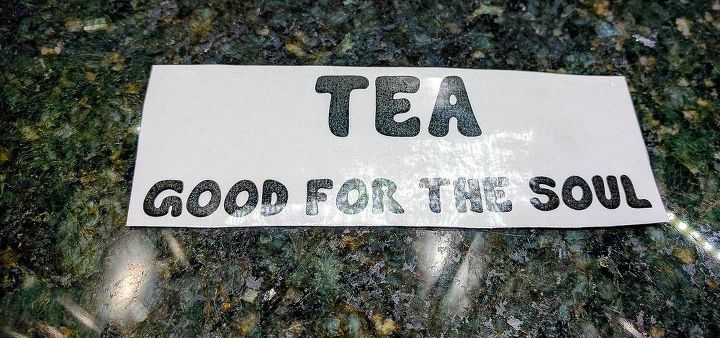
6 – Choose which font and lettering size you want to use. Make sure you have the right size lettering and style by printing a test sheet.
7 – Once you have decided and are sure you are happy with your style and size, place clear transparent tape across the lettering. Make sure your tape is wide enough to cover all the letters. If you printed past the size, you can always add a little extra piece of tape to cover the words.
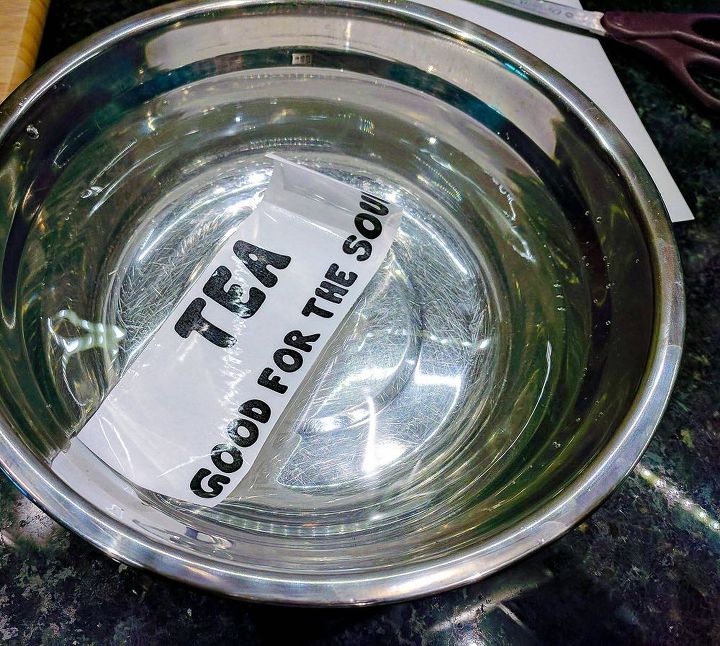
8 – With your scissors, carefully cut around the wording leaving some extra space on the sides of the words as well as the top and bottom.
9 – Take an object like an old credit card or the end of a wooden spoon and rub the lettering onto the label. You want to make sure the ink firmly adheres.
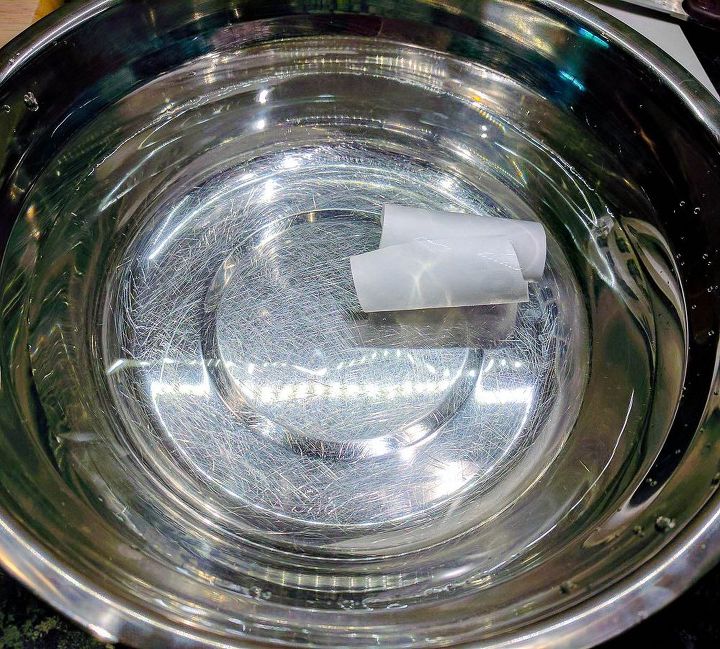
10 – Soak the letters in warm water for at least 2 minutes then remove them from the water.
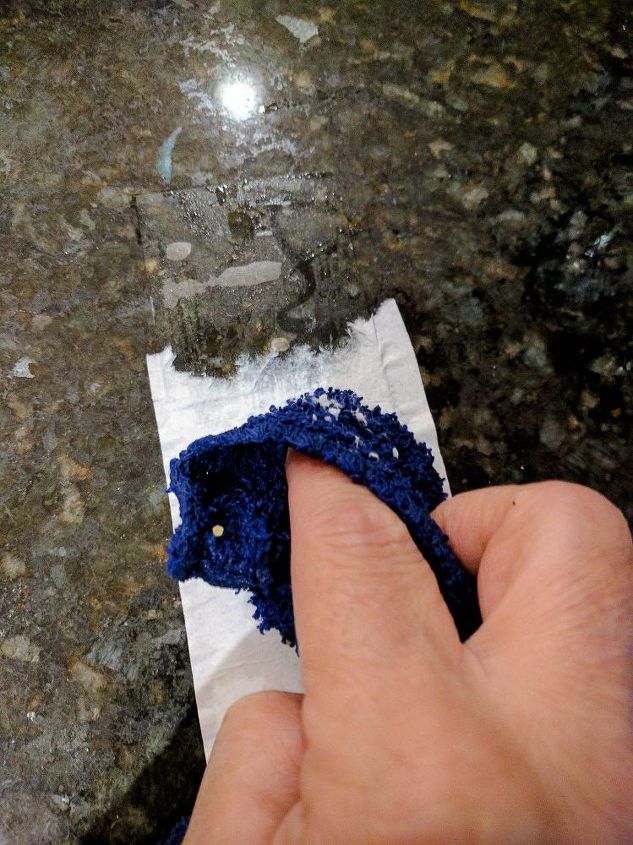
11 – Now, you have to remove the paper from the tapped letters. I like to take a wet rag and rub the paper off. You can use your fingers as well.
12 – Make sure all the paper backing from the label is removed from the tape.
13 – Place on your canister. Make sure it’s centered and positioned where you want it. You will have a minute to adjust the label before it adheres permanently to the canister.
14 – Done! Let it dry for at least an hour before touching it.
You can decide just how dark or light you want the labels to be. It all depends on how you print them.

I tried experimenting with different shades of gray and back. I love that you get to decide just how light or dark you make them. You can use color too! And, if you don’t like the way the label looks, you can easily remove it while it’s wet and start over.
After playing around and testing some label designs, I finally made one I love! I can’t wait to do the rest of them now! The nice thing is you can keep making them until they turn out to be just what you want! If you make a mistake, just remove it and start over.
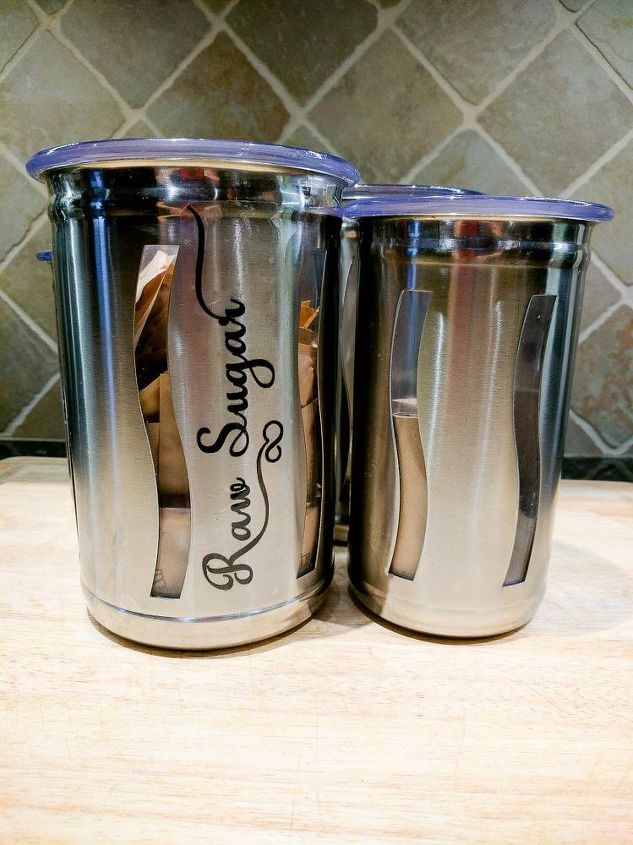
I’m so excited to create more! I have so many containers and canisters that need labeling.
I hope you get to enjoy these labels soon too. The possibilities are endless! Let me know if you have any questions in the comment section below!
PLEASE stop by my blog for more images and product details! I know you will find some inspiration for your projects too.
I'd love to see you there!
Also, subscribe to my newsletter for giveaways, updates, and much more! Subscribe Here!
Thank you!
Carolann
Sassy Townhouse Living
Resources for this project:
See all materials


Comments
Join the conversation
-
I love your lettering!
-
I have done the wax paper printing for wooden items. works extremely well. You just have to do reverse direction on lettering.


Frequently asked questions
Have a question about this project?
Will this work on wood?
My printer has ink that runs when wet. So I was wondering what kind of ink you are using? Is it laser ink? this is a great idea, but wanted to check with you before I wasted all the time.
What is the name of the font you used on your labels? Thanks :)