


Building a Breezy Doghouse Tutorial
4 Materials
$100
3 Hours
Medium
Summer is most definitely here with the warm sunshine and good times spent outside. That means my furbabies will be spending more time outside playing and enjoying the fresh air with me. The only problem is that my youngest puppy, Jayda, really didn’t have a place of her own outside to relax. But not anymore…
That’s where this adorable and cheerful doghouse has come to the rescue. I couldn’t wait to share this building a breezy doghouse tutorial with y’all too. Your puppies will thank you and me!

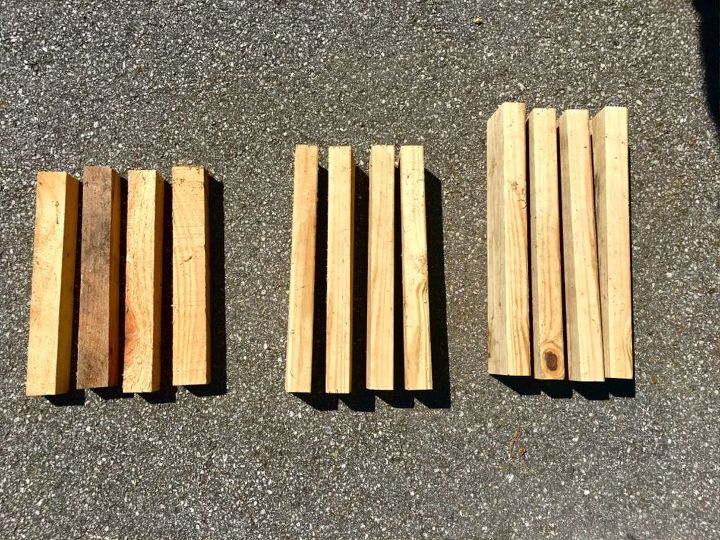
For the base of the doghouse, you will need wooden pieces in the following measurements:
- 4- 2″x2″x14.5″
- 4- 2″x4″x16″
- 4- 2″x4″x18″
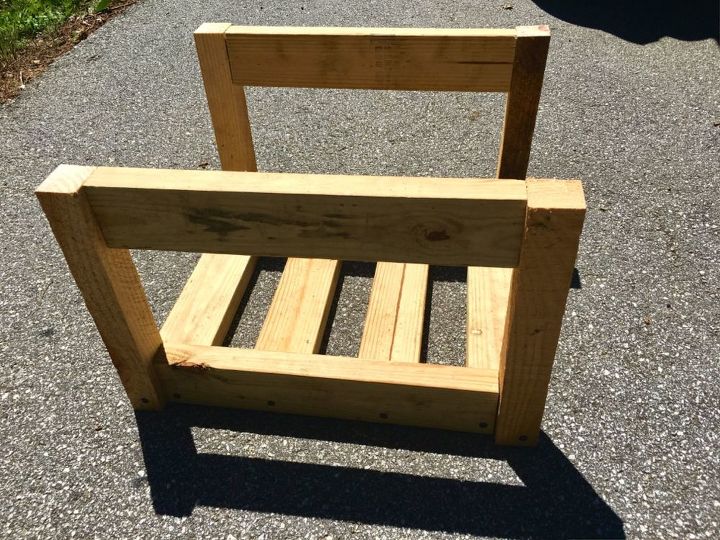
Using wood screws attach the base of the doghouse as pictured below with the 18″ pieces for the bottom sides and the 16″ pieces in the middle.
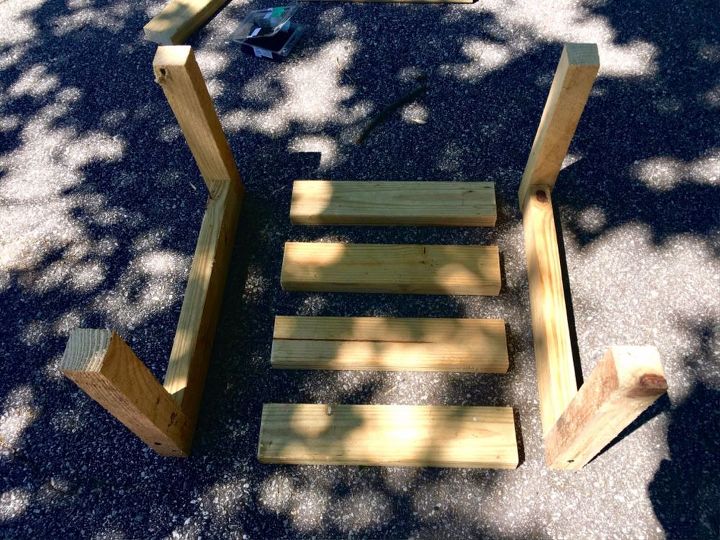
Then add the remaining 2-18″ pieces at the top on each side just as the bottom.
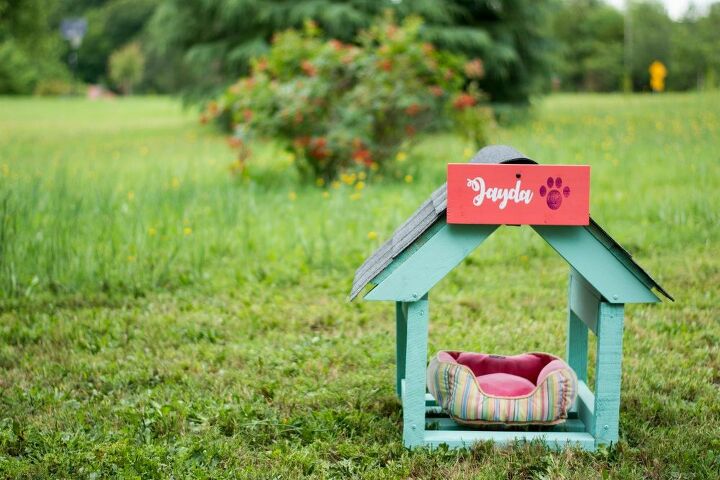
For building the frame for the roof, head over to thesoutherncouture.com. Add the Timberline® shingles on top. Be sure to line them up just right for the perfect color and style.

I painted the doghouse aqua and left some of the wood showing through for a more rustic look. I made a wooden sign and attached to the front of the doghouse using scrap wood, spray paint, vinyl, and my craft cutting machine.

Want more details about this and other DIY projects? Check out my blog post!


Frequently asked questions
Have a question about this project?