


Butcher Block Look-A-Like Countertops for UNDER $100!

by
Tootie Trouy
5 Materials
$100
2 Days
Medium
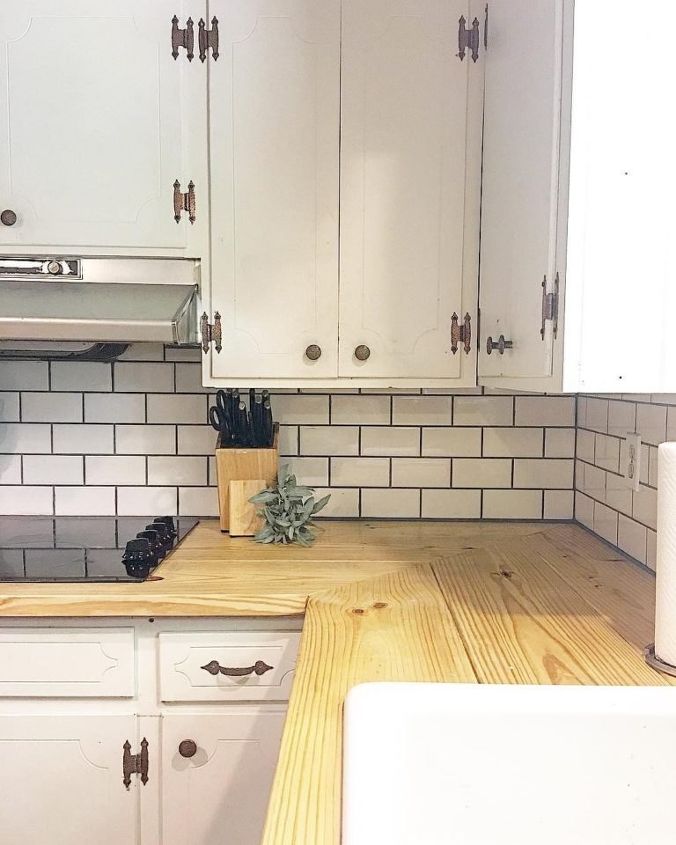
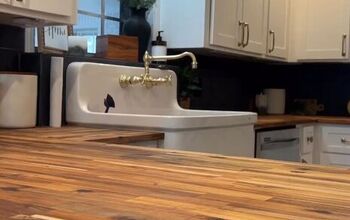
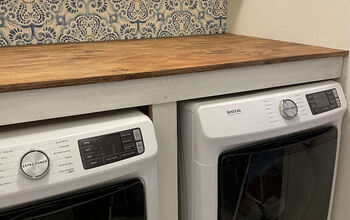
Using lumber, create a great wood kitchen or bathroom countertop for a FRACTION of the cost of other countertop materials!
Several years ago, I found a tutorial on Pinterest showing how to take regular lumber and use it for countertops. I remember showing it to my husband, and as usual, he thought it was a stupid, crazy idea that I had come up with just to save a few bucks, because that is how I roll.  Luckily, I talked him into it and it has been our go-to for countertop surfaces ever since! It is seriously the easiest thing everrrrrr…
Luckily, I talked him into it and it has been our go-to for countertop surfaces ever since! It is seriously the easiest thing everrrrrr…1. Measure your countertops. The typical depth of a counter surface is 25″ which allows for a 1″ overhang for he standard depth 24″ base cabinets. We found that (2) 2×10’s and (1) 2×8 work pretty well. I know what you are thinking: Tootie, can you not do simple addition?! That is 28″… I know, but you have to take into account that a 2×10 is ACTUALLY a 2×9.25 or some  …
…
…These 3 pieces will actually give you about a 2″ overhang, but it will work fine. Just make sure you measure yours to make sure that they are, in fact, standard.

2. Determine the amount of wood you need. These boards come in various lengths, so figure out before you hit the hardware store how you can get the most bang for your buck. For example, it you have a 6 foot run and the 2×10’s come in a 12 foot length, then get one board and cut it in half instead of purchasing two 6 foot boards. The cost will be less!
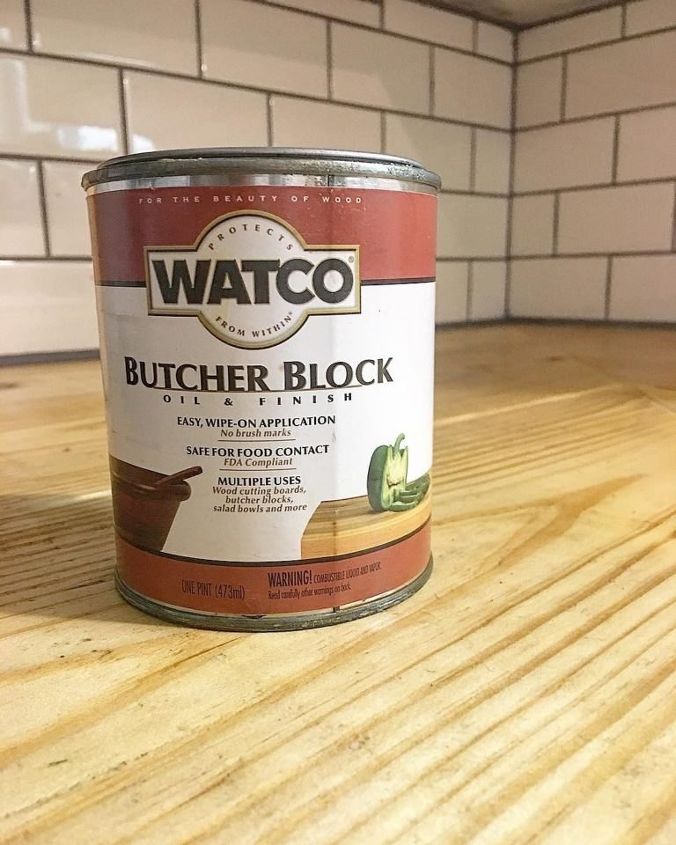
3. Make your trip to Lowe’s. Or Home Depot or wherever you get your lumber. Make sure your wood is UNTREATED. Remember, this IS a food prep area.  Also, be sure to check and make sure your board is NOT warped and will lie flat. Grab your wood, along with extra-strength wood glue, clear silicone caulk and Watco Butcher Block sealant, and head back home.
Also, be sure to check and make sure your board is NOT warped and will lie flat. Grab your wood, along with extra-strength wood glue, clear silicone caulk and Watco Butcher Block sealant, and head back home.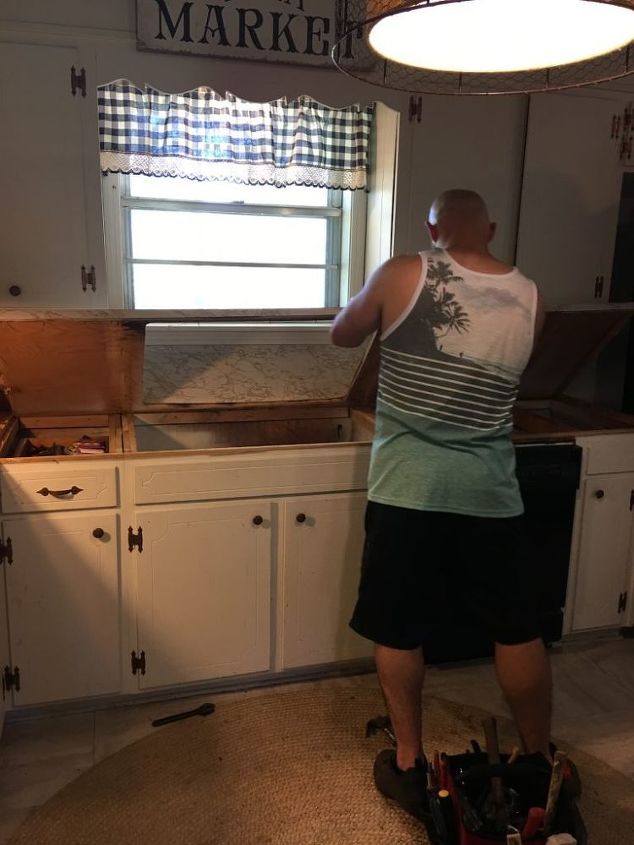
4. Demo Time!! It is important to remember that when removing your old countertops, try and do so as carefully as possible! You will need these old guys to use as templates for the new wood tops!
5. Once you have the old tops removed, cut your (2) 2×10’s and your 2×8 to the correct lengths. At this point, you can lay the old tops on the new and trace the holes for the sink and cooktop, if necessary. *a mitre saw or circular saw can be used to cut the boards to length, while a jigsaw works best for the sink/cooktop cuts.
6. You have all your cuts made! Great job!  It is now time to give your boards a good sanding. I like to round the corners and give them a very finished look!
It is now time to give your boards a good sanding. I like to round the corners and give them a very finished look!7. I am sure you think I am absolutely crazy when I say to glue the new tops down, but that is EXACTLY what you do. Apply your heavy-duty wood glue geneourously to the top edges of the base cabinets and place your new tops.
8. In order to ensure that the tops bond well, we cover them with towels and set heavy objects on top. This should be allowed to set for at least 24 hours.
9. This is where you use the silicone caulk. There will be a small valley where each board meets. In order to prevent this from being a food trap, simply run a line of clear caulk to “bridge the gap”. Another option for this step would be to fill the gap with wood putty and sand to make the tops smooth. This option would require staining the top and would create a more solid appearance. We decided to simply seal ours because I love the natural wood color and grain.
10. Seal the tops. We use Watco Butcher Block sealant because it is safe for food surfaces. We applied 3 coats.
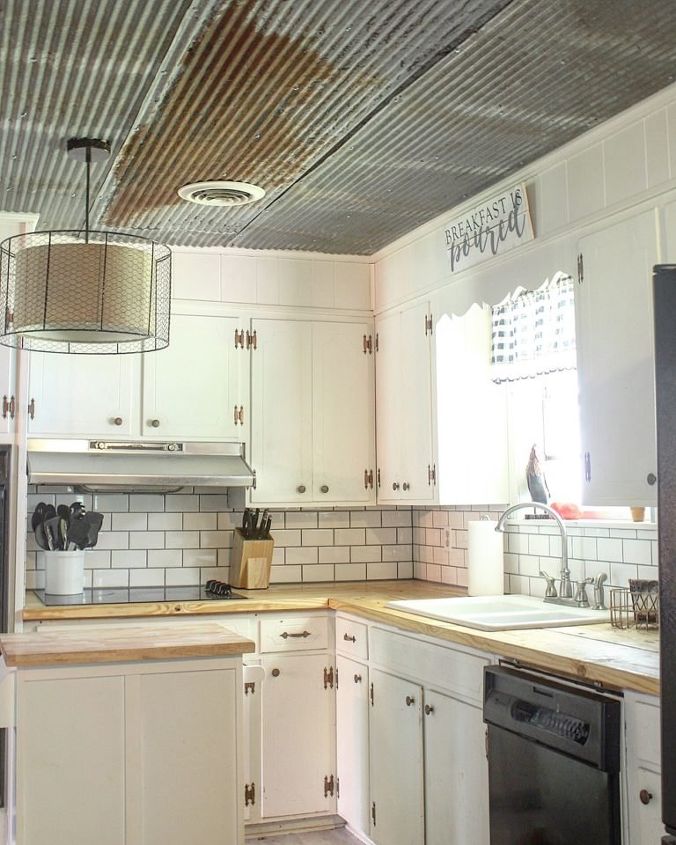
11. FINALLY, re-install your sink and cooktop. Step back and pat yourself on the back!  You just installed new wood countertops for under $100!!
You just installed new wood countertops for under $100!!


Any price and availability information displayed on [relevant Amazon Site(s), as applicable] at the time of purchase will apply to the purchase of this product.
Hometalk may collect a small share of sales from the links on this page.More info
Want more details about this and other DIY projects? Check out my blog post!
Comments
Join the conversation
2 of 301 comments
-
Thank you so much. This is what I needed.
-
I have been wanting to do that for years. I think I will make that my coming up summer project.


Frequently asked questions
Have a question about this project?
I am so over the moon loving this! Thank you!
I love the look but what keeps food from getting in the cracks between the boards?
Did you miter the corner or let them but up to it. I have done butcher block in a rental wasn’t that impressed as I figured I could make it out of wood to be solid.
So you don't attach the boards together before setting on the cabinets?