


Custom Frames... Just Add Memories!
4 Days
Medium
Pictures, pictures everywhere! With camera phones today, no one is lacking pictures of family, friends and fun. While most of our photo albums are digital, it’s nice to decorate your space with actual wall art including your special moments.
Frames are easy to find and there’s a plethora of options for printing your pics, but what if you want something a little more personal? Something unique that draws attention to your treasured memories while jazzing up your room.
We have just the answer… wrapit nluv™ Custom Frames! All you have to do is ‘Add Your Memories’ and enjoy!

Custom frames inspired by the wonders of Lake Tahoe surrounding me... Mountain life, vibrant colors, animals and the forest.
wrapit nluv™ Custom Frames
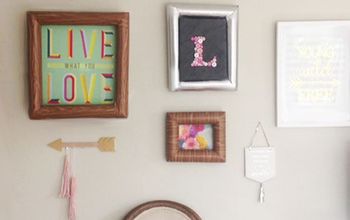
I love pictures and have thousands of them but most are not worthy of a spotlight on my wall. But, we always find those special photos that we actually love enough to print out and want to put on display. I know I focused so far on photos but we didn’t name these custom decor items photo frames… they’re just frames. Why you ask? Something doesn’t have to be a picture to be special and deserve a space on your wall. What about announcements, diplomas, cards? Whatever it is, it still deserves attention if YOU think it’s a treasured moment in time!
Find your inspiration
When I find inspiration from the world around me, the first thing I do is sketch out my design so I don’t forget. Since I use multi-layered finishes and other decorative techniques, I can never make the same piece twice and I love that! wrapit nluv™ Custom Frames are unique and cannot be duplicated. Even if the same general colors, materials and stencils are used, each one will still be a one-of-a-kind. When custom mixing colors and using different distressing techniques, the finished design will always be a reflection of that moment in time and never replicated, just like your treasured memories!
Living in Lake Tahoe, the nature surrounding me is a huge source of inspiration. This first set of frames highlights mountain life and celebrates the colors, the forest and animals we live among. One afternoon while rummaging through some old wood piles, I spotted a few beat-up fence slats. When I dug them out of the pile, the idea of wrapit nluv™ Custom Frames was born. Look around your own house, yard or even garage sales and antique stores. Do you see anything that inspires you to frame a memory and put it on display for everyone to enjoy? Your design doesn’t have to be elaborate or take weeks to complete. Look for creative inspiration from either the photos/memorabilia itself or an outside element, like Lake Tahoe is for me.
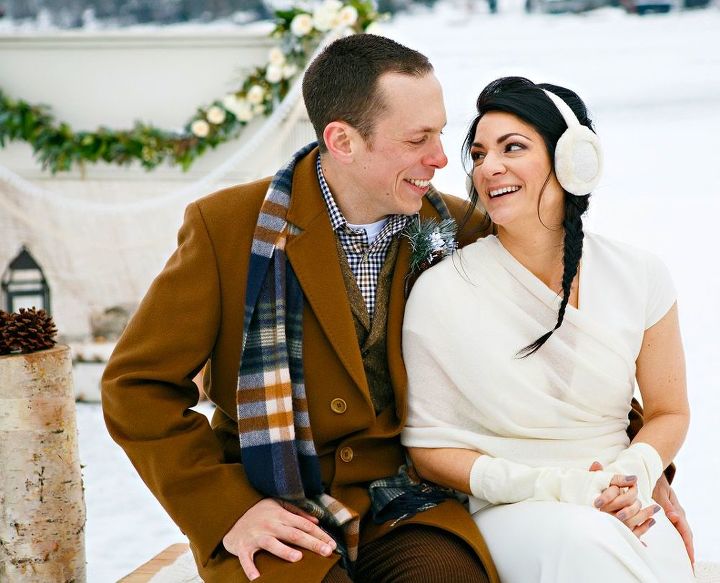
Draw attention to your treasured memories while jazzing up your room! Highlight those moments with a wrapit nluv Custom Frame. This is our wedding photo - deserving of a premiere wall spot in our home!
If you design it... your memories will shine
I started all three frames at the same time yet they each took a completely different path! Here’s the skinny on my process. See if it sparks any design ideas for you.
The quick scoop
- Use reclaimed wood fence slats, roughly the same size, long enough to fit three photos (5×7).
- Sand all edges of boards, removing any rough spots, sharp edges, etc.
- Wipe fence slats with a damp cloth to remove all dust and create a clean surface. Let dry.
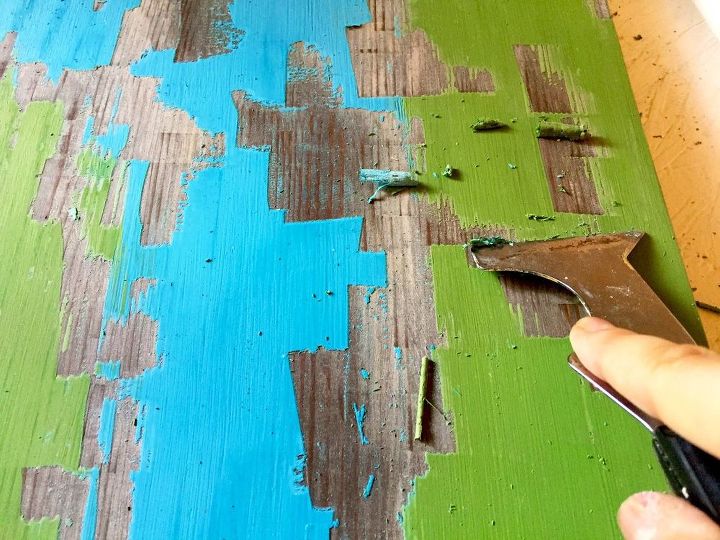
Scraping Board 1 across the color blocks to expose the underlying stained reclaimed wood.
Board 1
- Stain wood a dark color. I use Stain & Seal™ for easy application & cleanup. Wipe all excess stain and let dry.
- Add a layer of Creme Activator™ and let dry 30 min.
- Apply custom mixed green and blue Old World Finishing Paint™ (OWFP), in a random block pattern. 2 coats total, drying in between coats. Let dry total 2 hrs. after 2nd coat.
- Scrape, sand and wet rag off color to expose below stained wood. Let dry overnight.
- Apply Olde World Venetian Wax™ and let sit 60 min. Buff to a nice sheen.
- Add twine, spaced for three photos. Tie and glue on back of board.
- Custom stain clothespins and let dry.
- Clip on clothespins.
- ‘Just Add Memories’ & all done!
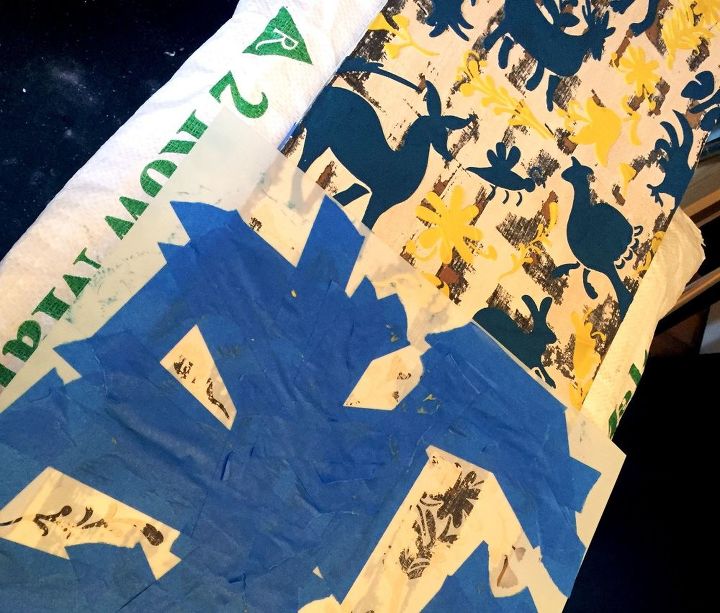
Carefully tape and apply your stencils! Be patient and let the layers/colors dry between applications. Don't smudge or mix up your colors by rushing.
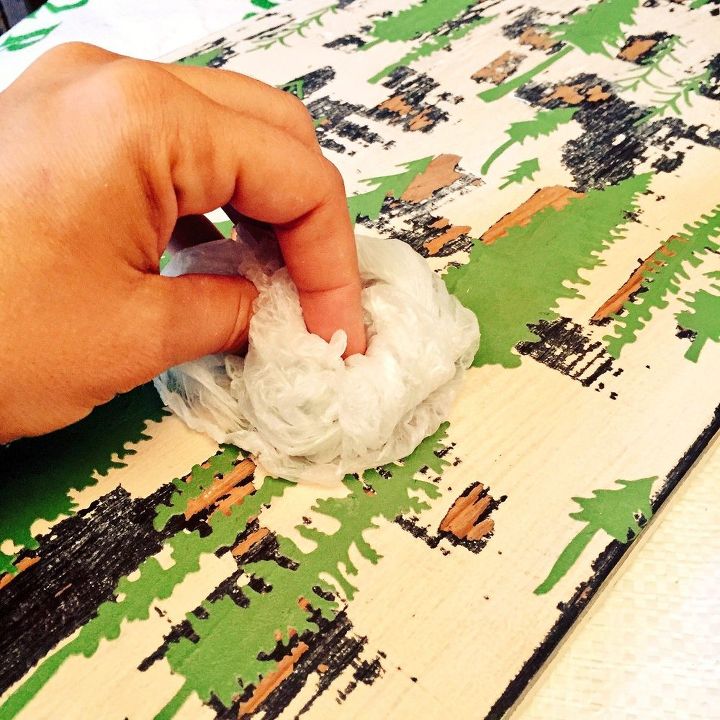
Buff that wax! Drill brush attachments and plastic bags are wonderful tools to use in creating a smooth, shiny finish.
Board 2 & 3
- Paint primer base dark brown, 1 coat & let dry fully.
- Paint 2 coats of dark brown latex paint, drying in between coats. Let dry total 4 hrs. after 2nd coat or until fully dry.
- Add a layer of Creme Activator™ and let dry 30 min.
- Apply cream latex paint as top color. 2 coats total, drying in between coats. Let dry total 4 hrs. after 2nd coat or until fully dry.
- Scrape off top color to expose below dark brown color & spots of raw wood. Let dry overnight.
- Mix custom colored Softex™ in green, blue and yellow.
- Align stencils on boards with tape & a light mist of adhesive spray glue. Apply Softex™ with a japan scraper. Clean stencil immediately. Let Softex™ dry on board.
- Repeat Step 7 as needed to finish stencil, especially if using multiple colors. Stencil one color at a time to prevent smearing & any color mixing. Be patient and take your time on the stencils. Let fully dry overnight.
- Apply Olde World Venetian Wax™ and let sit 60 min. Buff to a nice sheen.
- Add twine, spaced for three photos. Tie and glue on back of board.
- Custom stain clothespins and let dry.
- Clip on clothespins.
- ‘Just Add Memories’ & all done!

The finished set of Lake Tahoe inspired wrapit nluv Custom Frames. The mountain life is so inspirational!
Cost and time will depend on your materials and technique! Experiment and have fun!
Keep an eye out as our wrapit nluv™ Custom Frames will be available soon! Sign up for The nluv Memos and never miss anything! http://www.nluvstudio.com/nluv-memos-blog-jaime-pirozzi/
Do you have an idea for your own unique frame? Contact us and custom order one today! Or, did we inspire you to take on this project and create your own? Whatever you choose, we all have treasured memories that deserve a frame like this! http://www.nluvstudio.com/id-love-to-hear-from-you/
Unique one-of-a-kind frames are so much fun! They truly celebrate & spotlight those special moments in your life. Happy Framing!

Want more details about this and other DIY projects? Check out my blog post!


Frequently asked questions
Have a question about this project?