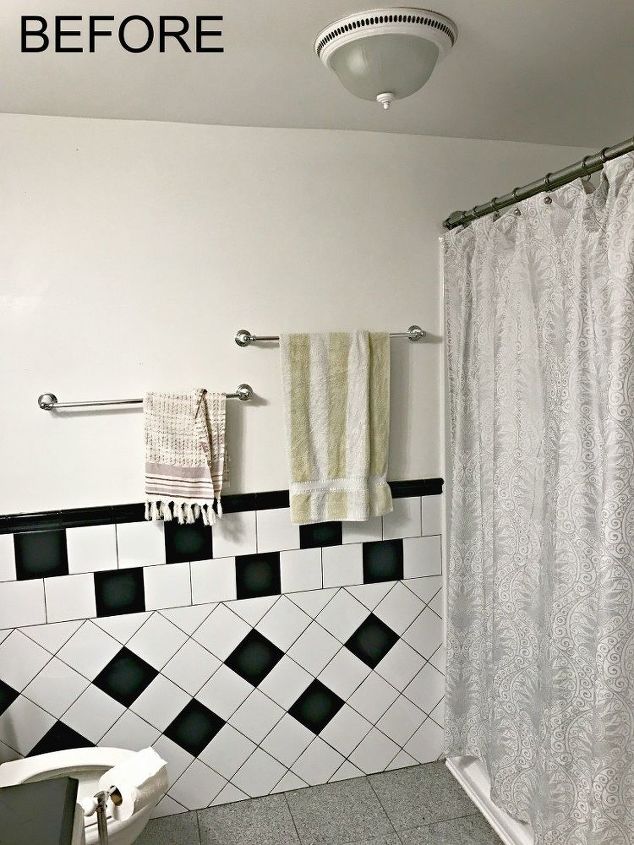
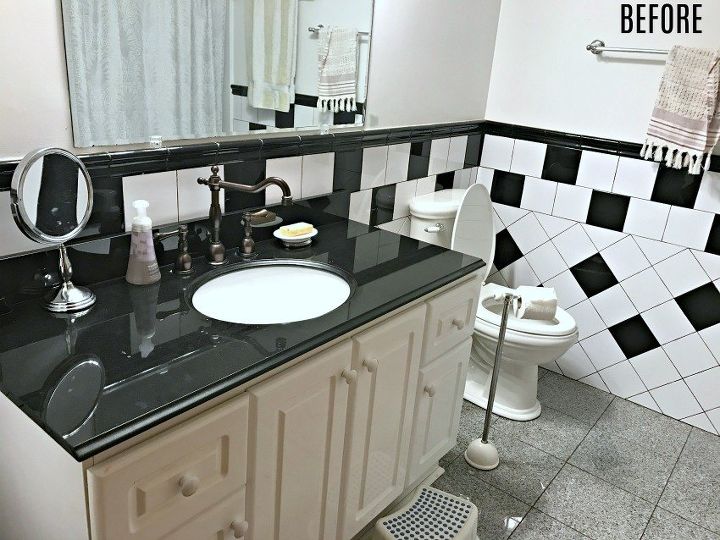
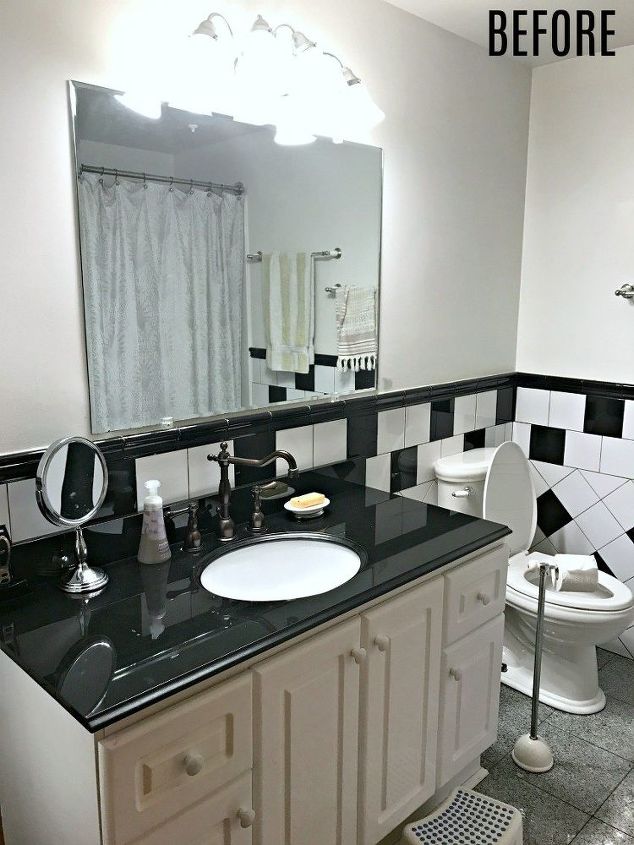
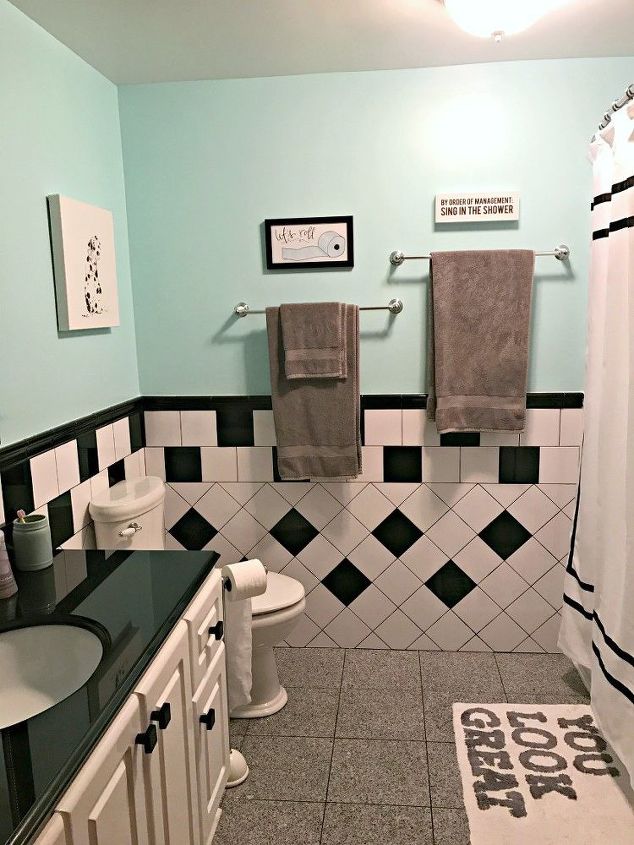
Retro Black and White Bathroom Update

Abbey D
by Abbey D
$300
1 Day
Easy
I think we all have those rooms in our house that we would love to completely gut and redesign if we had the time and the money. All too often these rooms get put on the backburner and other needs come first then all of a sudden you’re 5 years into living in that home and nothing has been done to it yet. Today I want to show you a classic case of a room I really have struggled with in our new house and how I “made it over” without changing the footprint of the room or doing too much in the way of work and money. It’s AMAZING what a little effort and some creativity can get you! My Retro Black White and Teal Bathroom Makeover is a new favorite room in my house now and you can see how I did the whole thing for under $300 with the help of my friends at Lowe’s.
It all started with this black and white tiled bathroom. The tile wasn’t my favorite—it’s outdated and I really wish it was white subway tile, if I’m being honest. The vanity serves its purpose, but it’s nothing special. The mirror was off centered and needed a frame. The light fixture was builder’s grade at best and added no character to the room. And the shower rod was rusted and worn. The previous owners had left the walls white and had laid down heated marble floors and black granite countertops. At least those were upgraded, but obviously this bathroom needed some work! I had GRAND plans to rip that tile off the walls and add a shiplap to the walls, but honestly…if you think this bathroom is bad,  you should see our Master Bathroom which is straight out of the 80’s. The Master Bathroom has taken priority over any big renovations in this house for the time being (more to come on that soon!), so this bathroom will have to wait a bit before I can proceed with anything drastic.
So rather than reinvent the wheel and let it sit there in all of it’s mismatched glory, I decided to embrace the retro vibe it was putting off and see what could be done with a couple hundred dollars and a few hours of effort…and to say I’m happy with the end result is an understatement.
After going through my budget I ultimately decided that I could get the biggest bang for my buck with these updates:
  • New light fixture $90
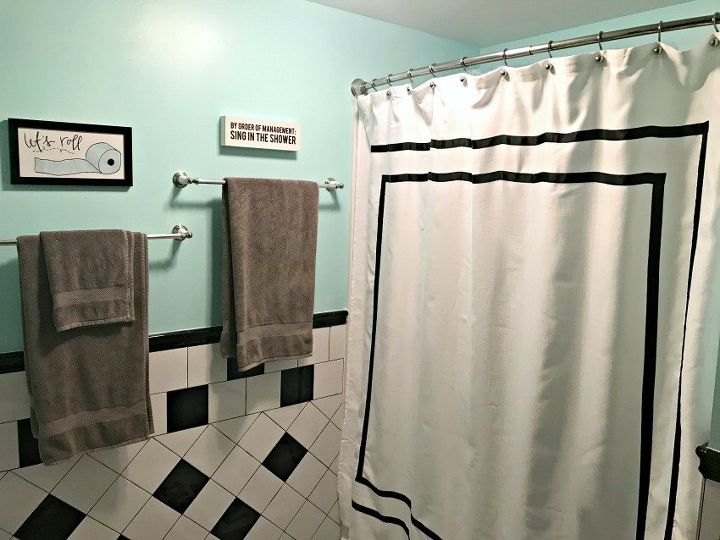
  • Teal painted walls $27
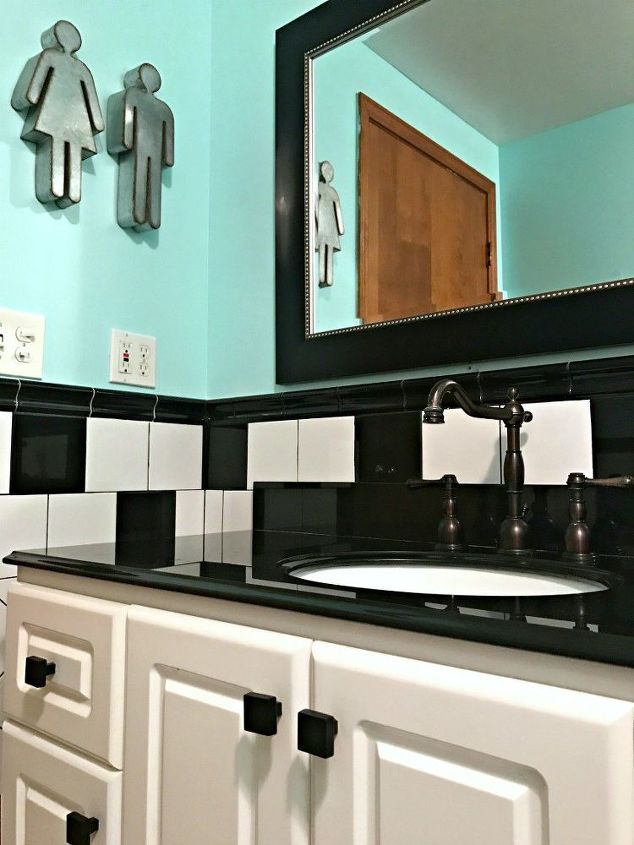
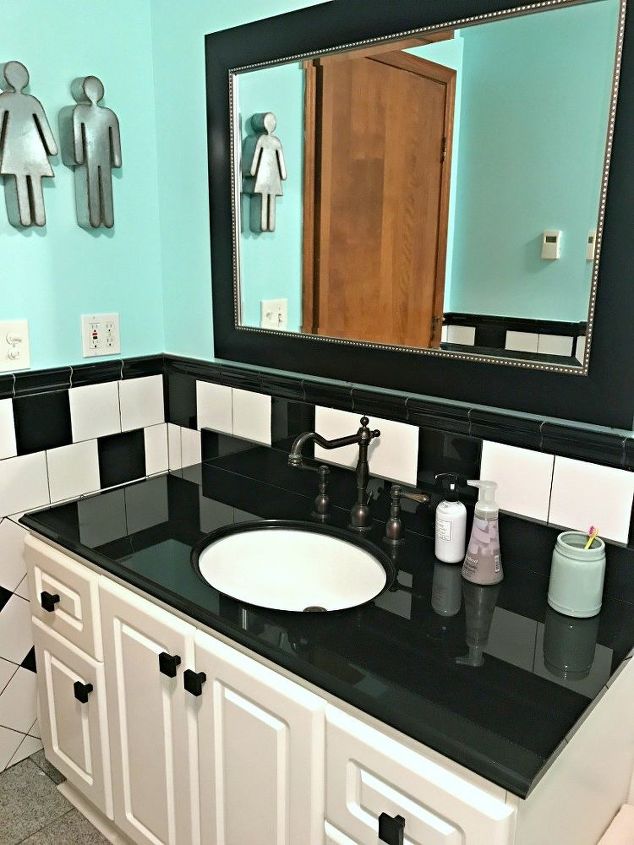
  • New knobs on cabinet ($2.50 each x 6)
  • New black framed mirror $90
  • New curved shower curtain rod $30
  • New shower curtain and liner $35


I also had a few items on hand from previous shopping trips including some artwork and bathroom linens. Finally, I had two white shelves from my old house that I used, as well. Overall, I spent about $300 and around 4 hours to update the room.


Now let’s take a look at the character of the before and after and the steps in between! (This room has no natural lighting, so it proved difficult to photograph).


For this room I used the Sherwin Williams Ovation Paint in Satin in Tame Teal. I thought this color was a perfect accent to the black and white and added a pretty pop of color. Lowe’s had LOADS of color ideas, so I was able to literally get everything there that I needed for my room.
I found some cute artwork from Hobby Lobby that fit perfectly with my color scheme and bathroom theme. I changed up the shower curtain and shower rod as well, so that it complimented my still outdated tile.
I updated the hardware on the vanity with square, black knobs from Lowe's so that there was a bit of contrast and pop and then we hung a new mirror and light fixture over the vanity.


On our list of to do's is to paint the trim and doors white, but it just hasn't happened yet, clearly the door is a big eyesore compared to the retro bathroom.
I also hope to update the faucet soon with something chrome to match the light fixture (not pictured yet).


We still have some work to do, but it's amazing how much you can embrace something to improve it's overall look rather than rushing to spend thousands on a complete remodel. At some point I hope to change this bathroom up and make it less retro and more updated, but for the moment, I'm happy with the changes and how fun the bathroom is now.


It's definitely a statement piece! Am I right?


View the FULL reveal and all the details on where I got products on my blog!
Abbey D
Want more details about this and other DIY projects? Check out my blog post!
Go
Frequently asked questions
Have a question about this project?
  2 questions
  • Joi Joi on Jul 05, 2017

    Where did you find the awesome boy girl wall figures?

  • K8g22178396 K8g22178396 on Jul 22, 2017

    Great job! Where did you get the galvanized people? They are adorable!!

Comments
Join the conversation
2 of 46 comments
  • Pennie Collins Pennie Collins on Aug 31, 2017

    Im a big fan of the retro look! Mid-Century Modern is what I grew up with! Back then it was called Modern! ☺️ Love it when people choose to work with and use what they have! This is the most earth friendly thing you can do! Love your bathroom!!

  • Eroque022810 Eroque022810 on Apr 19, 2018

    Love that you embraced the original look I love it and yes its a statement piece. I really love that you did get the biggest bang for each dollar you spent. I love that you identified what you could done now to give it life and make you happy. You started with good bones so you just tweaked it and sometimes that's all to really get things going. I would say that your choice of paint color tied it all together. As for the faucet just spray paint it because the shape is great and a can of paint and we'll removing it will cost less than a new one. Excellent job and your correct we live somewhere thinking we will get to it and in the meantime we hate it what's up with that. Yet we all have done done unless of course you had your house built to your specifications, not everyone does that so you are buying the past thinking you will get to it so get to it anyway you can. You should be the poster person for how to upgrade by embracing what you have and taking it to the next level.

Next