


A Kitten Cardboard Cabin: Gus' Getaway
2 Days
Easy
Last weekend, we brought home a new member of our family. Meet Gus! It got our cardboard crafty-side to blossom, so we made him a mountain getaway with his own cardboard cabin!
He’s pretty adorable and settling in quite nicely. Play time is his favorite with eating a close second. But, most of his time is spent napping of course. He’s just a baby and needs lots of naps. He can sleep anywhere his little furry heart wants but what about a special getaway just for him? Living in Tahoe, most of the homes are cabin style, so why not make Gus his own little cabin to fit right into his new mountain life? Reusing and recycling is what we do at nluv Studio so we’re making Gus’ getaway cabin out of something fun to PLAY with as well as SLEEP in. That’s right… we’re building a cardboard cabin fit for the mountain kitty lifestyle!
Don't miss out on all our projects! Sign up for The nluv Memos and keep in touch! http://www.nluvstudio.com/nluv-memos-blog-jaime-pirozzi/
Pet Store Anxiety
Your first trip to the pet store can be overwhelming as you try to pick out just the right items. What will he like? Toys, food, beds, treats, bowls, scratching posts, collars… and the list just seems to go on and on! One thing’s for sure – cats love cardboard! They love to climb it, scratch it, jump in & out of it, bite it and tear it into shreds.
We certainly don’t have a shortage of empty boxes in the studio, so why not make Gus a special little house out of a cardboard box & a few stencils for a custom cardboard cabin of his own? Not only will he relax and play with his toys in it, if he is feeling kitten spunky, he can scratch, climb, chew and tear it up as well for fun both sleeping and awake! Sounds like a win-win situation. I get to recycle a box and Gus gets a one-of-a-kind house built just for him to enjoy. Let’s do it!
A Kitten Cardboard Cabin
Gus’ getaway won’t require many tools, supplies or time. It is more a project of love that will not only be functional & loved but also cost saving and a great reuse of an empty box!
Tools & Supplies
- 1 perfectly sized cardboard box – big enough to play & sleep in but not SO big that it is scary in there!
- Heavy duty tape
- Box cutter
- Marker
- PrimEtch™
- Foam brush
- Paint (for the box itself)
- Paint foam roller
- Stencils
- Paint or textured medium for stencils
- Japan scraper (if needed for stencil application)
- Blanket or scrap towels
Step-by-step Instructions
The Box
- Look through your recycle pile and pull out the perfect box for your cardboard cabin. I picked one that Gus would have fun playing in, jumping on and (hopefully) taking a nap. It’s not too thick so he can scratch and bite it if he wants and also not too small or big so he will feel comfortable inside, doing whatever he does.
- Securely tape and assemble the box on all ends. Make sure no tape is sticking up or edges exposed. Try to keep the tape to the seams and edges only. This will help in painting.
- We need a front door and some holes for not only air flow, but also to play and stick little paws through for fun! Draw circles at the tops of all the sides. Put them pretty high up to the top of the box so your kitten will need to jump up or work to get those little feet through the holes. The more challenging, the more intriguing! Finish this step off with the front door. Cut one that is big enough for your furry bundle of joy to use but not too big, ruining the privacy of being inside.
The Base Paint Prep
- Shiny packing/shipping tape may stick well and create a sturdy box, but it doesn’t like paint very much! That’s why I did a quick coat of PrimEtch™ over all tape and any old shipping labels to ensure the paint would stick. Let dry completely before moving on to painting.
- Painting is up next. 2 coats all over the box will do the trick! Use a foam paint roller for a smooth finish on the box. I found an old can of exterior house paint that is actually the color of the box itself. It’s perfect! Gus’ cardboard cabin is actually looking like a little woodsy home. I think Gus’ house is the same color as ours! Let dry fully between coats.
The Decorating
- Now the really fun part… decorating your little custom cardboard cabin. Cats love to look at (and hunt) birds, so I decided to stencil birds on Gus’ house. Two have taken flight while one sits on the side to welcome Gus to play in his new ‘digs’. I had several left-over custom mixed colors of SofTex™ and decided to use them for the stencils. Spray each stencil with a light dusting of glue so it lays flat on the box. Apply texture material or paint to stencil. Clean stencil immediately and let stenciled image dry fully.
- All that is left is to stuff the customized cardboard cabin with a blanket, towels, toys and anything else your kitten will love. Gus is a sucker for sheepskin material and little catnip mouse toys so his cabin is full of them!
- The point of the cardboard selection is so the new owner can enjoy sleeping and playing, so don’t bother to clear coat it! I’m counting on Gus loving his new house and hopefully he tears it up to prove it! Once everything is dry, time to introduce the cabin to its new owner.
It always feels good to recycle materials and use up all those custom mixed painting products! No waste and awesome, fun results… a perfect pair! Gus is settling into his new home and taking his naps in mountain-life comfort style.
The next time you feel the urge to go out and buy a new house for your kitty or pooch, consider making one with materials you already have around the house. You might be surprised with what you come up with! Happy building.
Meet Gus. He's so adorable.
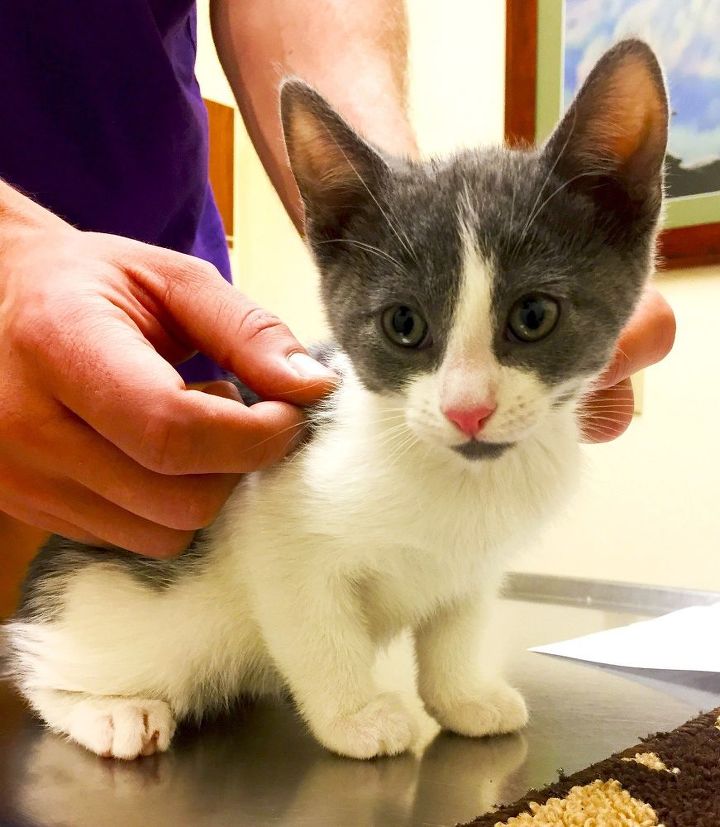
Meet Gus. He's so adorable & the newest member of the nluv Studio family.
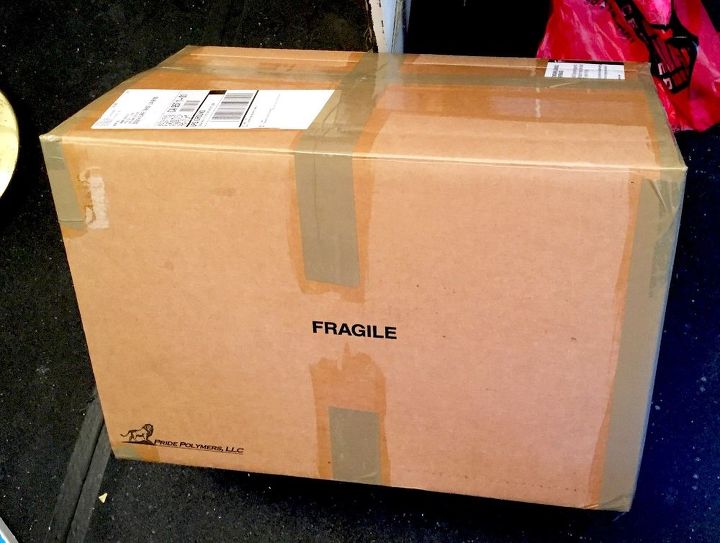
The perfect box to transform into a cardboard cabin.
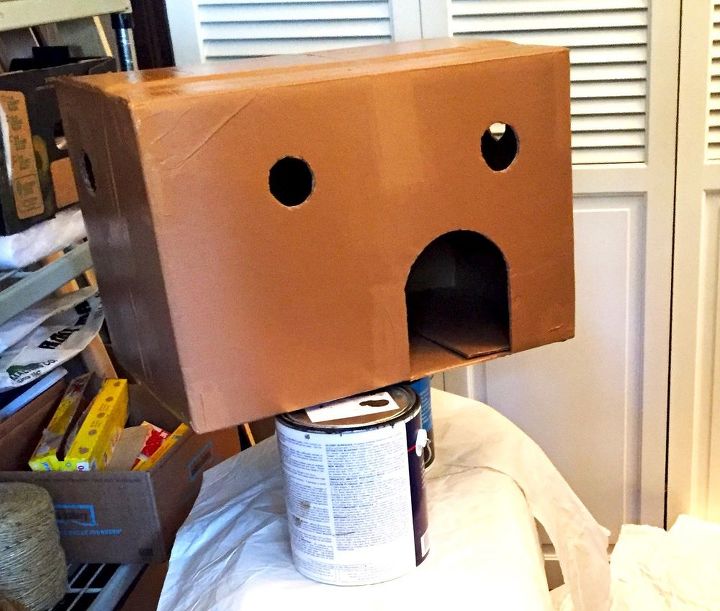
Air holes for play and a front door to say 'Welcome!'.
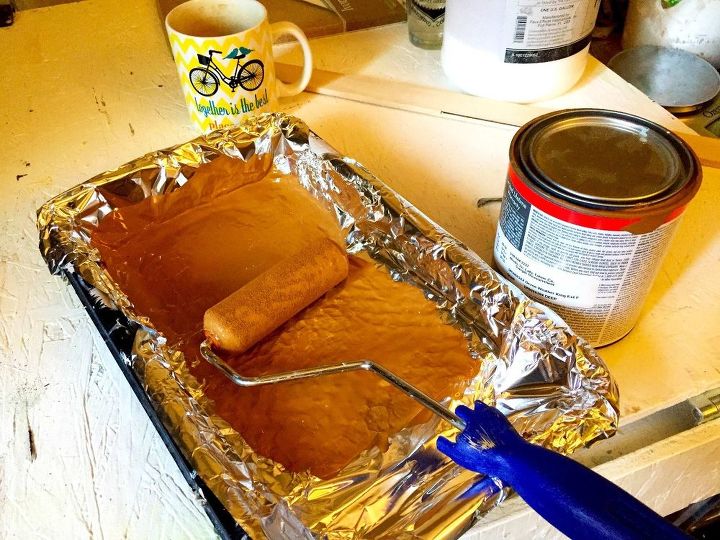
Leftover paint in the perfect cardboard color.
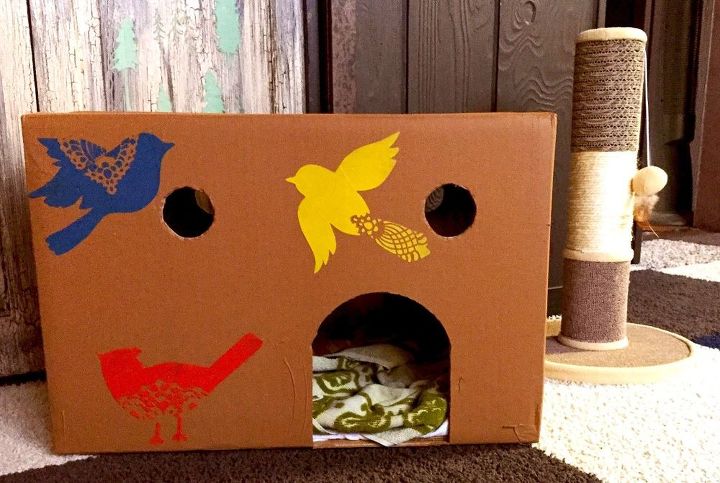
Gus has birds to chase now!
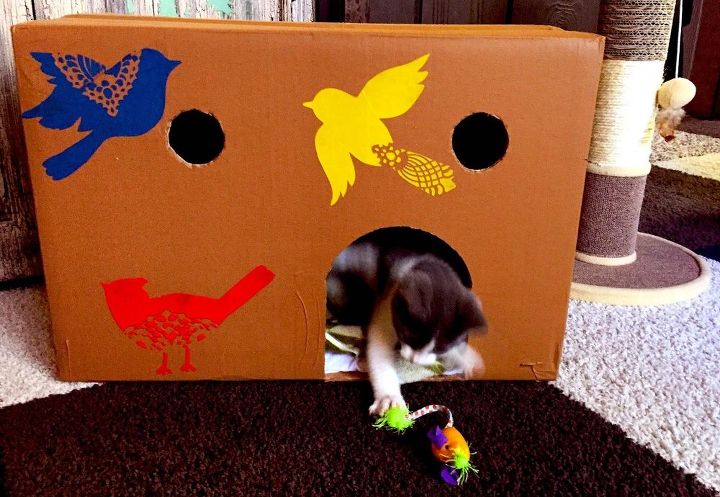
Gus is having fun in his cardboard cabin! No mouse is safe!
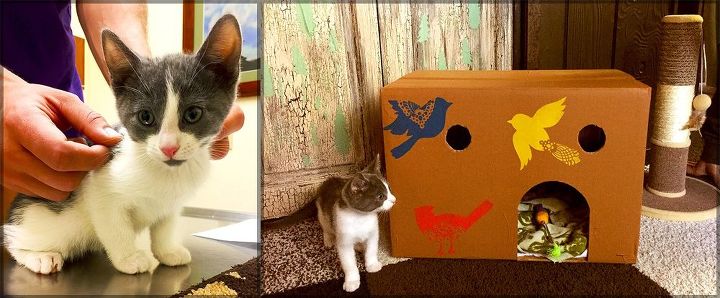
Gus loves it!

Want more details about this and other DIY projects? Check out my blog post!
Comments
Join the conversation
2 of 5 comments
-
Adorable!!! Yay for Gus!!
-
Love it!!!


Frequently asked questions
Have a question about this project?