


Closet Makeover

by
Nicole
12 Materials
$175
2 Days
Medium
I know what you're thinking! Closet?! Really?! Yep! I started by redoing the flooring (see previous post) and that turned out so great I just kept going! Now I have more of a boutique than a closet! 😊

demo day!
First up was removing the full length shelf that the builder had installed about halfway up the wall. We weren't using the shelf or the closet rod attached to it and I really wanted more vertical space so I grabbed my utility knife, pry bar and rubber mallet and started pulling and prying and pounding away until the shelf was ready to remove. The builder had caulked in the shelf so cutting through the caulk was really job #1. After the shelf was removed, I had to do some patch work on the drywall. A little spackle was all I need to do the job.
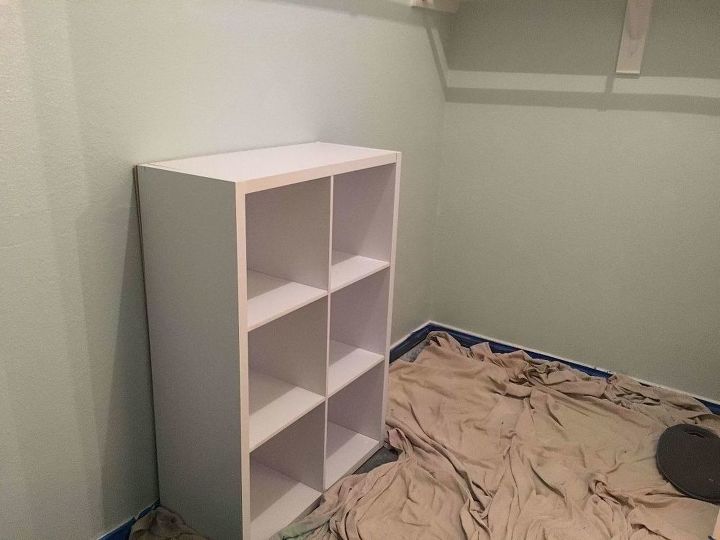
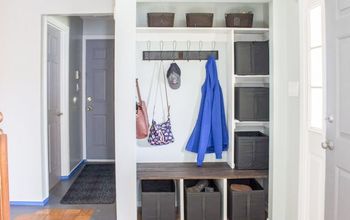
cubby was purchased from amazon
- With the shelf out of my way, I was ready to create my "built-in" cubby, For this to look like the builder installed it, I needed to have it flush against the wall which means I had to remove the baseboard directly behind the cubby.
- I marked the baseboard with a pen and then used my utility knife to score the baseboard and my pry bar to pull it away from the wall.
- I attached a cheap piece of plywood to the back of the cubby so that I would have something firm to use when securing to the wall. The cubby came with a flimsy backing that is perfectly fine if you aren't trying to use the cubby as a built-in. I had my local Lowe's cut the plywood to size.
- I secured the cubby to the wall using drywall anchors. I use the E-Z anchor brand because these babies will go through anything, even a stud. I hate searching for studs so I use these because they will install easily anywhere you want them, even if it is in a stud. I used to use those little plastic anchors but then this one time I ended up needing to put it in a location that happened to have a stud and those plastic anchors will crumble to pieces if you try to install into a stud. So I use E-Z anchors and never have to worry about searching for studs again (I am married after all!
 )
)
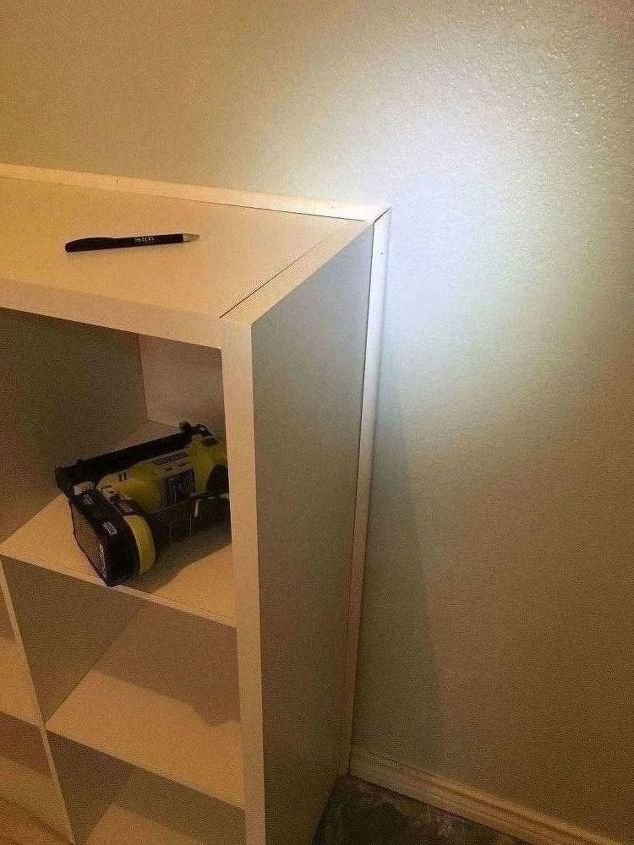
look at those mitre cuts!
- With the cubby in place, I added quarter round trim around the cubby to give it that finished and professionally installed look. Quarter round trim is available at any hardware store or lumber yard.
- I used my Ryobi brad nailer to attach the quarter round to the wall.
- I used a mitre box and hand saw to make the corner cuts. I have since purchased a mitre saw and it's the single greatest tool I have, but a cheap $7 mitre box will do the job just fine!
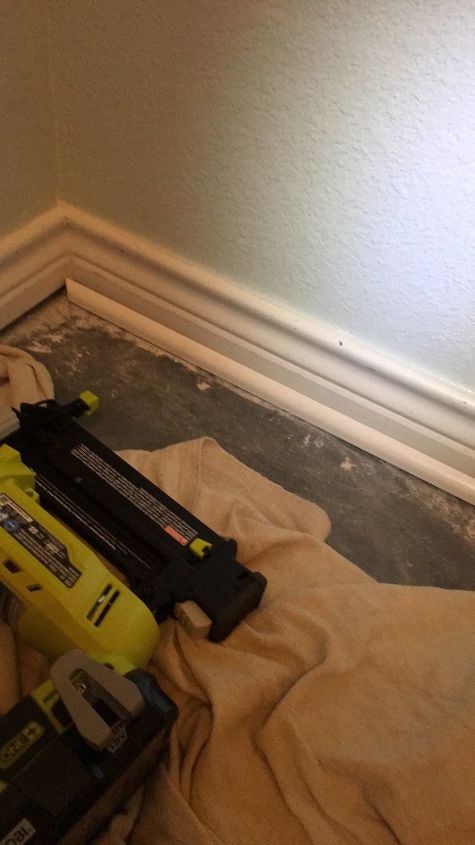
- I also added quarter round trim to the bottom of the baseboards around the entire closet because of my prior project where I removed the carpet and painted the concrete foundation. With the carpet gone, there is a gap between the baseboards and floor that needed to be filled.
- Once the trim is nailed in, use standard trim caulk in the color of your choice to caulk in the trim. Do not skip this step! This is what gives it that finished and polished look.

Caulked and loaded! :)
This is a picture of the trim all caulked in. At this point you'll want to paint the trim a color of your choice in a glossy finish. Sand out and rough and bumpy spots in the caulk prior to painting.
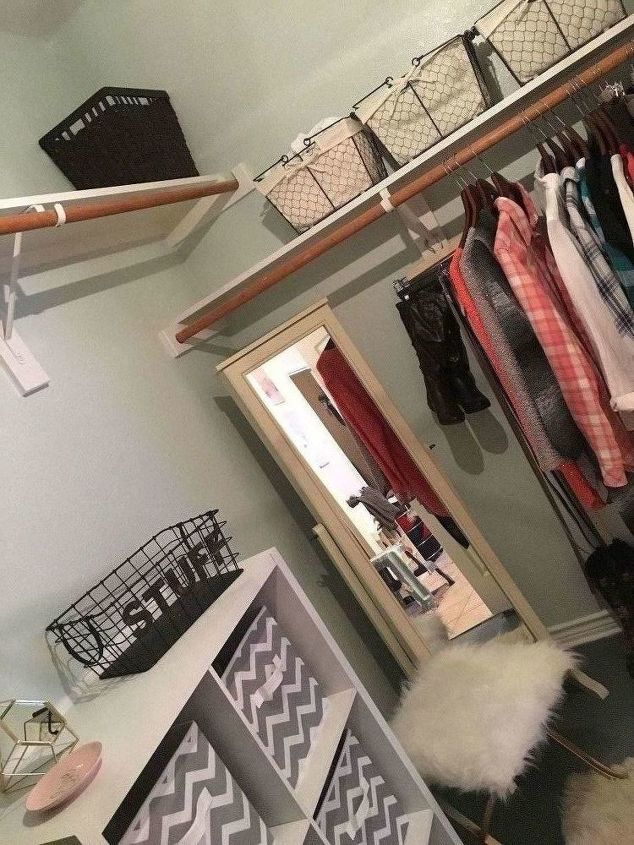
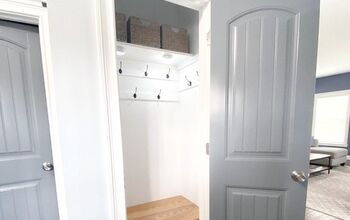
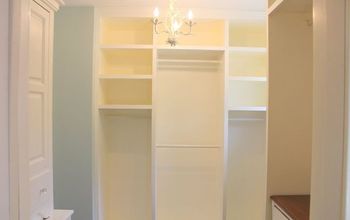
My very own boutique, err I mean closet! 
I painted the walls and ceiling Brook Green by Behr, added a few accessories (including a new light fixture) and called it a day!
Before this, I had never really given much thought to my closet but now it is definitely one of my favorite rooms in the house!
NOTE: my project estimate does not include the cost of all materials listed as many of these I already had. The Ryobi brad nailer is not included. This is about $125 from Home Depot
Comments
Join the conversation
2 of 4 comments
-
Wow!! Your closet looks fabulous! I would never leave :)
-
It's really hard to leave! 😊but I'm making over the bathroom now so I have pull myself away!


Frequently asked questions
Have a question about this project?