


Old RV Gets A Whole New Look

by
Lydia S.
4 Materials
$300
4 Weeks
Medium
My daughter recently went looking for an inexpensive RV. The budget was low so we had to try to find a fixer upper. I found one at the small car lot where I bought my first RV. It is a 1977 Fleetwood Flair. Yes, I know, it's 40 years old, but other than being severely outdated and needing cleaned badly, it was in pretty good condition.
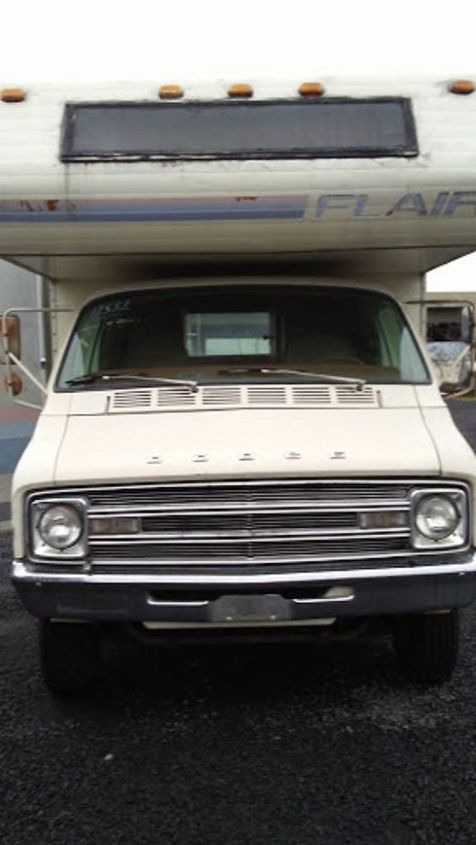
We call her "Pearl"
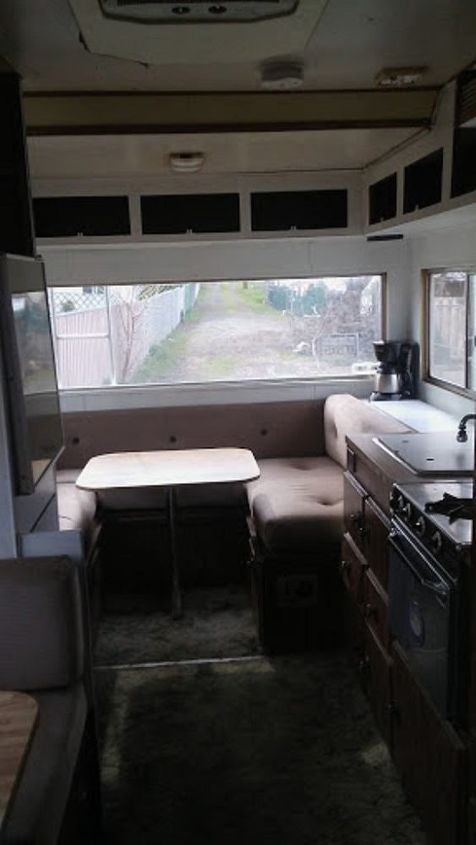
I love a good project and with an idea of what we wanted her to be, we set out to make her beautiful again. Below are photos I took at the car lot. Notice how dark everything look. It was covered on the inside with very dark wood paneling. The carpet had 40 years of dirt ground in and, as a bachelor had been using it as a fishing cabin by the river for the last few years, the smell wasn't great either.
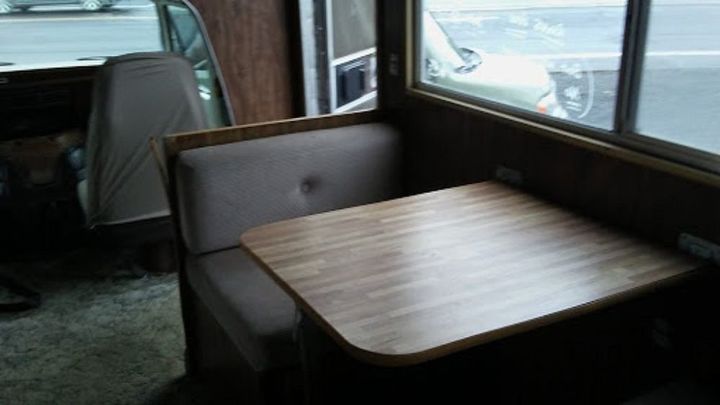
Front dinette/twin bed
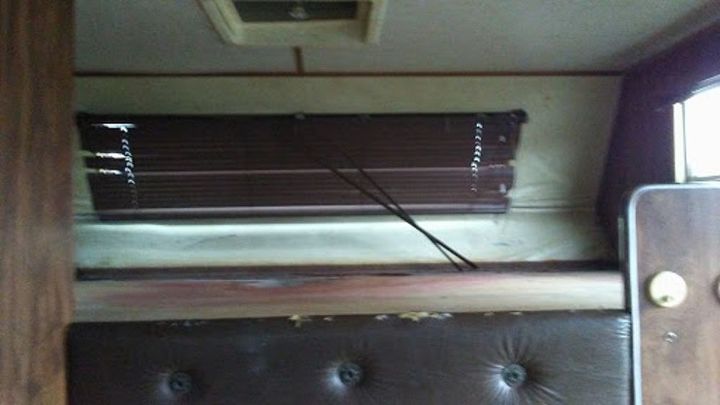
Overhead bunk
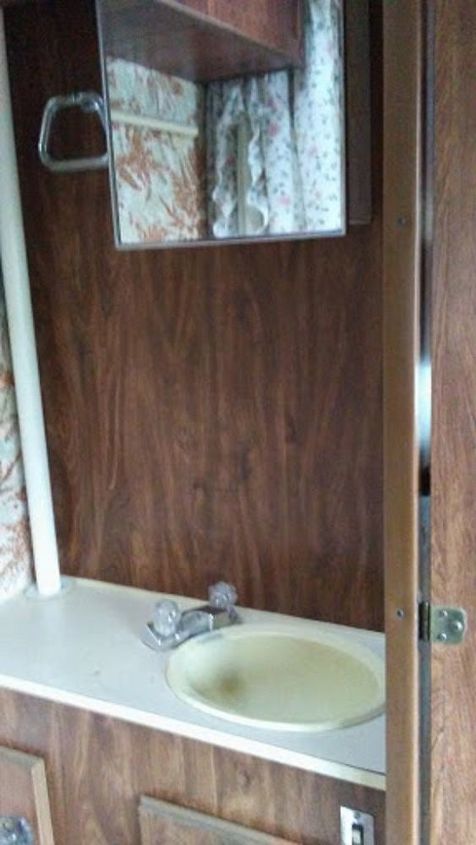
Bathroom vanity
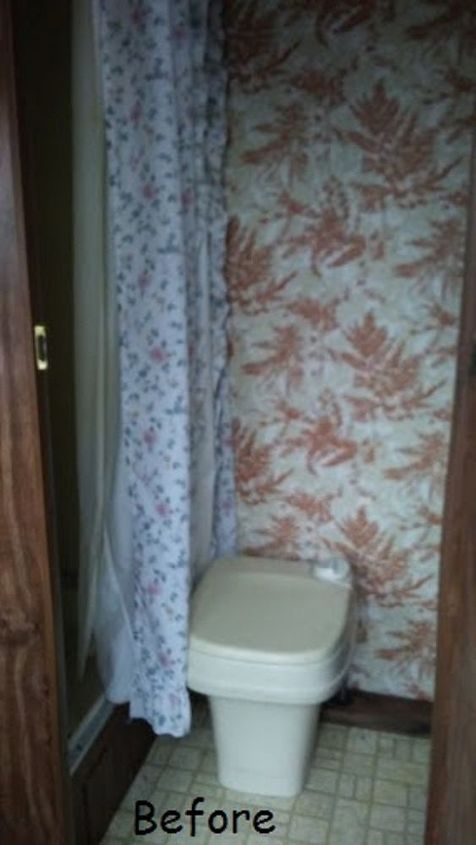
Toilet and that fabulous wallpaper
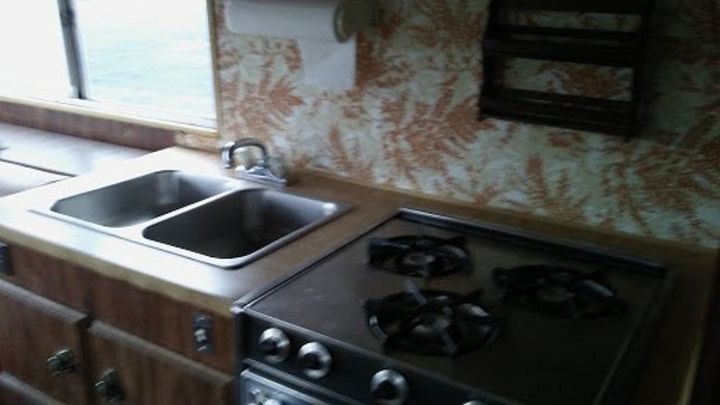
Kitchenette (and more fabulous wallpaper)
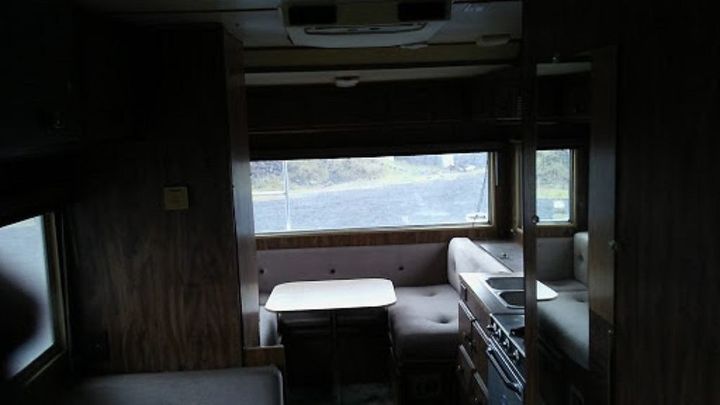
Rear dinette/full bed
As you can see, she was in desperate need of face lift. We bought some supplies and set to work on shining up this "Pearl". After moving all of the cushions and giving her a thorough cleaning, I went to work on priming all of the surfaces.
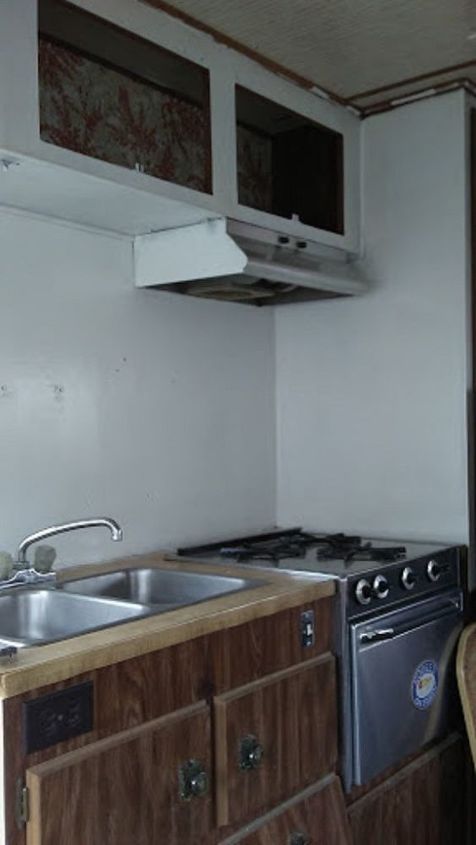
Primer in the kitchen
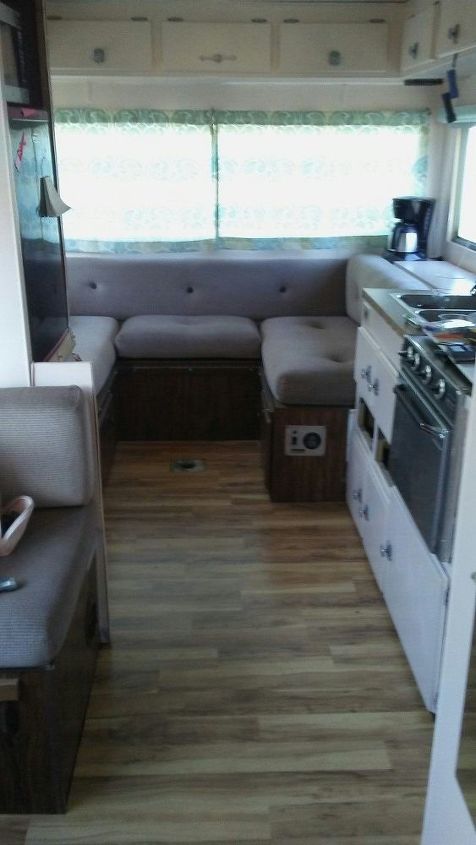
My daughter chose a paint color and we began to paint. I was the lucky recipient of a bunch of free paint from my employer, so we didn't have to buy hardly any paint at all. It really cut down on the expence of the project. She chose the softest peach/pink. We removed all the drawers and cabinet doors and and removed the hardware. She painted the hardware with Universal® Hammered Metal Spray Paint in silver. They came out beautifully.
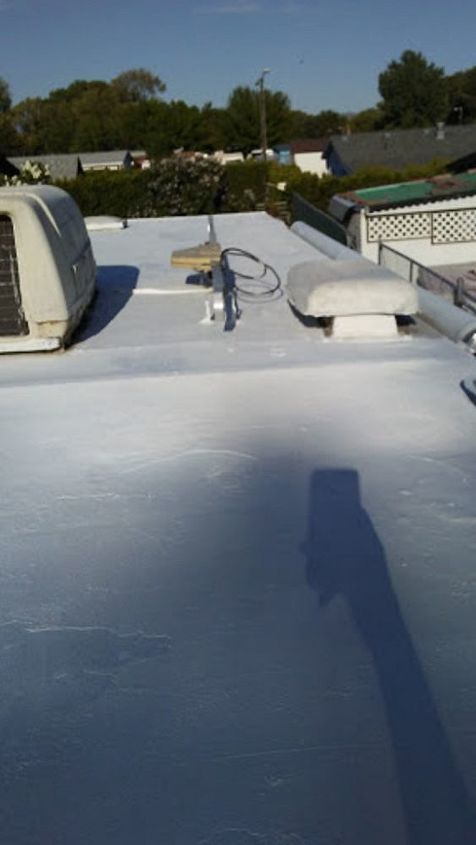
You can already see how much more light it is inside with just the primer. We were determined to get rid of the dark brown panelling. Next came the roof. It needed resealed. We chose Henry Dura-bright White Roof Coating. It seals and protects the roof and cuts down on the heat from the sun by up to 90%. RVs are like tin cans and the heat in the summer can get it hot in there.
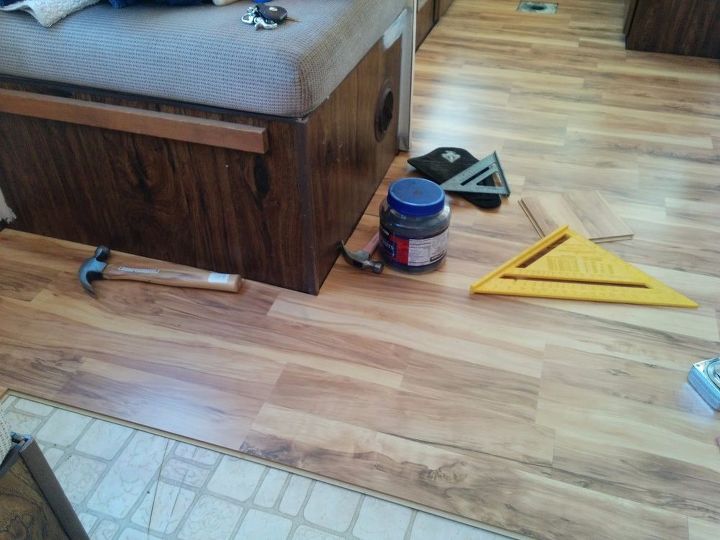
Our last thing to date was the floors and window coverings. We were able to find some great deals at the Habitat for Humanity Re-Store on roller shades and blinds. We got all of them for $20. I made the new curtain for the back window after buying the fabric we found at Jo-Ann Fabric. My husband, who is a retired floor layer, lovingly volunteered to lay the laminate flooring, which we got at on clearance at Home Depot. The floor underneath the carpet was not pretty but after a lot of elbow grease and help from my daughter's girl friend, we got it cleaned and ready for the laminate.
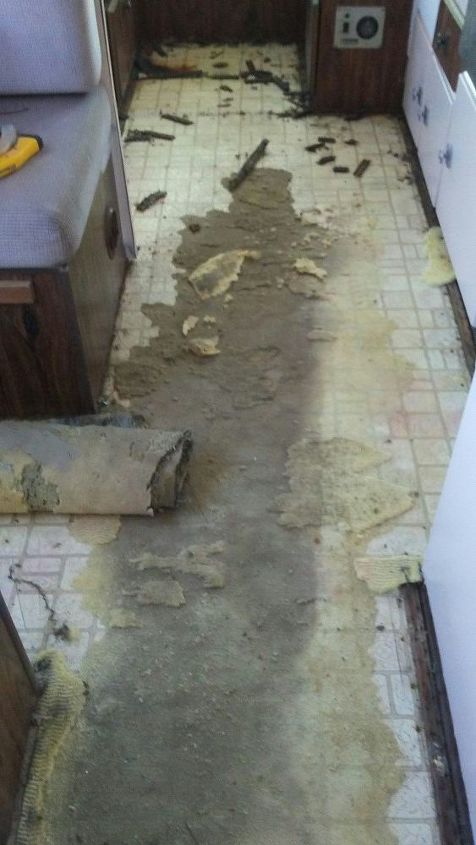
Gross!
What a difference a day can make. We started with the beast and ended with the beauty.
A work in progress
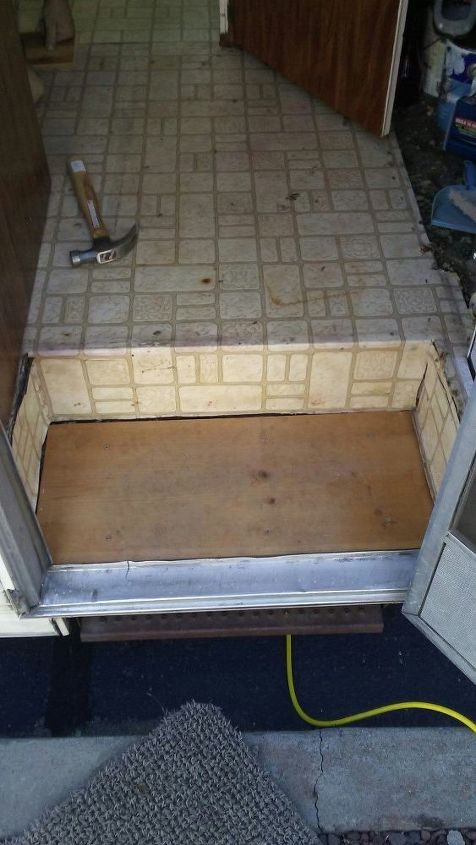
Entrance before
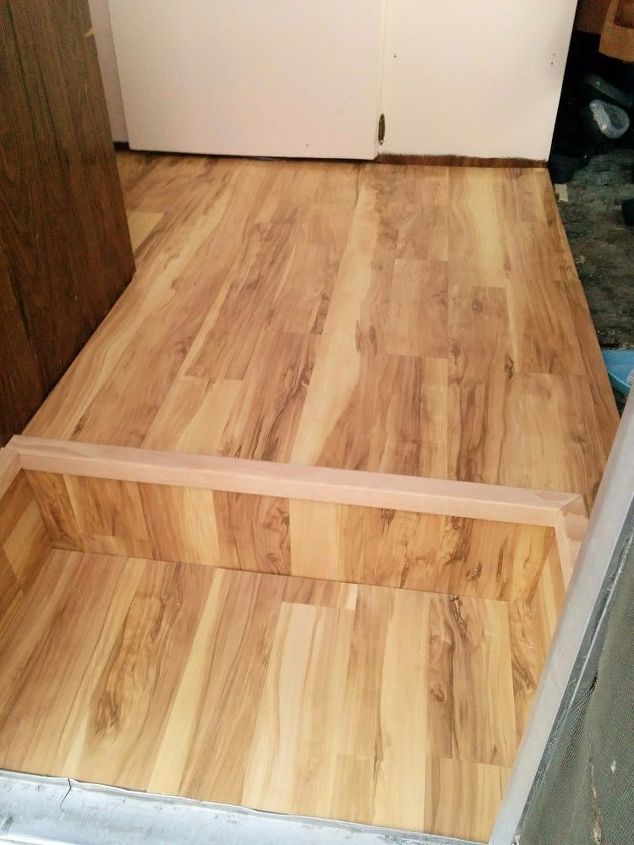
Entrance after
I wish I could post more that 15 photos because this was weeks of work and months of planning and there is so much more I would love to share. You can see what great changes have come to our little "Pearl". She is now everything the girls and I knew she could be. We still have a few loose ends the take care of but anyone who does DIY knows that we are never really completely done, just on break until the next project.
Comments
Join the conversation
3 of 5 comments
-
Fresh!
-
Wow awesome job Lydia.


Frequently asked questions
Have a question about this project?