


Make Your Own DIY 3D Art

3D art is all the rage these days, but it can be one of the more intimidating types of projects to start. What people often don’t know is that making your own 3D wall art can be surprisingly simple and cheap, even for beginners. For this project, I decided on going with a rustic flower motif with attached LED lights that could help it stand out during both day and night.
I used mine for decoration in my pantry, but yours could go anywhere you want a bit of color. The LEDs mean it can even be used as a nightlight, and since it uses so little power you don't have to worry about it adding to your electricity bill.
Step 1: Gather Your Materials
Tools and Materials:
- Hot glue gun
- Paint brush
- Fine sandpaper
- Flat wood piece (I used a piece around the size of a small-medium picture, but you can choose a different size if you’re trying to fill a larger or smaller space)
- Chalk board paint (whatever backing color you like)
- A collection of medium twigs
- Succulents for décor (or fake flowers if you prefer)
- LED string lights (battery-powered preferred)
- Décor butterfly
I picked up all my purchased materials from Dollar Tree, but any DIY or superstore should have everything you need. You might want to get a little bit more than you need, just in case you make a couple of mistakes along the way as I did.
As you can see from the required materials, there is a lot of flexibility available with this project, which makes it one of my personal favorites. Depending on your mood, your color choices, preferred plants, and the seasons, it's easy to create something which screams you!

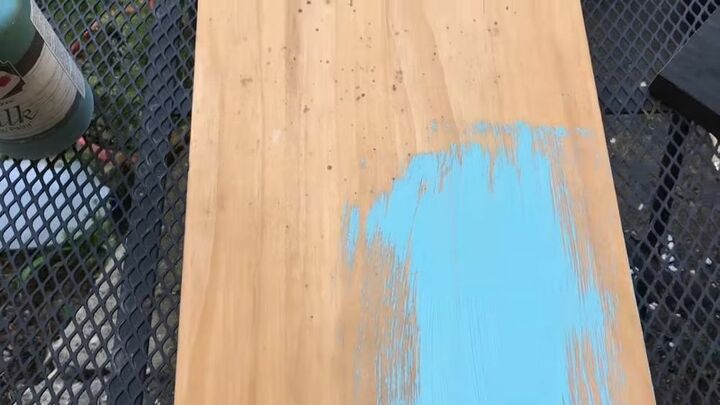
Step 2: Paint the Board
The first step in this project is to get your backing piece of wood painted. I went with a teal color for mine because it would be a nice fit for the area I have picked out for it, but you can use whichever color you think is best. Using chalkboard paint I covered the whole area evenly for a solid finish.
Once this was fully covered, I waited for it to completely dry. Don't rush ahead here, I know watching paint dry is boring, but we need dry paint for the next step!
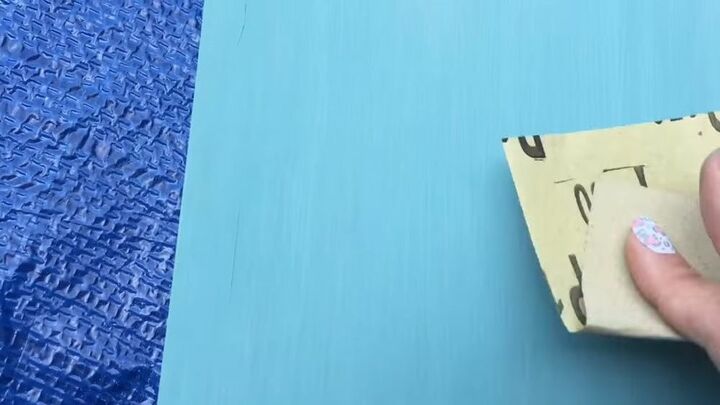
Step 3: Sand
When the paint was dry, I scraped some of it off with some fine-grain sandpaper. The point of this is to match the look of an older and weathered painted piece, and this is much faster than the alternative. As you can see, I used quite a soft touch with mine, but you can go more in depth if you want a more aged and rugged look.
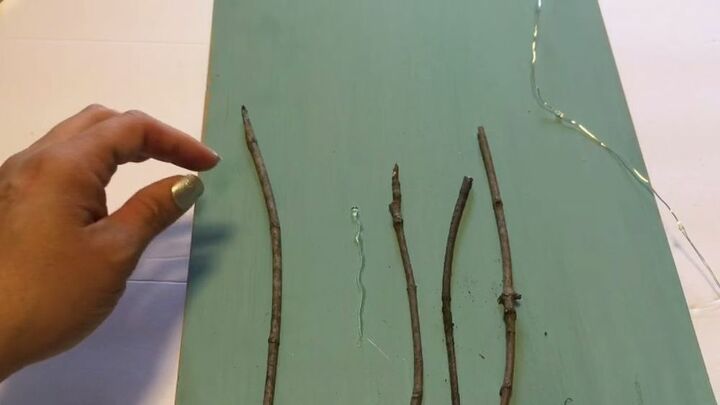
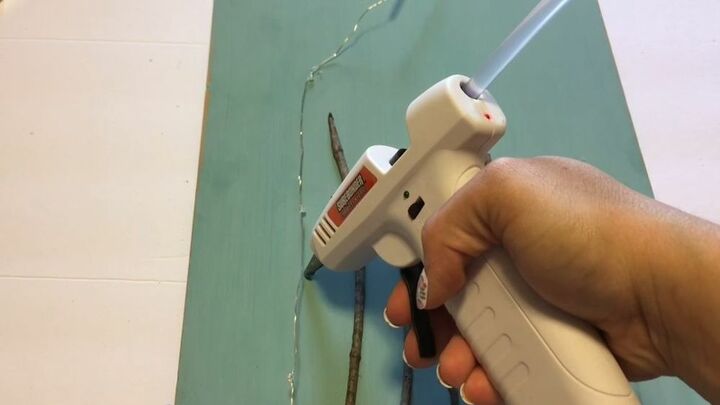
Step 4: Glue on Sticks
With the sanding done, we have a canvas to work on. The first part of this new process involves gluing the sticks and small twigs onto the backboard. For this, I used a little hot glue on the backboard in the shape of my chosen sticks, and I pressed the sticks into it.
For this step, you need to keep in mind that the sticks are going to look like stems in a vase for our succulents. This means you need to make sure that they're organized in a way you're happy with, and that the tops of the sticks are far enough away from each other that all your succulents can fit. Plan ahead!
Step 5: Attach LED String Lights
Since our stems are now set, I needed a vase to put them in, and this is where the LED lights came into play. To do this I put tiny globs of hot glue in key points around the outside of the sticks so that the silver wire of the LED lights stuck to the backboard in the shape of a vase. I looped the string at the top so it would look like an opening for our stick/succulents to poke through.
Before gluing for this step, you should first make sure that you’ve given yourself enough length of LED string to make the complete vase. Starting at the wrong point with the glue can leave an unfinished vase, so check first!
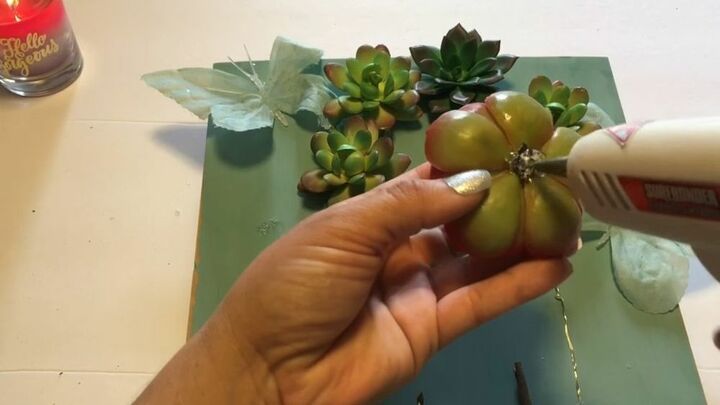
Step 6: Glue on Succulents
I originally thought about using fake flowers for this project, but I couldn’t find any that I liked, so I went with real succulents. The only downside to this is that real succulents won’t last as long as fake ones, and even though it’s easy to replace these on the finished project, it’s something to keep in mind when making your flower choice!
All that I needed to do with my succulents was detach them from their stems, and hot glue them directly onto the backing board – easy!
Step 7: Add Additional Décor
My final step included filling in a few blanks, and getting everything aligned as best I could. To do this I added a few more sticks to the backing board so my succulent stems looked better connected, and I also added a white butterfly to the top of my project. This is why I said to plan ahead in my guide because it can be a bit tricky to add sticks in later if you make a couple of mistakes along the way as I did.
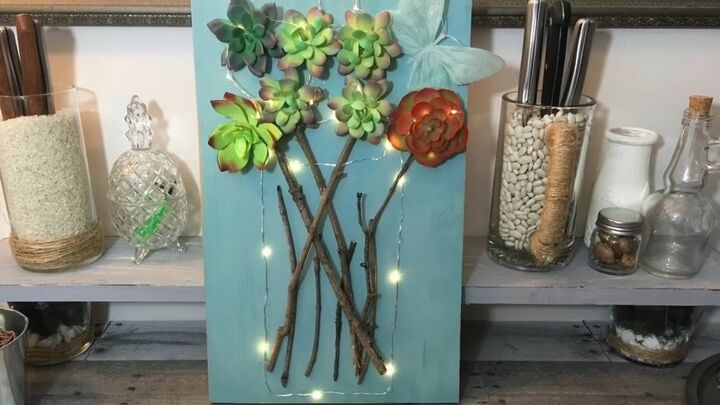
The finished product!
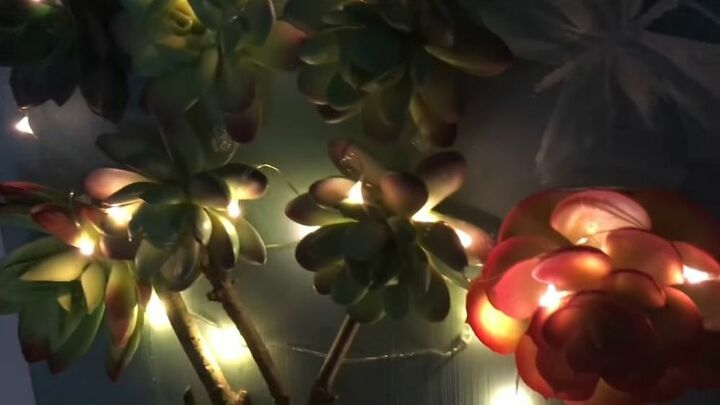
With everything glued and dried, it’s time to stick your DIY 3D art project somewhere special. Depending on what lights you used, you might need to connect it to a power socket, but I used battery power for easier placement. Remember that if you did use real succulents as I did you might have to replace them eventually, but this is easy to do and can be a positive, as it can help in letting you experiment with new colors and designs!
If you completed this project yourself then let us know down below how you put your individual twist on this classic DIY wall art project, and for all of your future DIY projects, please think of us here at Hometalk!
Comments
Join the conversation
-
I love this idea and have quite a number of extra faux succulents left over from another project. Thank you for this idea and LOVE the lights added too! Thank you for sharing!!
-
Very nice, I will be doing this thank you


Frequently asked questions
Have a question about this project?
Pretty!
Did you do something to the twig so it will remain as is? (E.g. some spray a chemical or paint) or leave it au natural?