


How to Stencil a DIY Patchwork Picnic Quilt

3 Materials
$50
4 Hours
Easy
Quilted patchwork patterns are bursting with energy and playfulness and are super fun and easy to create when you use a simple, repeating shape. Using stencils, especially in a patchwork quilt design, is a great way to bring all of your favorite colors and patterns in one place. Craft Stencils make stenciling fabric pieces easy and the small scale patterns are versatile and adorable. With such endless options for color and design combinations for you can easily the exact look you want!
Follow the instructions below to learn how you can stencil and sew your own DIY patchwork picnic quilt with small craft stencils for fabric:
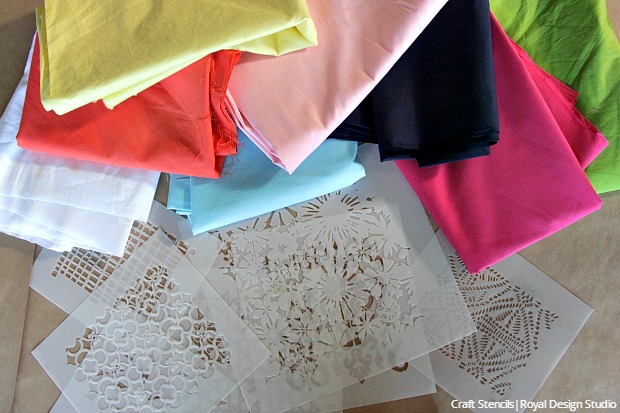
Supplies from www.royaldesignstudio.com
- Adisa Tribal Craft Stencil, Acanthus Trellis Craft Stencil, Floral Fireworks Craft Stencil, Camel Bone Weave Craft Stencil, Zahara Moroccan Craft Stencil, Loose Weave Craft Stencil, Chez Ali Craft Stencil
- Royal Stencil Cremes in Shimmer Pink, Pearl Oyster, Royal Blue, Metallic Teal, Bright Gold, Black Frost, Lime Shine, and Orange Ice
- 1 yard of fabric in each color: pink, fuchsia, navy, blue, yellow, white, green, orange
- Sewing machine, iron, thread, trim
- Ruler, rotary cutter, pencil, painter’s tape
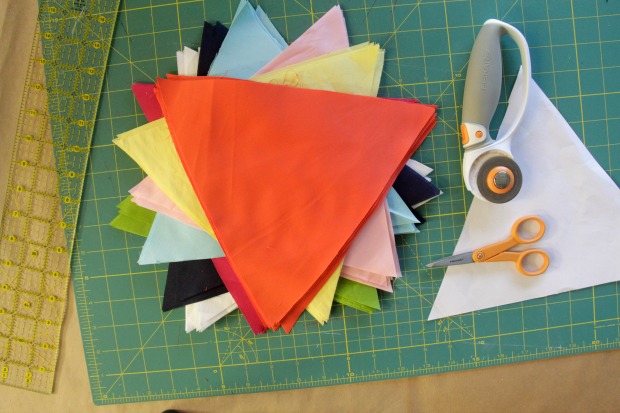
Step 1: Cut 8 triangles of each color fabric with each triangle measuring 10.5” on each side and an extra ¼” to allow for an inseam. You can create a paper template beforehand to guide you. Use a ruler and rotary cutter to cut multiple pieces at a time , or trace the triangles and cut them with scissors.
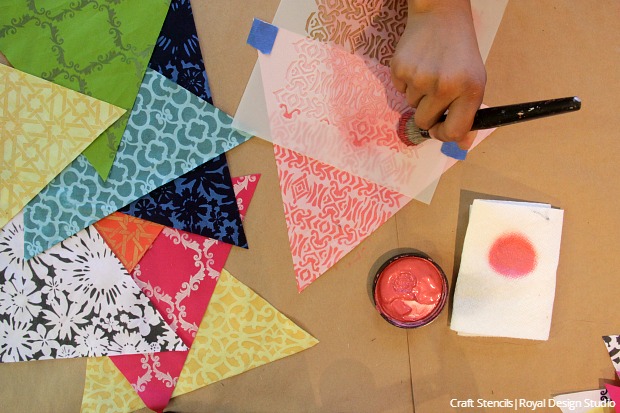
Step 2: Stencil one Craft Stencil design on each fabric color. Use the Royal Stencil Creme color that coordinates with each color fabric that you are stenciling.
Pink fabric – Shimmer Pink Royal Stencil Creme
Fuchsia fabric - Pearl Oyster Royal Stencil Creme
Navy fabric - Royal Blue Stencil Royal Stencil Creme
Blue fabric - Metallic Teal Royal Stencil Creme
Yellow fabric - Bright Gold Royal Stencil Creme
White fabric - Black Frost Stencil Royal Stencil Creme
Green fabric - Lime Shine Stencil Royal Stencil Creme
Orange fabric - Orange Ice Stencil Royal Stencil Creme
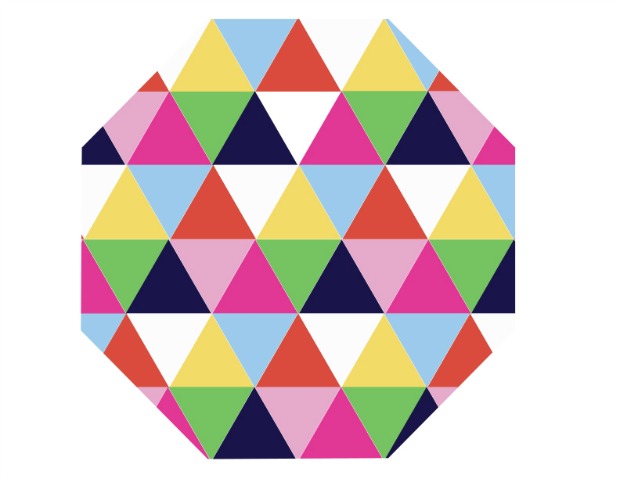
Step 3: Line up all of your stenciled fabric triangles in the patchwork design that you would like to create. Make sure this quilt design alternates with different colors and stencil designs.
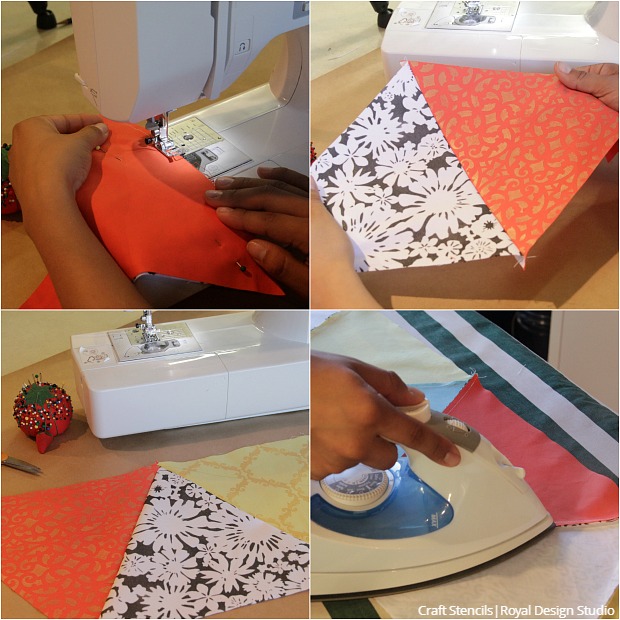
Step 4: Begin sewing the triangles together one row at a time. Make sure the patterns are facing each other inwardly while you sew one side of the two triangles. Remember to backstitch to avoid the stiches from loosening! Repeat this step to complete each row. Press the seams using a flat iron.
Step 5: Sew together the rows that you created in Step 4. Press the seams again using a flat iron.
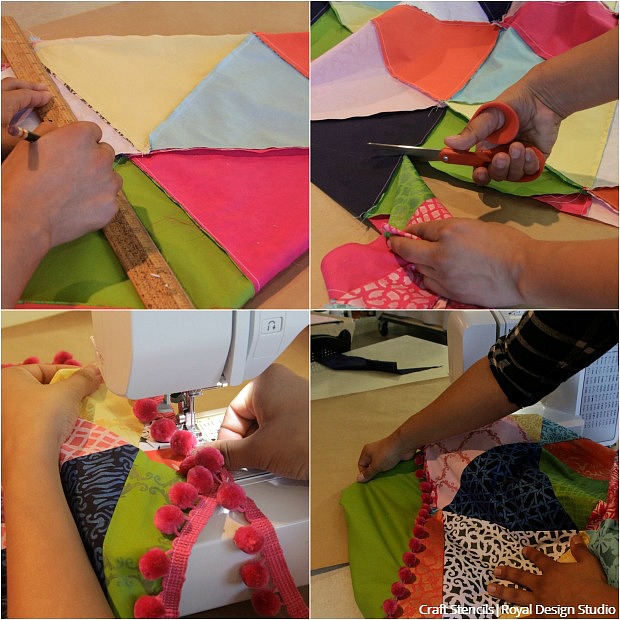
Step 6: Create an octagon shape out of your sewn rows by folding it three times in half to form large triangle. Measure 24” from the center on each side of the folded fabric and trace a straight line. Cut the folded fabric following the traced line to create an octagon.
Step 7: Use extra fabric for the backing of the DIY patchwork picnic quilt. Since we did not have enough of the same color to use, we instead sewed together multiple pieces for a colorful backing. Cut the backing about 1” larger than the stenciled and pieced front side.
Step 8: Add the pompom trim by securing it around the backside of the stenciled fabric using pins. Sew the trim along the fabric’s perimeter.
Step 9: Pin the backing to the front with each side facing each other inwardly. Sew the two large octagon pieces together whiling leaving a 6” opening.
Step 10: Turn the DIY throw blanket inside out by pulling the front sides through the opening. Hand stitch to close the opening and press it with a flat iron to finish your blanket off.
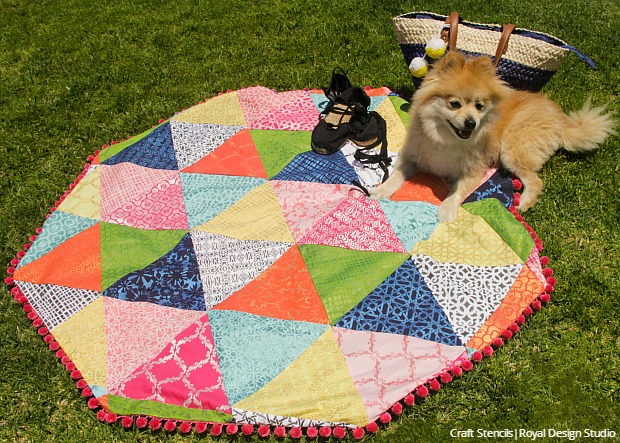
Take your DIY patchwork quilt to your next picnic, or use it to cover your bed, as a throw on the coach, or for a sweet doggie blanket. This fabric project makes a perfect DIY gift that shows off your personality, creativity, and love!
Comments
Join the conversation
2 comments
-
This is just beautiful! Love your swet puppy too! Great share, thanks. 🐩❤


Frequently asked questions
Have a question about this project?