


DIY Color Changing Live Edge LED Shelf

by
Austiwawa
12 Materials
$75
10 Hours
Medium
In this tutorial I will be showing you step-by-step how to make this beautiful one of a kind color changing live edge LED shelf. This project was a lot of fun to make and I am very happy with the finished product. Overall this project won't cost you too much money and you can even use some recycled materials for this build. You may even have some of the materials laying around your shop/workplace. The shelf is controlled by an IR remote and it an be changed to any color that you like!
Before you go through the rest of the steps for this project, you should definitely watch the video that I have posted below. The video will show you plenty of clips of myself building the shelf from start to finish. Also, if you enjoy the video you should definitely hit the like button or even consider subscribing to my YouTube channel to see more of my projects!
Let's get started with this project!
{
"id": "4083218",
"alt": "",
"title": "",
"video_link": "https://www.youtube.com/embed/KkhvBk3agw8",
"youtube_video_id": "KkhvBk3agw8"
}
{
"width": 634,
"height": 357,
"showRelated": true
}
https://www.youtube.com/watch?v=KkhvBk3agw8
Notes:
The bottom piece off wood that I used for my shelf is rough cut piece of silver birch and the top piece of wood is pine. I purchased the silver birch as well as the acrylic sheet from a local second hand construction supply store. I bought the pine from the hardware store and it came in 4' in length and 10" in depth.
The paint that I used for the pipe was "Krylon - Oil Rubbed Bronze" and the wood stain is "218 puritan pine".
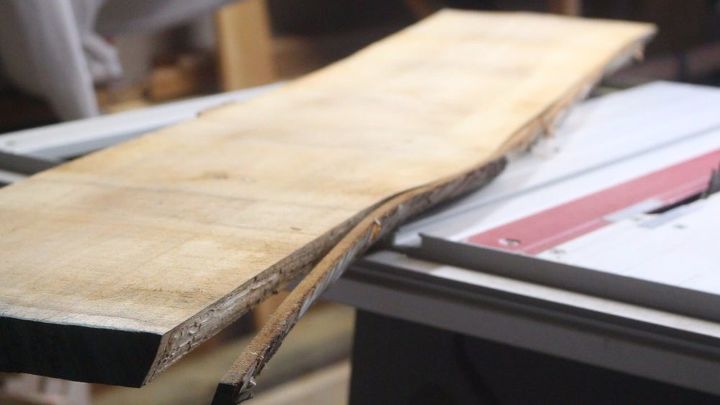
Step 2: Squaring/Planing the Silver Birch
Now because the silver birch that I purchased was so rough and not flat on either side I had to do a bit of shaping up. I started by cutting each end flat making it 41" in length and cutting along the back side so that it would be able to sit flat against the wall. The only thing that I did to the front side was remove that bark because it was falling off. The reason I bought this piece of wood was because of the wavy raw edge on the front side. This is what will make the shelf look so unique.
In order the make the wood flat on the top and bottom side I had to run the wood through the planer multiple times. If you don't have a planer you can get around this step by purchasing a unique looking piece of wood from a local wood shop that has already been planed. It may just cost you a little more extra money.
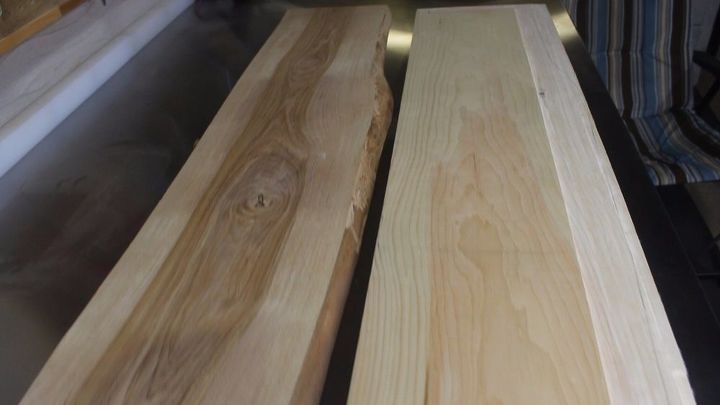
Step 3: Preparing the Pine
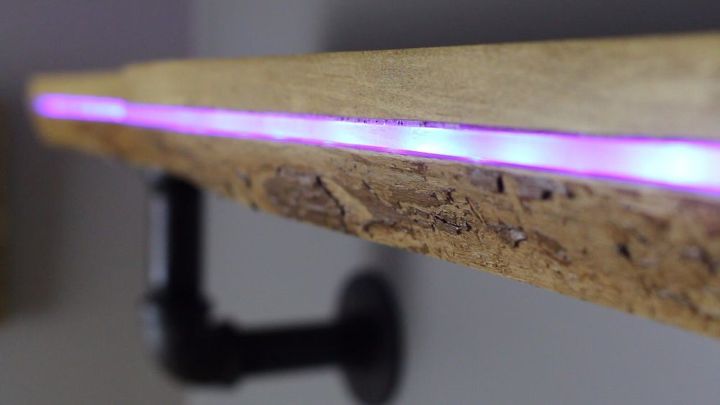
Now that the silver birch has been cut to size we will need to cut the pine to match it. I started by cutting the pine to the same length as the silver birch (41"). The LED strip as well as the acrylic will need to be inserted between the two pieces of wood. It is very important the the acrylic that you decide to use is thicker than the LED's so they aren't pressing up against the wood.
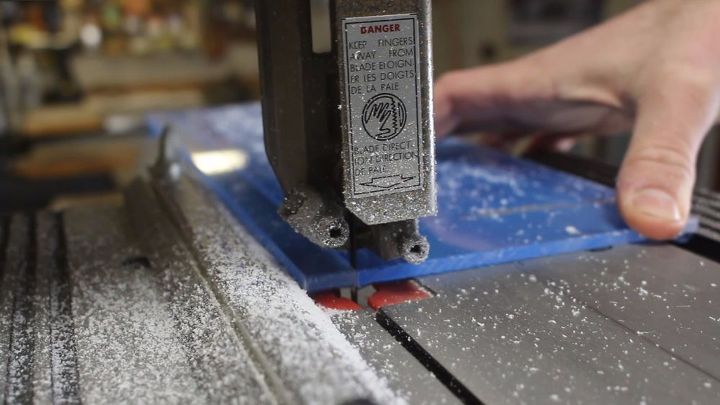
In order to make a perfect groove for the LED's and the acrylic I set up my router so the bit could only cut 5 mm deep and cut 1.5" into each side and 2" into the front side. After that I traced to shape of the silver birch onto the pine and roughly cut out the shape using the band saw.
Step 4: Cutting/Gluing the Acrylic
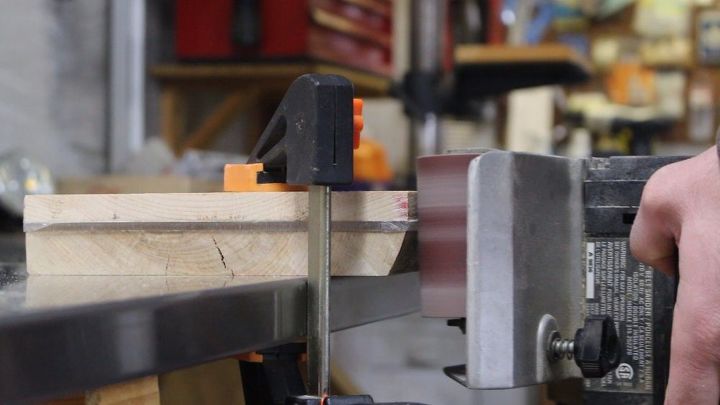
Surprisingly you do not need a lot of acrylic for this project. So there is no need to go out and buy a large sheet of it! I did not have much of it to work with so I cut it into strips that were just over 1 cm in width with the exception of one curved piece. I then sanded the the side that will be glued onto the pine so that the glue would adhere better. I used "Lepage - Heavy Duty Contact Cement" to glue the pieces of acrylic to the pine and clamped it to dry overnight.
The acrylic SHOULD NOT get glued to the silver birch.
Step 5: Smoothing Out the Edges
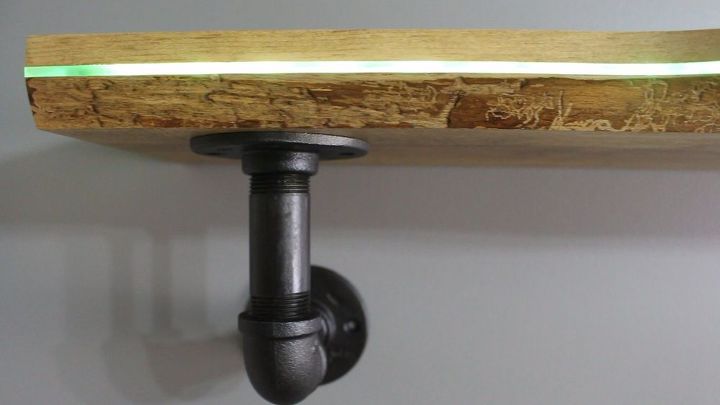
The next day once the glue was dry I removed the clamps to make sure that the acrylic was stuck nice and secure. I will be using 6 screws to fasten the two pieces of wood together. In order to hide the screw heads I will be using plugs. To prepare for this I drilled half way into the pine using a 3/8" forstner bit and then drilled the rest of the way through with a much smaller drill bit. When you are drilling these holes it is important that you don't drill anywhere into the groove that was made for the LED's.
After the holes were made I screwed the two boards together and then smoothed out the edges with a belt sander starting with heavy grit sand paper. I made sure not to sand any of the rough edge on the silver birch.
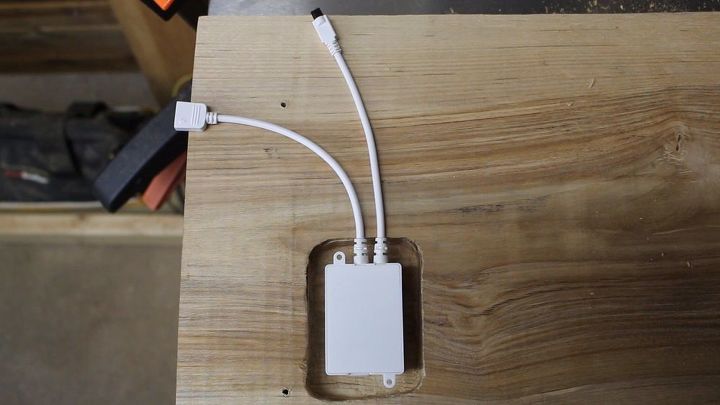
Step 6: Adding the IR Receiver
The LED strip lights come with a remote that is used to change the color/dim the lights. This remote sends a signal to the supplied receiver, which will need to be hidden somewhere inside of the shelf. To make room for this receiver I used my router to cut a hole almost all of the way through the silver birch. I then cut a groove for the receiver into the pine that was thick enough for the white wires. The one wire connects to the LED strips and the other has the IR LED on the end. The IR LED needs to be somewhere on the outside of the shelf in order to receive the signal from the remote so I carved out a small hole onto into the front of the pine.
A hole will also need to be drilled into the back of the shelf for the power cable.
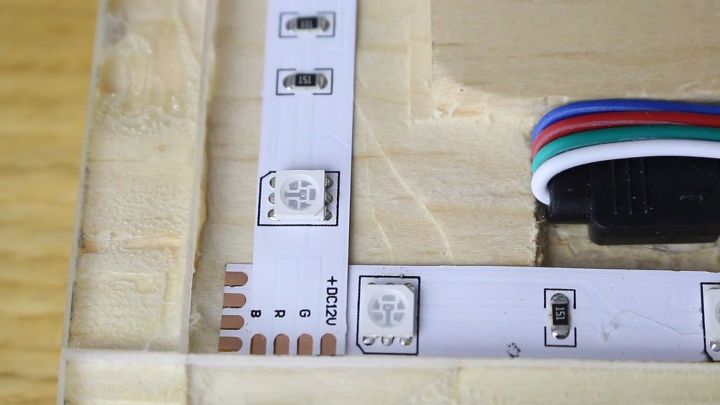
Step 7: Installing the LED's
After making room for the IR receiver it can be screwed into place and then the LED strips can be installed. I put two strips along the front and one strip on each side. You will most likely need to add some extra wire in order to make all of the connections. When soldering the strips together make sure to double check all of your connections and test the lights to made sure they work once you are finished.
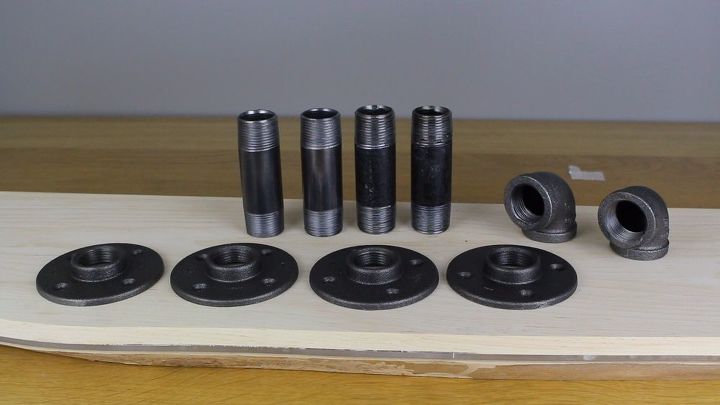
Step 8: Cleaning and Painting the Pipes
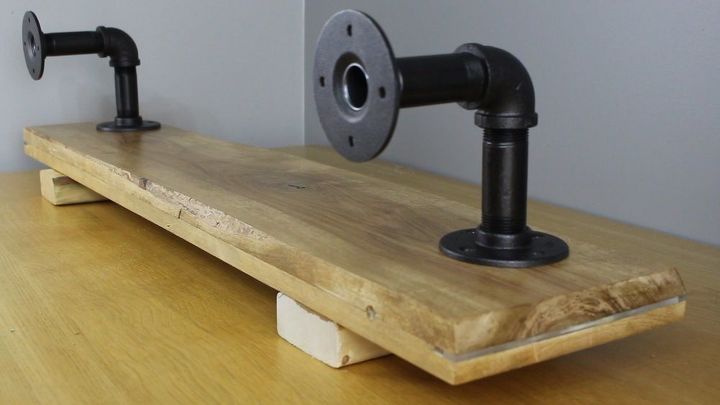
If you have never worked with black pipe before you may not know that this stuff is filthy and it will make your hands black once you start working with it. I am going to give my pipe a coat of paint in order to give it a nicer look. In order for the paint to stick to the pipe it will need to be cleaned off before it gets painted. Pure white vinegar works perfectly for this. I poured some into a bin and scrubbed all of the pieces with a cloth. Once they were dry I assembled the pieces as shown in the pictures and then gave them a couple coats of paint.
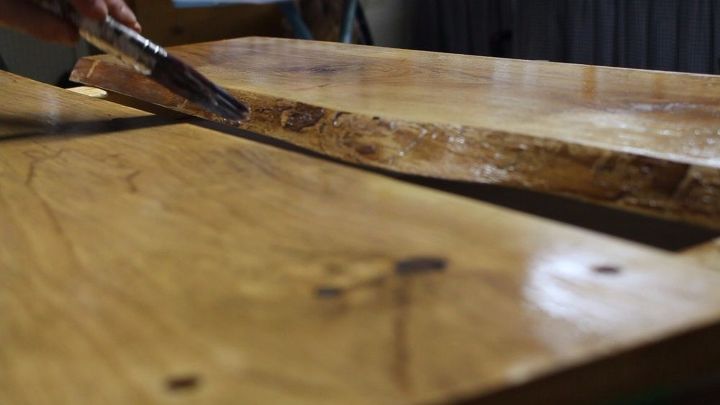
Step 9: Staining/Varnishing and Making the Plugs
The shelf is now getting close to being complete. A coat of stain can be added followed by a few coats of varnish after that. To make the plugs I used a 3/8" plug cutting bit on one of the scrap pieces of pine. After the shelf was dry I screwed it together and then pushed the plugs into the holes. I purposely did not glue the plugs just in case some of the LED's burned out in the future and needed to be replaced. This way it would be easy to open up.
A cotton swab works perfectly to stain the plugs once they are in place!
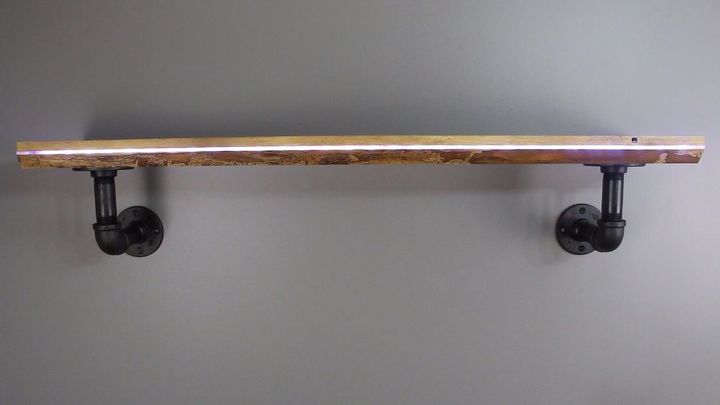
Step 10: Finishing Up!
All that's left to do is add the pipes to the shelf and then fasten it to the wall! This shelf is very heavy so I highly recommend that you use a stud finder and fasten it directly to the studs. I measured the distance between the studs before I fastened the pipes to the shelf and spaced them accordingly.
I also highly recommend that you hide the power wire behind the wall if you are going to hang this shelf up in your house. This will make it look a lot cleaner in the end and when it is turned off your guests would never guess that the shelf could light up.
The power cable comes very short so I extended mine buy cutting the wire off of an old AC adapter and soldering it in the middle of the cable.
I hope that you all enjoyed this tutorial! Thanks for reading and watching :)


Any price and availability information displayed on [relevant Amazon Site(s), as applicable] at the time of purchase will apply to the purchase of this product.
Hometalk may collect a small share of sales from the links on this page.More info
Comments
Join the conversation
2 of 8 comments
-
that is beautiful, and creative!!
-
Awesome!!! I love lights!!!


Frequently asked questions
Have a question about this project?