


Mailbox Upcycle - Garden Tool Storage
If you love this project, grab your quick start DIY guide & subscribe to our blog!
This garden tool storage from old mailbox post is brought to you by Mod Podge and apart of the Fab Furniture Flippin' Contest. Contestants of the Fab Furniture Flippin' Contest received free product from our sponsor, Mod Podge. The opinions in this post are completely my own based on my experience. Also, this post contains affiliate links, but nothing that I wouldn’t wholeheartedly recommend anyway!
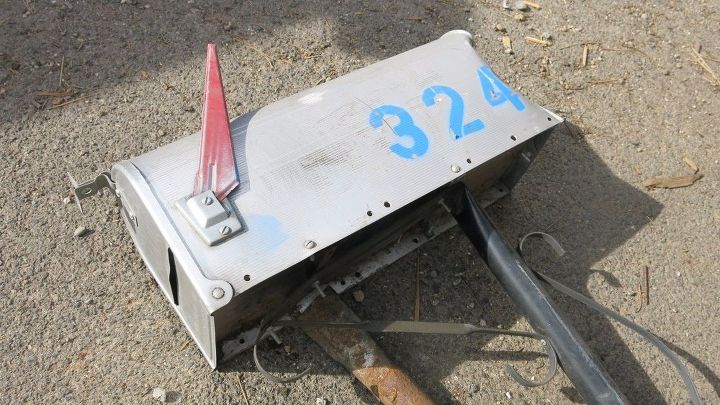
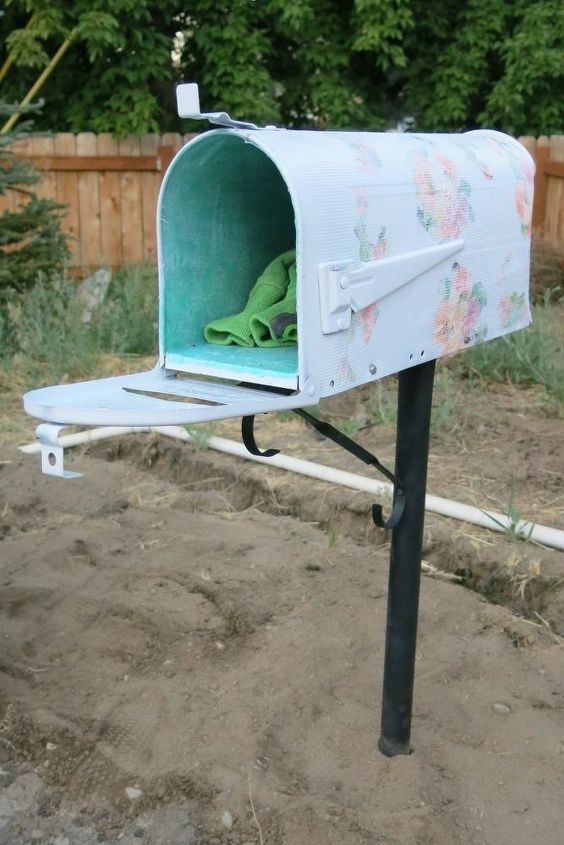
Ever since we built our raised garden beds in our backyard, I’ve wanted some place handy keep keep by garden tools near the garden beds. It was a tad inconvenient having to walk all the way around the house to go into the garage to grab my gardening gloves and any other tools I needed. One day my hubby and I were wandering around our local ReStore and I spotted this old mailbox that had seen better days. It was dirty and beat up, but I could see right past that. I saw potential…garden tool storage from old mailbox!
This old mailbox is the perfect upcycle project for you to tackle this Summer. I only spent $3.50 on the old mailbox at the thrift store. Just a little creativity and Mod Podge really transformed this mailbox into an adorable and unique solution for my garden storage needs. Not only does it provide storage for my garden tools, but it’s super cute with the floral design on the outside and a bright, colorful inside.
It started with an old mailbox…
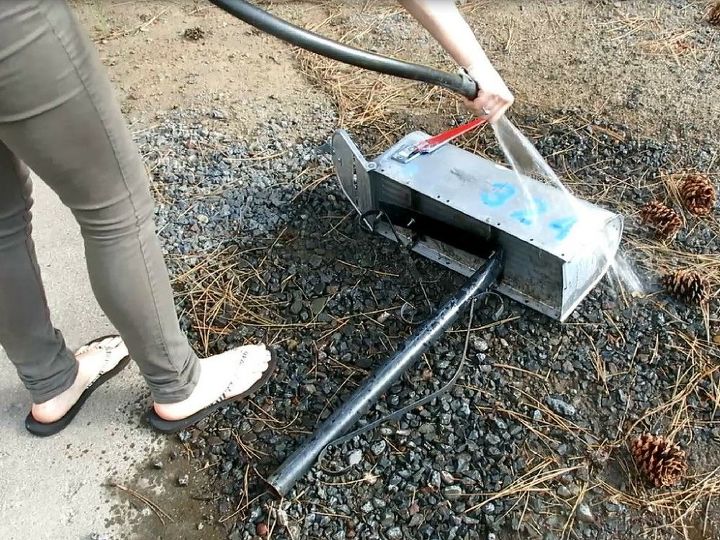
Step 1. Clean mailbox and post.
Since you’re working with an old, grimy mailbox you should definitely clean both the mailbox and post. I just used a hose to rinse them off and then wiped them down with a wet paper towel. If your mailbox has rust, you should scrape that off first as well.
Step 2. Spray both mailbox and post with outdoor spray paint.
Once the mailbox and post are clean, you can get them painted. I gave them a few coats of outdoor spray paint.
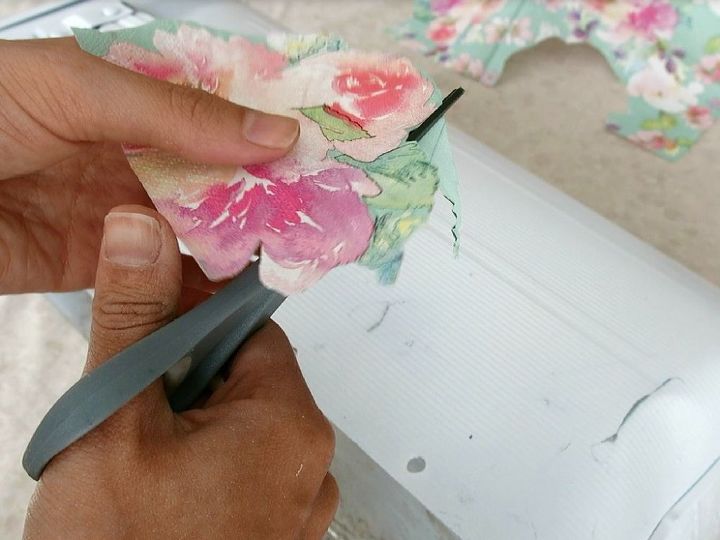
Step 3. Cut out flowers from floral napkins.
To get the floral effect on the mailbox, cut out individual and groupings of flowers from floral napkins or tissue paper (or even scrapbook paper, although it will look a little different with that material). This can take some time, so just pull up a seat in the living room and watch some T.V. while you do this part. Alternatively, you could decoupage the entire napkin on the mailbox.
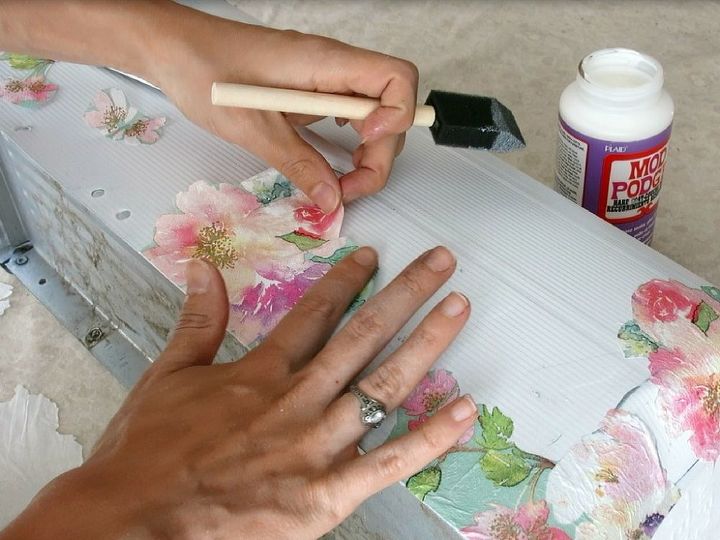
Step 4. Attach flowers to mailbox with Mod Podge.
Using a foam paint brush, gently brush the back of the napkin with Mod Podge and lay onto the mailbox. Smooth out any wrinkles and then brush more Mod Podge on top of the napkin piece. Let Mod Podge dry fully.
Optional: I didn’t love how the flowers looked after this step, they were a little too bright for me…so I decided to dry brush them with a bit of white acrylic craft paint. The paint really stuck onto the ripples in the napkins and I love how it made the surface of the garden mailbox distressed looking. I achieved the look I was going for, subtle and soft.
There's a few more steps to this tutorial... hop on over to this blog post to see how I brightened up the inside of this mailbox!
My garden tools are just a couple steps away from my garden. If you’re looking for a great storage option for your garden tools, keep your eye out at thrift stores and Craigslist for old mailboxes. With just some creativity and Mod Podge, you can transform the old mailbox with genius garden tool storage that is adorable!
What’s your favorite Mod Podge craft?
Let me know in the comments!

Comments
Join the conversation
-
I love this :) Very useful and clever. I cant wait to make one.


Frequently asked questions
Have a question about this project?