


Vase Decor With Paper Napkins & Mod Podge | Decoupage

With a pack of paper napkins, some paint, and some Mod Podge, you can make this beautiful damask vase... add some rhinestones and you'll have a stunning piece that is sure to catch everyones attention! This is pretty easy to make, you just need to take your time with it. If you've never decoupaged before, (noun the art or craft of decorating objects with paper cut-outs) in this case, it would be cutting and gluing certain designs out of a paper napkin onto the vase... I suggest practicing on something else first, to get the hang of it.
You can watch this video that's also a step by step or just keep scrolling and read the written step by step I have provided for you. I apologize in advance for the quality of this video as I made it when I was first learning how to edit. I'm still proud of it as I think it's pretty good for someone who knew nothing of editing. Self-thought and still learning.  Speaking of learning, let's get started!
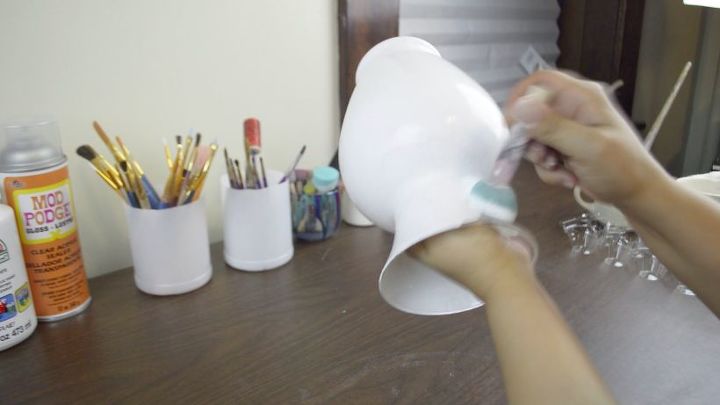
Make sure the vase is clean and dry before starting. Using a pouncer brush and white acrylic paint... give the vase two coats, letting it dry between each one.
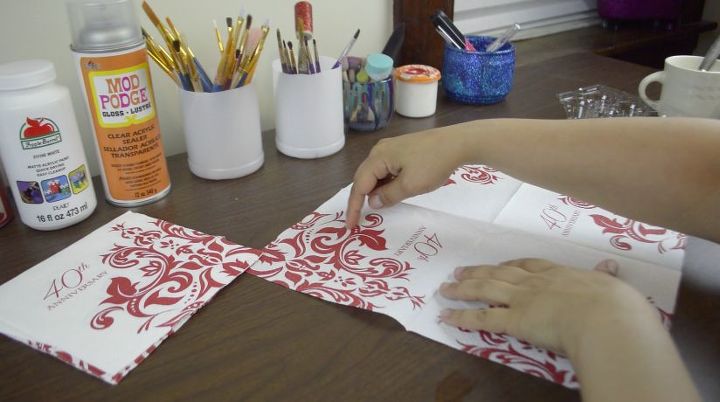
While the vase dries, cut out all the desired designs out of the napkin. I used more then one napkin for this vase. The video can give you a better idea of the designs I picked and where I placed them.
After you've cut all the designs out, separate the plies of paper. I find it easiest to do this by slightly wetting your fingertips and pinching the paper napkin in-between them.
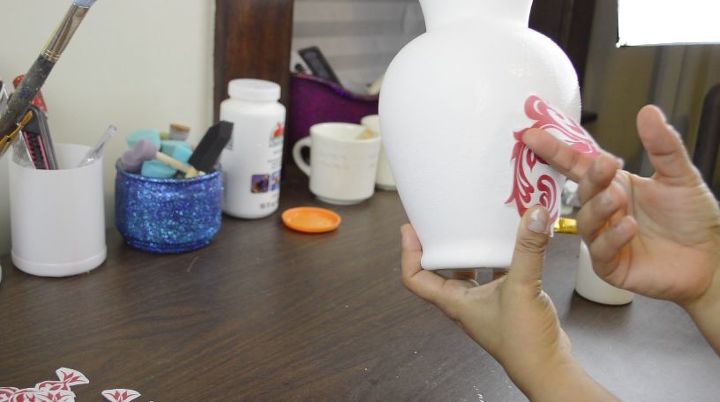
Once the vase is fully dried and you have prepared all of your pieces, using Mod Podge and a brush, glue them onto the vase in anyway you'd like or follow the video to see the way I did it.
Place a light, even coat of Mod Podge where you want the piece. Place the piece onto the vase and LIGHTLY, smooth down the napkin with a piece of crumpled up plastic wrap. This part is to minimize wrinkles. Make sure to use a fresh piece of plastic wrap every time you smooth out a piece. You don't want to rip the next piece because there was glue from the last one on the plastic wrap. There are other methods of smoothing out the napkin, I find this to be the easiest for me.
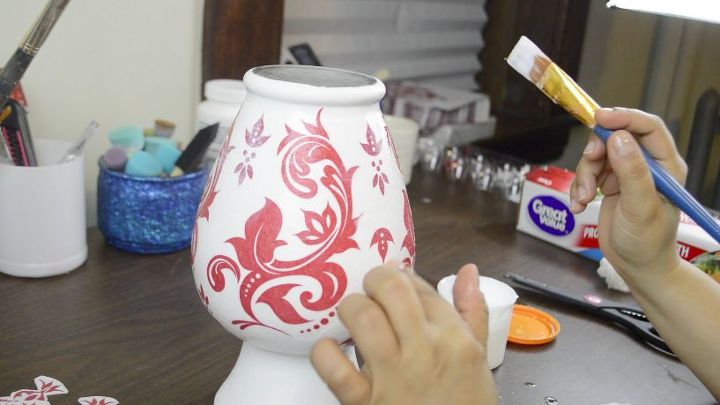
Continue doing this until you have completed the entire design.
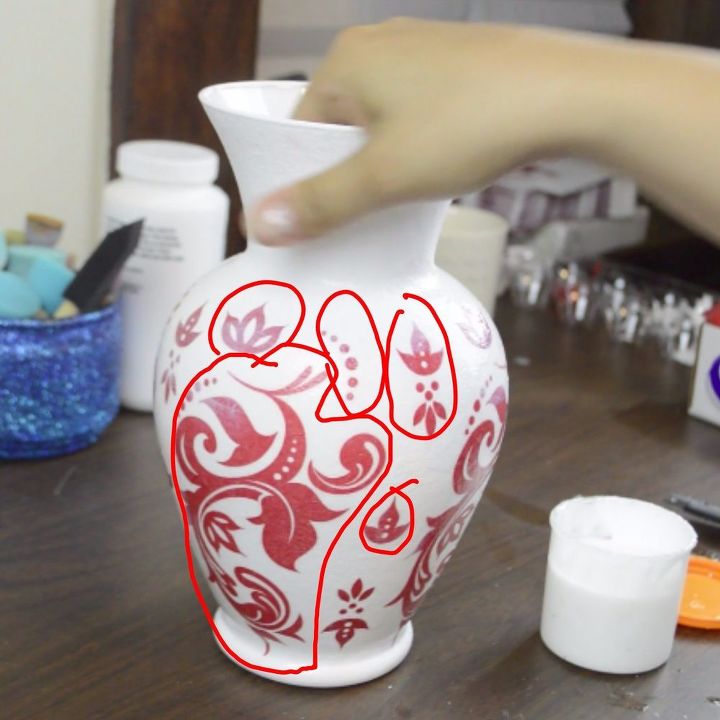
These are the 5 designs I cut out of the napkin to create this look. I just repeated the design all the way around.
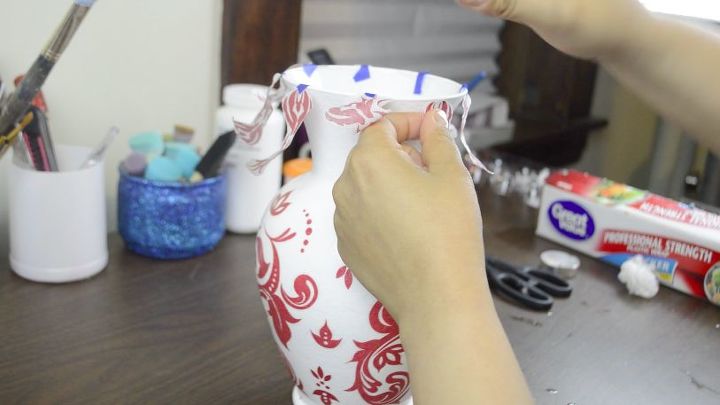
Using painters tape, I taped on all the pieces I wanted for the top if the vase. I did this so that I could try and space them out the best I could but it still came out somewhat un even. You don't have to do this part if you don't want. You can just eyeball it.
If you do it this way, don't stick the painters tape on hard. I barley pressed on it. You don't want it to lift the paint or rip the napkin.
Now glue them down the same way you did the other pieces.
1.) Place Mod Podge
2.) Place paper napkin design
3.) LIGHTLY Smooth out with a piece of crumpled up plastic wrap
4.) Place more Mod Podge to seal it
Let that dry.
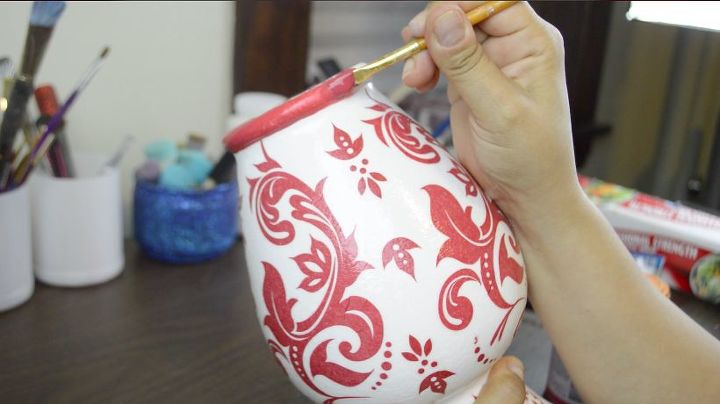
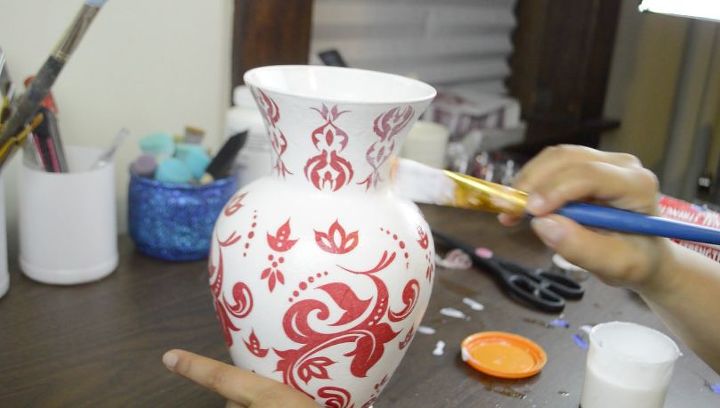
Paint the bottom of the vase with matching paint and a brush.
I went to Lowe's with the napkin and had them whip me up a sample of paint. It was like $3. You can just mix your own if you'd like. This was a gift for my mother, so I wanted it to match perfectly.
Let that dry.
Using the same paint, but a pouncer brush this time, paint the rim as shown here.
Let it dry.
I place all my work in front of a small fan I have so that it dries faster.
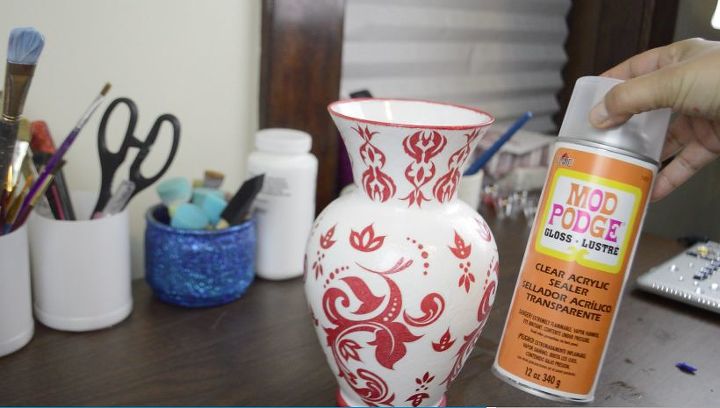
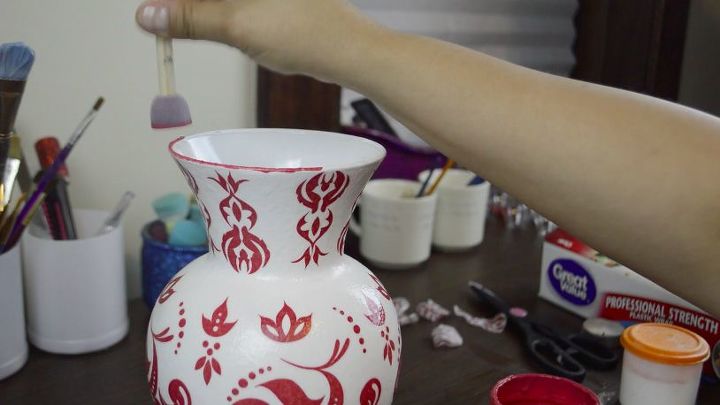
Seal the whole vase with a clear sealer of your choice. You can just coat the whole thing in one more layer of Mod Podge if you'd like. I used Mod Podge clear acrylic sealer.
Let it dry.
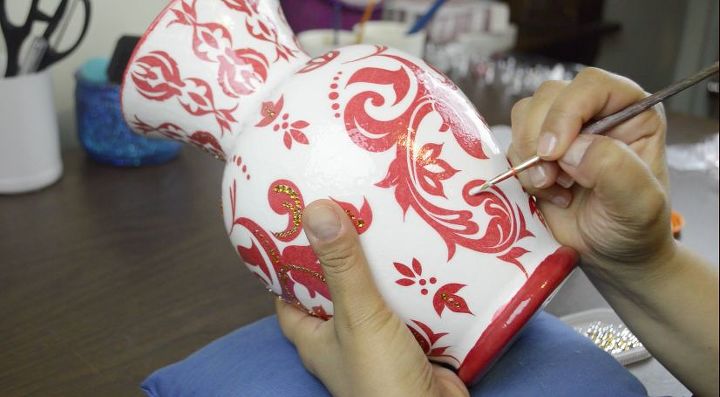
You could stop there and keep it classic or add rhinestones for a more glamorous look.
I used Mod Podge and a thin paint brush to place all the individual rhinestones.
I do it this way because I get my rhinestones in bulk and it's cheaper. If this is to much work for you, you could buy the rhinestones that are already stuck in a line and just stick them on. It's just way more expensive that way.
Colors and sizes I used: I'll leave the link down below in the materials section.
Gold in the sizes 2mm, 3mm, 4mm
Deep Red 2mm, 3mm, 4mm, 5mm
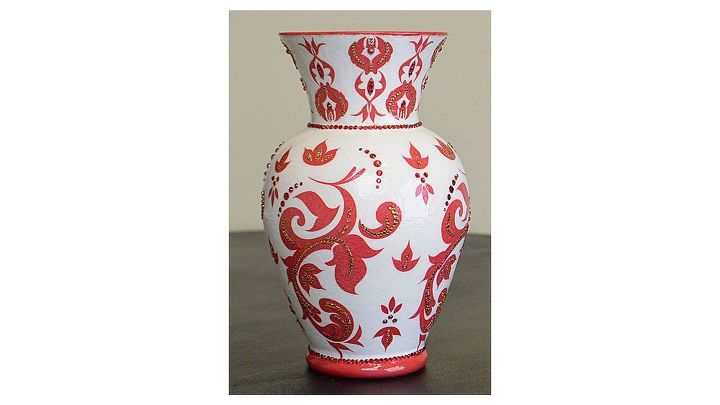
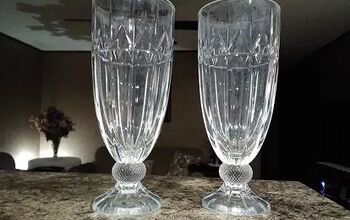
This is it all done! This picture doesn't show how sparkly it is but it came out really pretty. This was a gift for my mother and she loved it! If you liked this DIY and want to check out more of my crafts... stop by my YouTube page and have a look. Don't forget to say hi!  The link to my channel is down below, where it says, To see more. Hope to see you there!
Note: You can put real flowers in this vase but you have to make sure water doesn't touch the outside, so no washing it either. You could wipe it with a damp cloth if you seal it with a water proof sealer.
DIY home decor using recycled paper
Comments
Join the conversation
-
IT IS lovely. Very time consuming.
-
Gorgeous


Frequently asked questions
Have a question about this project?
WOW!! Gorgeous!! How long did it take you to complete the vase??
What were you using to pick up the rhinestones and put them on the vase?
Beautiful vase! What gave you the idea to use napkins? never new the pattern came of like that.Seen it done with wrapping paper but you but it inside the vase. Brilliant idea!
Could you use paper with a design instead of napkins? I have something that mom loves maybe I could copy? Thank you its beautiful.