


DIY Wood Stove Quartz Ledger Accent Wall

by
D4rkrpincess
6 Materials
$380
6 Days
Medium
We set out to make an accent wall for the back of where the wood stove would be. I would suggest looking first into county and city codes before you start on any project :) my hubby did all the research before we started doing it!
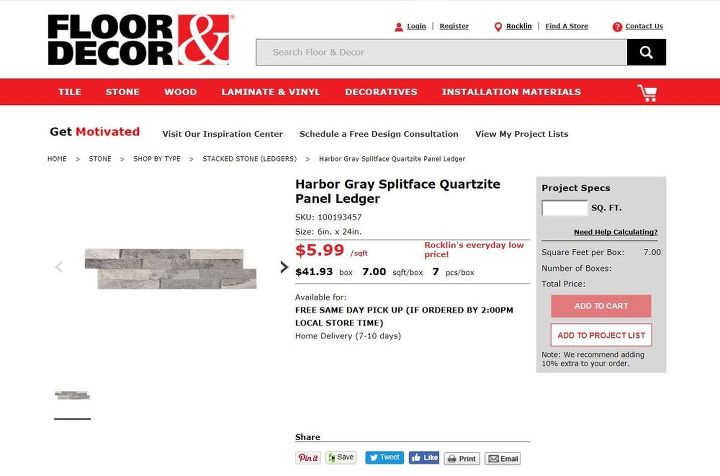
First, we set out to figure out what kind of accent wall we wanted. After much debate between modern tile, rustic tile, or stone, we finally agreed on something called quartz ledger. This was our first pick, but the color was not in the store and we didn't want to drive to Nevada so we opted for a whiter shade that is available in our town. We needed approximately 40 feet (4 ft wide and 10 ft tall) for our accent wall. The price was $5.99/ sq ft.
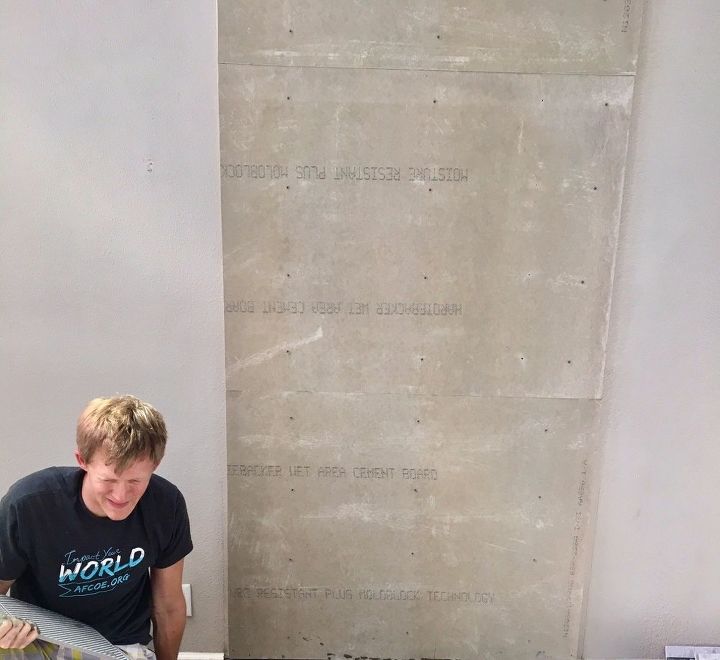
The code requires us to have space between drywall and the hardiebacker. My hubby decided to nail the hardiebacker with some nuts behind it (normally people would use ceramic spacers). Always drill into the stud! With something this heavy, you don't want to take any chances on not drilling into the studs. He also put wood on each side of the wall.
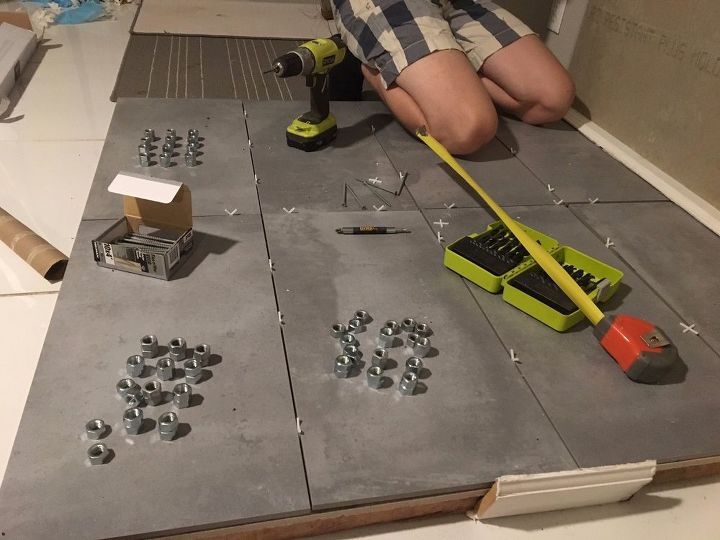
As you can see in the pictures, here are the nuts that he used behind the hardiebacker. We put 24 nuts (2 per drilled hole) into each 3x4 section of the hardiebacker.
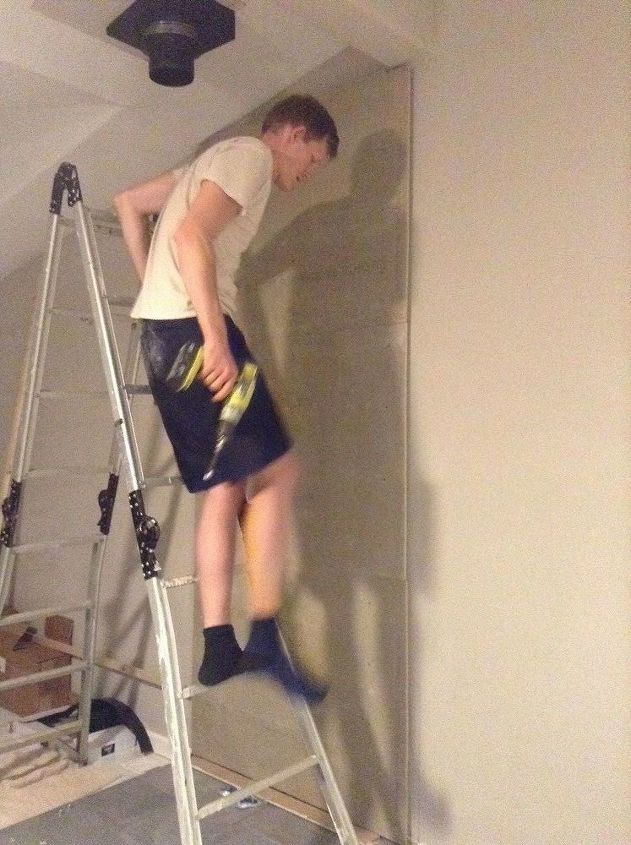
Finally finished up on putting all the hardiebacker -- comes the fun part of putting the quartz ledger!
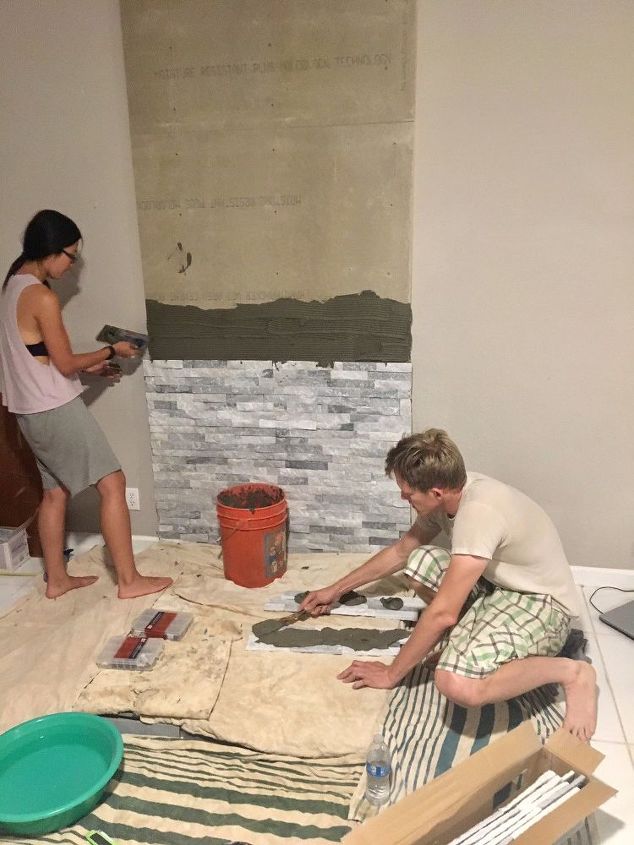
We used Mapei Ultraflex LFT mortar (mix according to instructions) and put a generous amount on the hardiebacker as well as on the back of the quartz ledger itself. Someone in a video suggested that its best to do only 3 feet high at a time, so that is what we did. Since each piece of ledger is 6x24 and our accent wall was 4 feet long, there wasn't really much cutting to do except for the end pieces and the upper section of our slanted wall. Use a diamond blade to cut stone.
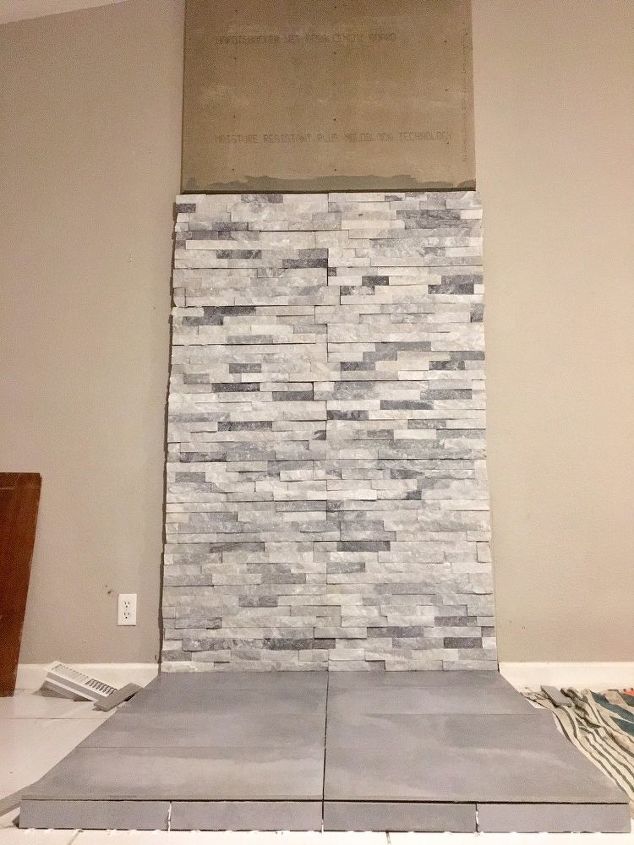
End of day 2 installing the quartz ledger. I think we may have gone above the 3 feet recommended height due to realizing that we could not save the mortar (we tried and the next day it was as hard as a rock and we had to throw it out). So take note of that, and use all the mortar in one day.
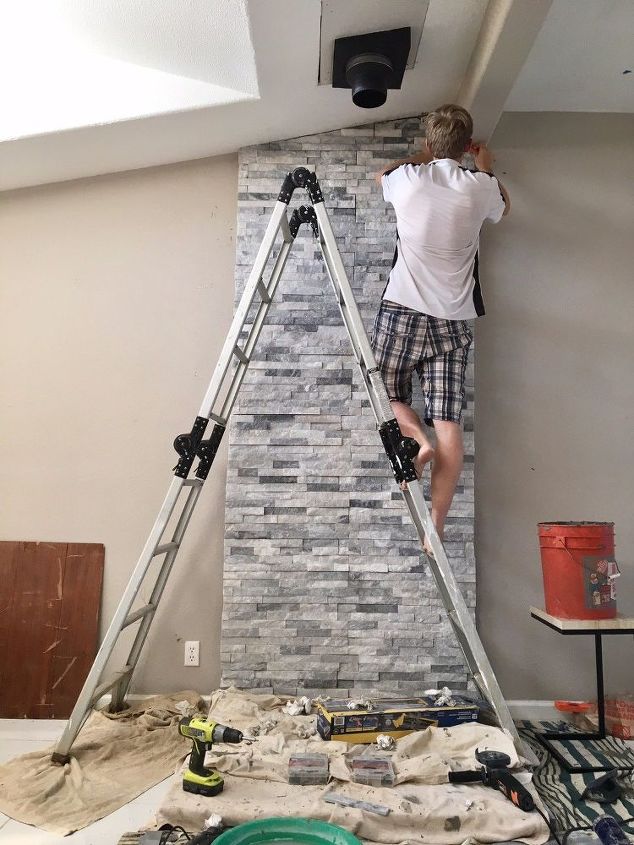
End of day 4, the hardest part was trying to cut the slanted pieces. I have also noticed that the corners are not perfectly aligned and that is NORMAL for stone ledgers. It kinda drove my OCD self crazy so I wanted to add a border to hide it.
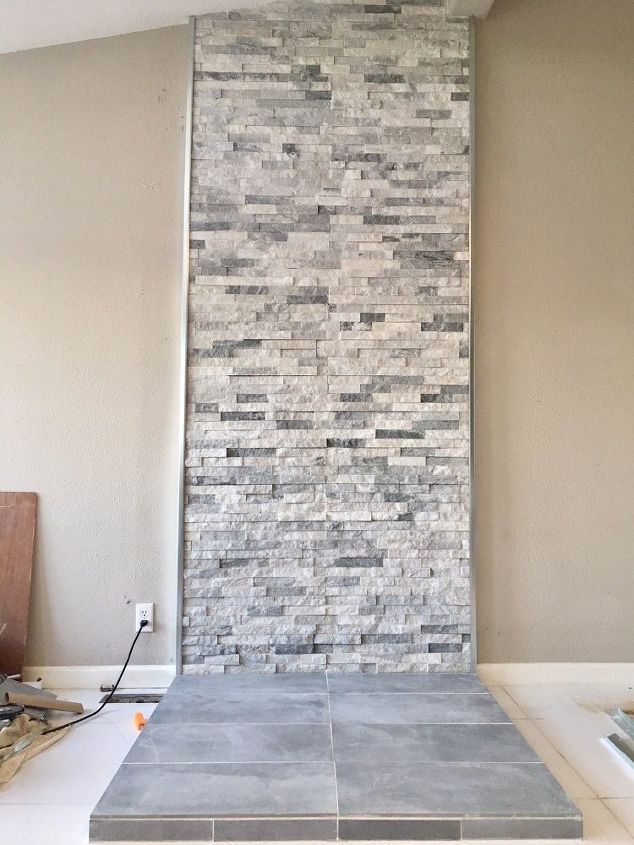
And yes, borders can get VERY expensive so we went around Lowes and Home Depot for something that is cheap and could be used as a border and we finally found it! Roof flashing  1 inch covering the stone, and 3 inch covering the back to give it a nice a smooth look (they come in 10 feet sections). It was cheap and did the trick! We just put two screws (one at the top, one at the bottom) on the flashing. Nailed it to the 2 inch wood my husband put behind the hardiebacker.
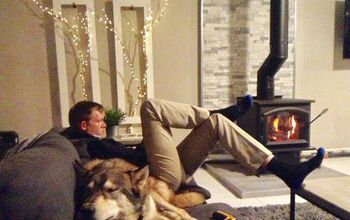
1 inch covering the stone, and 3 inch covering the back to give it a nice a smooth look (they come in 10 feet sections). It was cheap and did the trick! We just put two screws (one at the top, one at the bottom) on the flashing. Nailed it to the 2 inch wood my husband put behind the hardiebacker. And this is the finished wall accent! Here is the approximate breakdown!
Quartz Ledger - $256 approx 40 sq ft plus a little extra
Mapei Ultraflex LFT - $45 for 3 bags, used about 2.5 bags
Hardiebacker - $39 for 3 hardiebacker
Roof Flashing - $10 for about 2 roof flashing in 10 feet sections
Galvanized Hex Nut - $30
If you would like to see how to make the hearth pad, go here! http://www.hometalk.com/diy/living-room/diy-hearth-pad-for-wood-stove-30385401
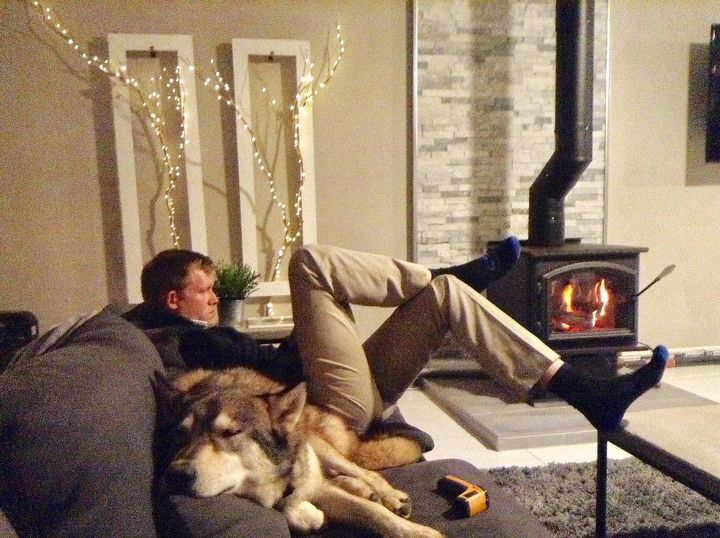
Here is the picture with the wood stove installed 
Comments
Join the conversation
5 of 9 comments
-
Awesome! If I didn't know better, I would think you had a professional contractor for this project. Kudos to y'all, and please post a picture after you install your wood burning stove.
-
Love love love.


Frequently asked questions
Have a question about this project?
This is so awesome! You guys are so creative! I would love to make this accent wall! Did your hubby make the same woodframe for the wall as the one he made for the hearth pad, or did he just naile boards to 4 sides of the hardiebacker? I dont understand how he drilled into those nuts? Did he pre-drilled the holes on the hardiebacker and glued the nuts on the other side of the hardiebacker. Did he measure where he would need to drill to meet the studs? any advice would be greatly appreciated, I am so new to this!