


Modern Adirondack Lounge Chairs | DIY

$2000
2 Weeks
Advanced
These were the first chairs I've designed and built, and let me tell you--chairs are difficult! There are so many crucial measurements, and angles required to make a comfortable chair. These are constructed with mild steel and black walnut.
{
"id": "4107426",
"alt": "",
"title": "",
"video_link": "https://www.youtube.com/embed/WS_aa0t3OcI",
"youtube_video_id": "WS_aa0t3OcI"
}
{
"width": 634,
"height": 357,
"showRelated": true
}
Alright so here is the video! I try and condense all of my builds into ~8 minute videos while including the relevant steps. There are a few details in the video that I wasn't able to squeeze into the pictures, so if you can spare a few minutes I invite you to check it out.
These were the first chairs I've designed and built, and let me tell you--chairs are difficult! There are so many crucial measurements, and angles required to make a comfortable chair. These are constructed with mild steel and black walnut.
If you want a concise list of the tools used in the build, check out the video description on my youtube channel "ZH Fabrications".
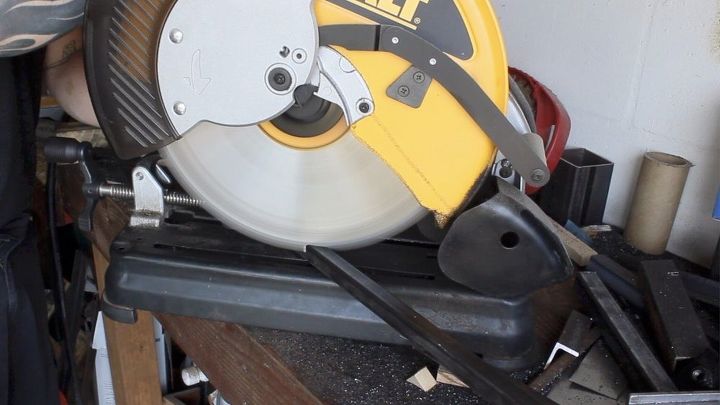
So, the first step was to make the seat pan. For this I used 3/4" steel tubing cut to 24" length. I cut the tubing on a DeWalt DW872 Cold Saw.
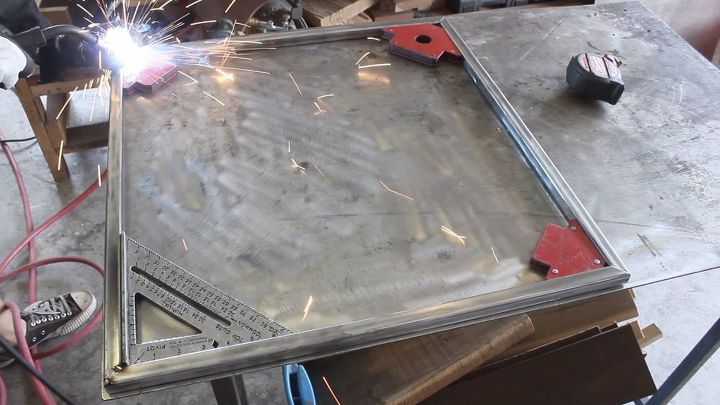
Next step was to weld it all together, I use 90 degree magnets and a speed square(If you don't have a speed square, you need to get one). The welder I'm using is a Lincoln Electric 140C MIG welder.

Since, I'm not making a fancy Adirondack toilette, I needed to weld some support braces for the cushion. For this I used 1/8"x1" mild steel flat stock.
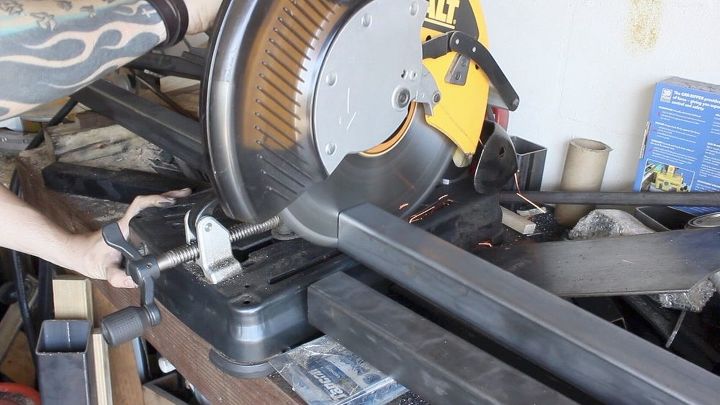
On to the legs! The front legs were easy as they were just 90 degree cuts, the back legs, however, sit at an 10 degree angle(which required two 80 degree cuts). The legs are made out of 2"x2" square tubing.
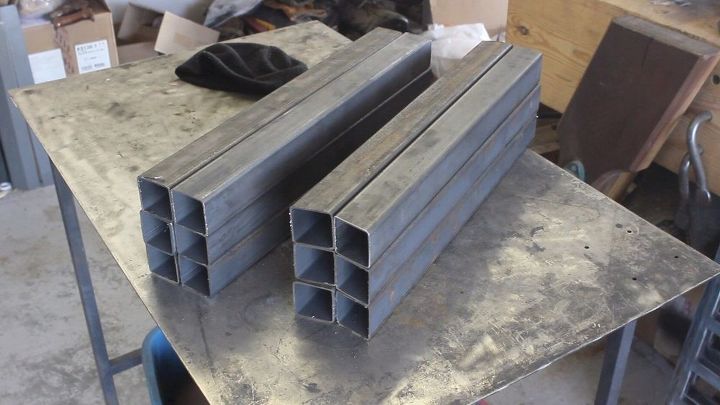
Here are the legs for three chairs, front legs(90 degree) on the left and back legs(80 degree) on the right. Want to try an interesting experiment? Go to a room with no chairs, and measure 17"-19" from the floor, that's how low standard seat height is--If you don't have a chair in the room you will say, no way(it looks way too low). Same as most tables, they are only 29"-31" tall (which also seems ridiculously low if there isn't a table in the room)

This was one of the trickier parts of the build. Since nothing in my shop is perfectly flat--not my welding table, not the floor, etc. I often weld on top of a sheet of glass to ensure I get perfect alignment. I can't stand chairs that rock(unless they are rocking chairs of course)
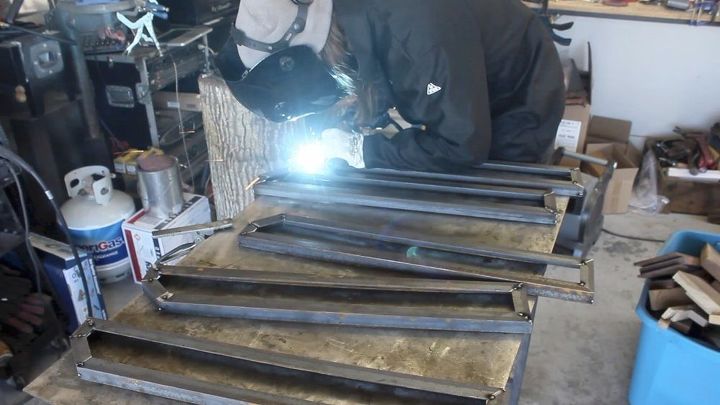
The next step was to weld up the angle iron, here you can see the angle iron welded up to frame the armrests.
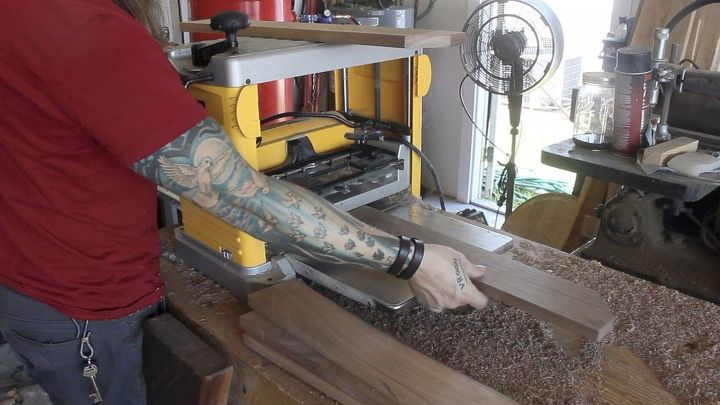
Using my DeWalt DW734 lunchbox planer to smooth out the walnut arm rest inserts. I love the smell of walnut!
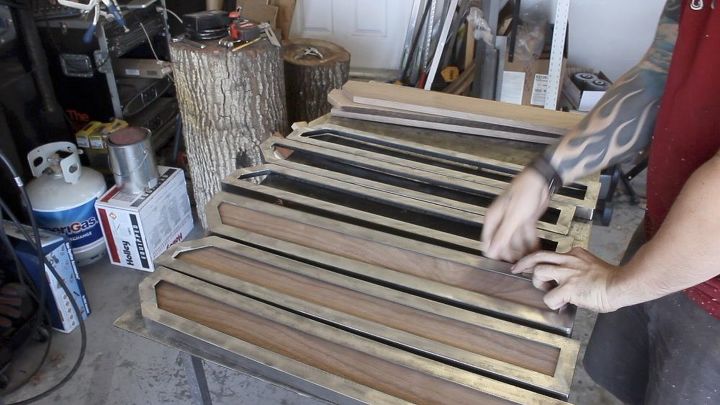
Here is the mock-up of the walnut inside the frame.
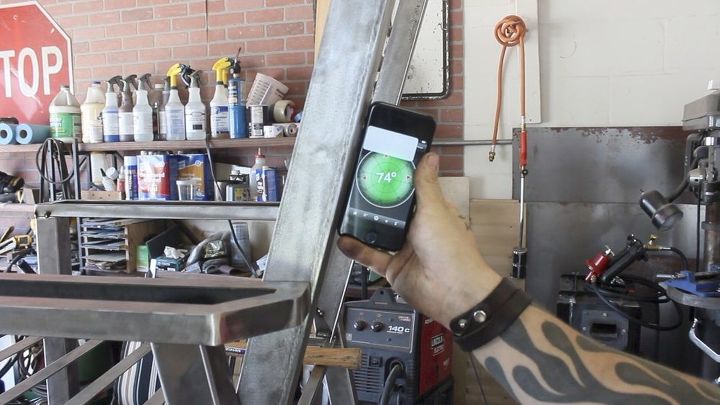
So I found this app, called tiltmeter, which is pretty awesome, it's essentially a digital level. After playing musical chairs at some local furniture stores I decided that 74 degrees was my favorite. You can see what I was talking about earlier in regard to tacking the armrests in place for the back-rests. I knew I wanted the back support flush with the backside of the armrest, so I held that in place and actually rotated the bottom of the support in order to get the desired angle.
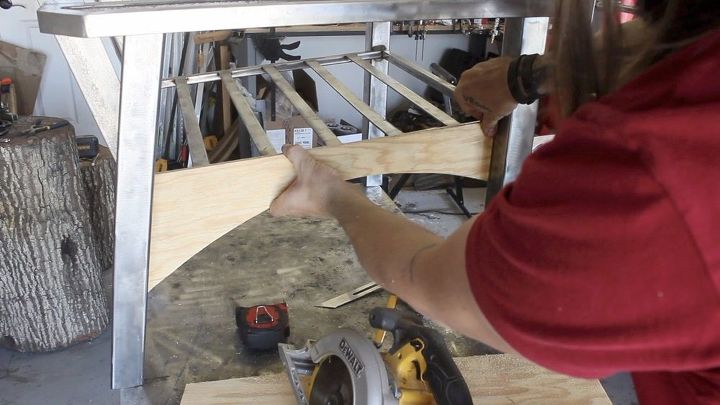
I feel like the stretchers are really what pull these chairs together(facepalm). But seriously, I looked at a lot of arch bridges for influence on this design, and--well I really like these. The plywood in the picture is obviously just a template, as it's much faster and easier to shape & manipulate wood than steel.

Here I am welding the stretchers in place. I cut these out of 1/8" mild steel plate with a plasma cutter--before I had the plasma cutter I used a jigsaw with a metal blade for this type of thing.
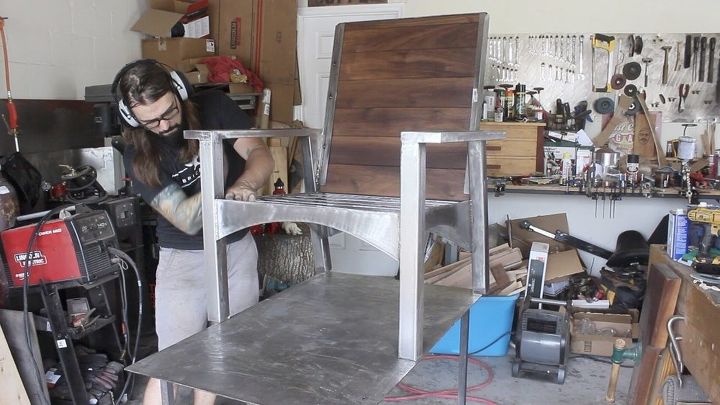
After applying Rubio Monocoat finish to the walnut, the final step to hand sand the mild steel down to uniform--umm, shininess?
Since the chair is mild steel, and well--mild steel rusts when left untreated, I applied 3 coats "clear metal wax" from sculpt nouveau.
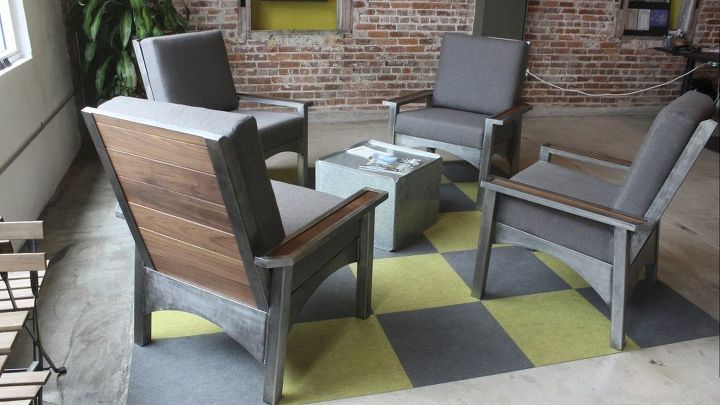
Here they are in their space! I personally would have liked to see the chair with tobacco brown cushions, but the grey actually works well in the space. Anyway, this was probably my most demanding project to date, but it was also very rewarding. If you are interested in the video, I have the link in the first image. Also, if you'd like to stay posted on my work, I invite you to follow me on my instagram "ZHFabrications" Thank you!


Frequently asked questions
Have a question about this project?