


How to Install a Toilet in 1 Hour or Less

Today we're going to share how to install a new toilet on a tile floor.
Specifically American Standard's one-piece Cadet 3...which is an awesome toilet for small bathrooms.
Why should you learn to do this project?
Well, for one it'll save you a ton of money. Second, it's good to know how a toilet works.
When there's a leak you'll have the ability to fix it and save even more money!!!
Let's dive in and see how to replace a toilet on a tiled bathroom floor, we have a ton of great tips.
At the beginning of the our video Steve discusses the toilet flange.
This is by far one of the most important parts to the a new toilet installation.
Here's the deal:
If the toilet flange sits below the finished floor, the toilet will leak.
Why?
It's simple, the watertight seal between the toilet bowl and wax ring will eventually fail.
In order for this not to happen the toilet flange must sit above the finished floor by at least 1/4".
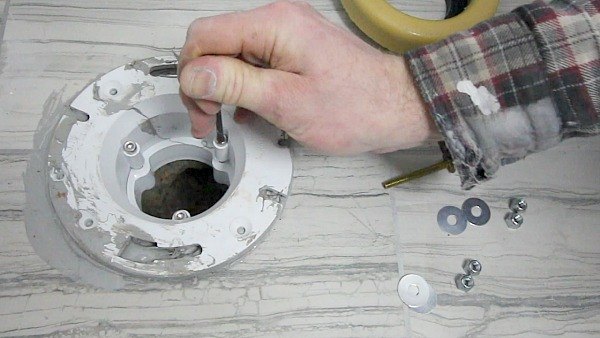
Steve used an Oatey 4" replacement toilet flange for cast iron pipes.
This flange uses a rubber compression gasket which enables the flange to be used on many types of cast-iron piping.
The 3 stainless-steel bolts are tightened to compress the rubber gasket to secure the flange to the existing pipe.
In addition, the compression joint allows up to 3" of adjustment.
This replacement flange is for broken flanges or flanges that sit below the finished tile floor. They're super easy to install.
Once the flange is fixed the next step is to replace the toilet.
Does the wax ring on the flange or bottom of the toilet bowl??
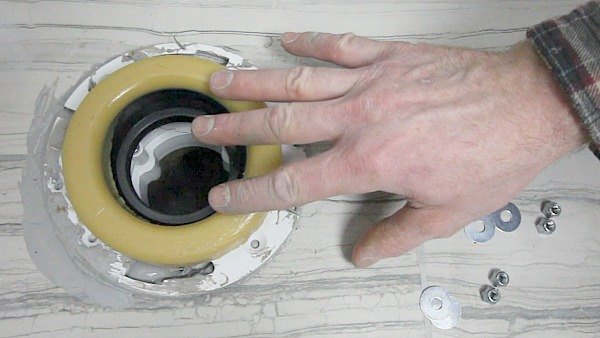
Let's answer the wax ring question:
Always place the wax ring on the closet flange.
This helps eliminate the possibility of the ring falling off the bottom of the toilet bowl.
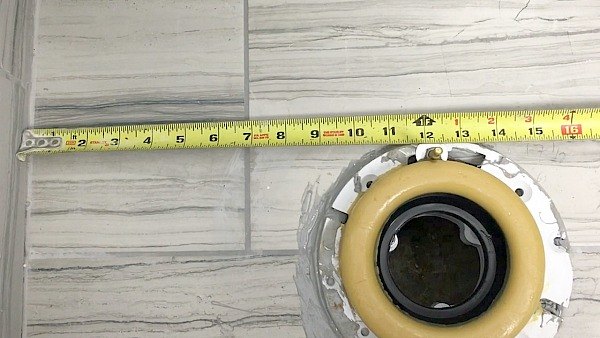
Before you buy a new toilet, get the rough-in measurement.
Why does this matter?
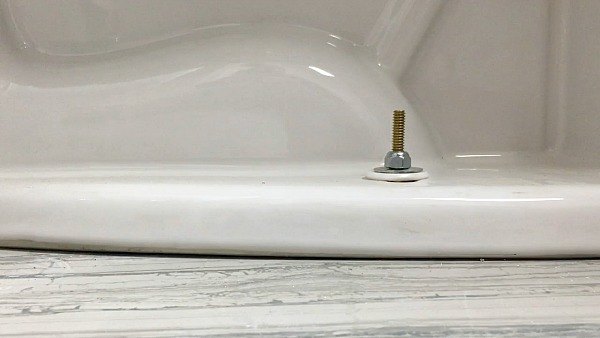
First, the rough-in is the distance between the closet flange bolts and finished wall.
In our case that distances was 12".
That's why you see the closet flange bolts positioned at that 12" mark. We secured them to the closet flange using nuts and washers.
That's why you see the closet flange bolts positioned at that 12" mark. We secured them to the closet flange using nuts and washers.
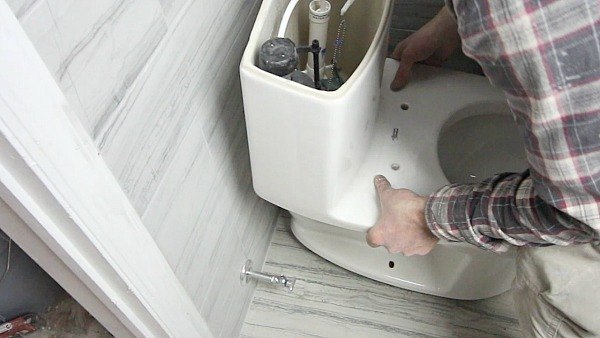
Align the holes in the toilet with the closet flange bolts and slowly lower it until the bowl meets the wax ring.
Then compress the toilet against the wax ring to make a good watertight seal.
Add the plastic washers first, then metal washers, and finally the nuts to the closet flange bolts.
Tighten the nuts with a wrench.
This is super important:
Do not over-tighten the nuts because this could crack the bowl.
Tighten the nuts just enough to keep the toilet from moving.
If the tile floor isn't flat, the toilet bowl might have to be shimmed. We cover this in a different toilet installation tutorial...just in case you're interested.
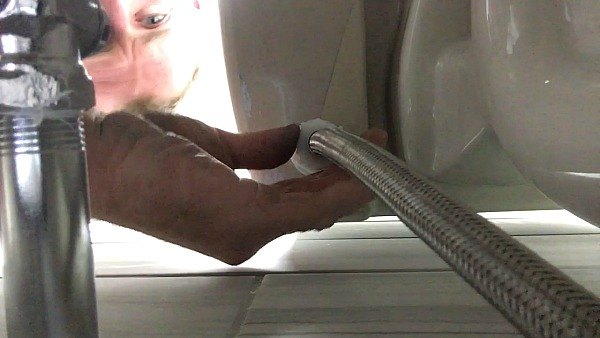
The next step is to get the water hooked up to the toilet.
What kind of water supply should be used?
Let's answer the last question:
steel braided supply lines are the best.
They don't leak (if installed right) and don't look cheesy like those nasty plastic ones.
Choose a supply line that will fit the shut-off valve. Typically this is 3/8".
Hand tighten the supply line to the toilet tank's fill valve.
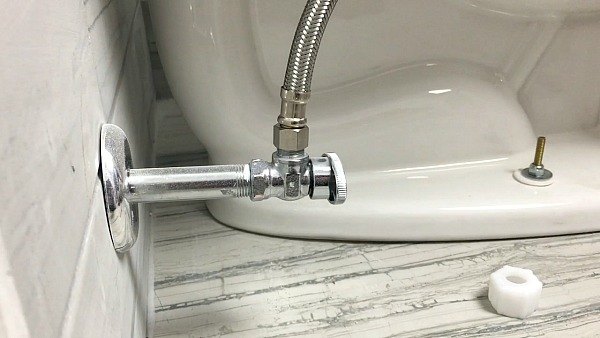
And do the same for the shut-off valve connection. Then tighten that nut 1/4 to 1/2 turn using either a crescent wrench or pliers.
Here's a PRO TIP:
The crescent wrench won't scratch the nut's finish.
I forgot to add this tip to the video, oops.

Turn the shut-off valve to the on position and watch the water fill up the tank.
Check for any leaks at the plumbing connections and ensure the toilet tank water level is roughly 3/4" to 1" below the overflow pipe.
The nice thing about one-piece toilets is there are no leak points at the tank to bowl connection.
That said, we have a great tutorial on how to install a two-piece American Standard toilet.
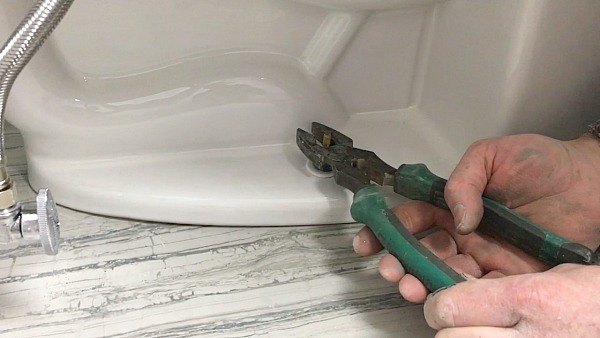
Trim closet flange bolts using linesman pliers.
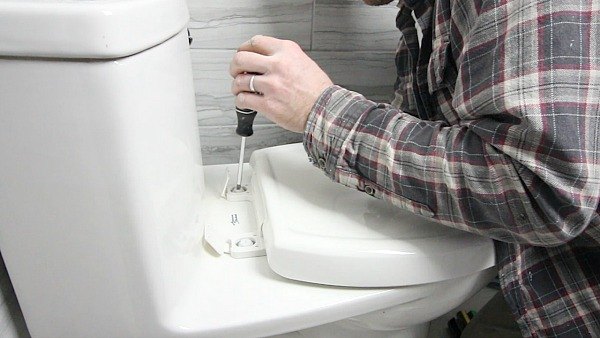
Then add the self-closing toilet seat...which is super easy.
Place the rubber gaskets on the seat's hinges, then the metal washers (Steve explains which ones to use in the video), and secure the seat to the bowl with the plastic nuts & washers.
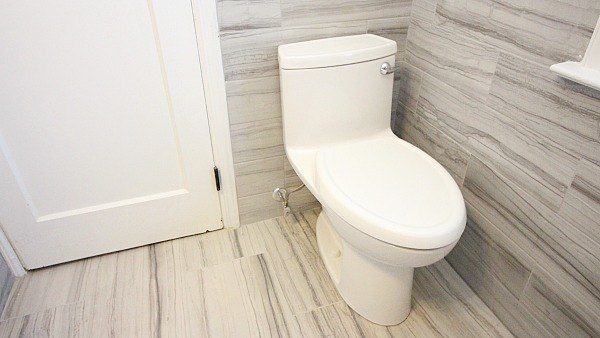
This new toilet took about 1 hour to install. And it looks pretty darn good with the bathroom's tiled walls and floor.
Thanks as always for reading, watching, and being part of our awesome community.
Ask your questions below and we'd be happy to help.
Talk to you soon,
Jeff & Steve
Here is a helpful guide on how to remove a toilet!
Watch our video to see step-by-step how to install a new one-piece toilet in less than 1 hour.
Resources for this project:
See all materials


Comments
Join the conversation
-
We had our toilets replaced. Our problem was the oval toilets are too long out in the front to fit in our 1960’s spaces. Plus, we wanted higher, handicapped type toilets. Our plumber was able to find round high, handicapped type toilets that fit perfectly in our spaces. He had to search, but they are out there. We are really enjoying our time in the bathroom now.
-
I don't need to replace my toliet but somehow the toliet has shifted over just in the back about1/2 inch so somehow I need to straighten it back out so that its straight again. The cover doesn't fit on the back anymore because of this small shift of the toliet. I can't afford to pay someone to come and fix it as I am an older person on disability so that means a fixed income. So I am wondering how I can personally do this myself like I said it's kinda like turned just a bit in the back and just needs to be turned back so I can once again put the lid on the back of my toliet. I have a very small bathroom so I purchased a stand to put on top of the toliet to put towels on but the skinney little legs won't fit in because of the toliet being turned just a bit. My toliet and sink are about just over an inch apart thats the problem if the toliet was straight I could put the stand in there just perfect. Could someone please tell me how I can fix this. Thank You so very very much. Lori


Frequently asked questions
Have a question about this project?
Great tutorial! Question: does the Oatey flange reduce the pipe size? If so, will that cause the toilet to back up?
Thanks
Is that an illusion caused by the photo angle, or is the toilet really so close to the wall it would be, er, difficult for larger people to sit?
Great Job.......Jeff and Steve.....if I need some plumbing and a new toilet......do you want the job? What do you go by? The Two Toilet Teamsters ??? The whole room looks excellent!!