


Faux Old Brick Wall
4 Materials
$25
5 Days
Easy
This is a wonderful project that takes few supplies but lots of time...but well worth the investment! Thanks Wendy for the great inspiration and instruction.
Ugly paneled bedroom wall! Spackled, and I had considered wallpapering but nothing excited me! I was tired of looking at it! Enter Hometalk and Wendy Barrish!
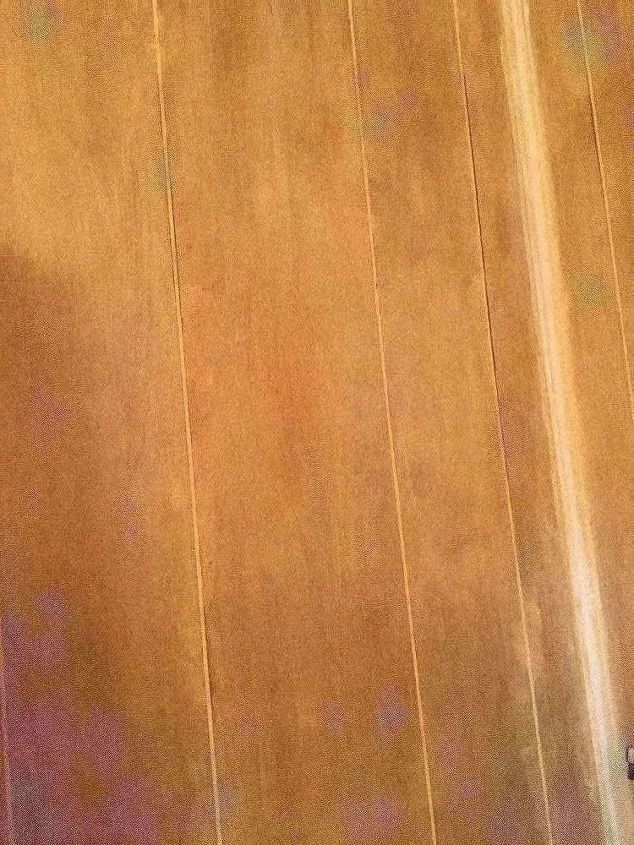
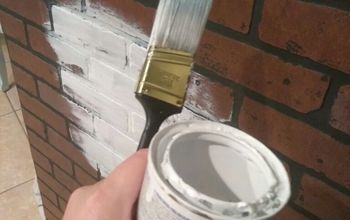
First, paint the wall. Cheap paint is ok. I used leftover white.
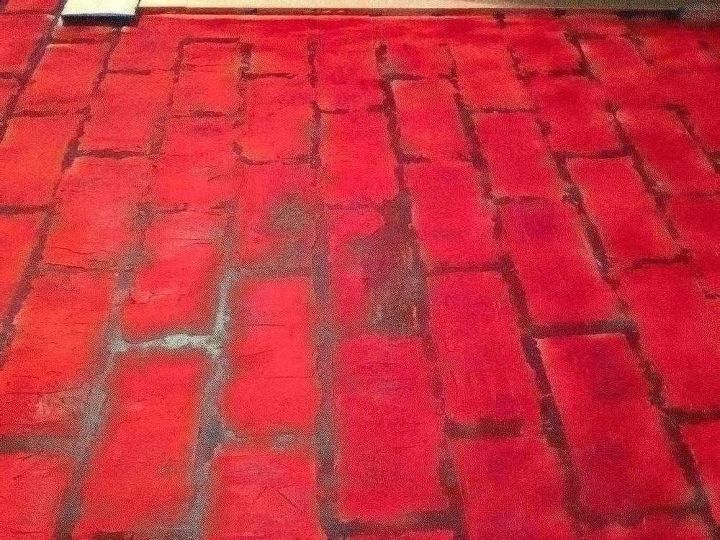
Measure and tape!! I measured the bricks 8" X 4" with a 12" ruler and a pencil. I started at the top left corner. Don't worry about pencil marks. They will be covered in the process. Sorry, missed that first taping photo! Blue painters tape and lots of patience. After wall is taped, spread the compound into the measured squares. I had compound everywhere so use drop cloths! Bricks do not have to be perfect thicknesses! I added more compound here and there for varied thickness. I used different spreaders for different effects. This only takes a couple hours to dry. I decided to use acrylic enamel spray paint for time, so I left the tape on. I wanted an old brick effect so I chose red for my base paint. All that red.....I nearly had a heart attack!! I stared at it for two days! Come too far to chicken out now!
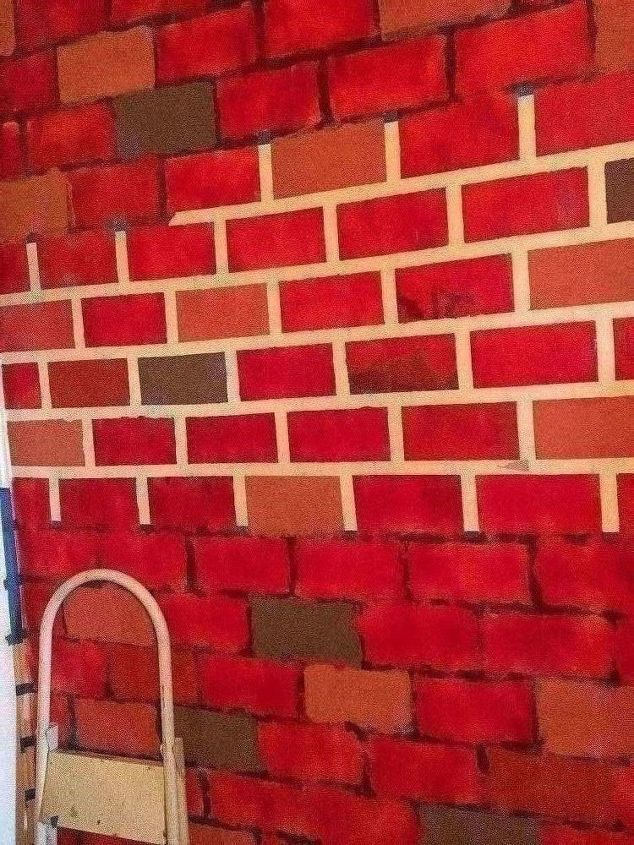
I have all colors of acrylic paint on hand, so digging in the cabinet, I found interesting colors to soften all that red!! Remember to vary colors and give it random shading for the old brick look. Bricks are very porous so they do suck up color! I began to pull tape off. Wow....more like it!
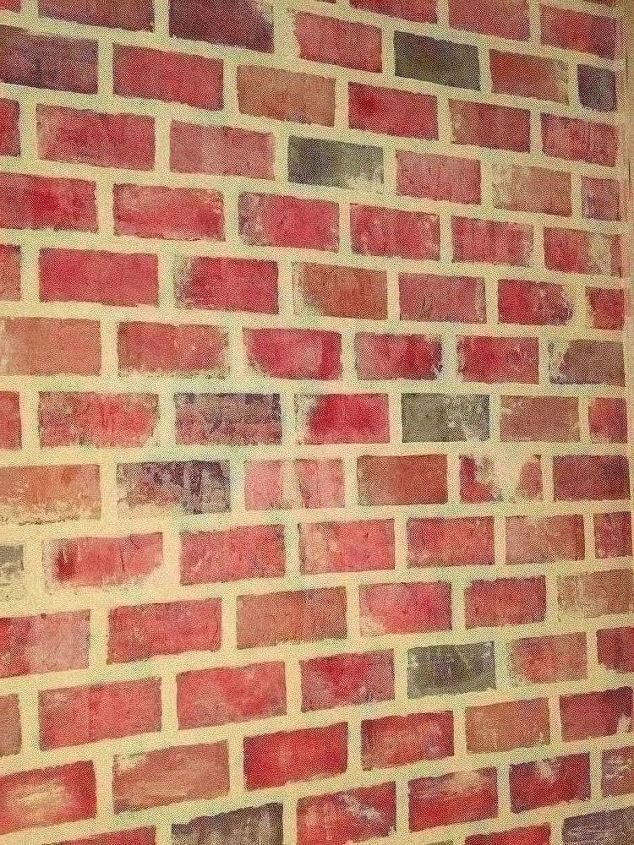
Work the compound into all mortar lines. This is slow work but I had to cover the last paneling showing, plus it looks more realistic. Let dry. To soften the red and age the colors, I whitewashed entire wall (1 half paint 1 half water). Let paint drip or apply 2 coats randomly for an authentic look. After dry, I added more compound with a damp sponge. You can't mess it up . Remember...An old brick wall has so much character and so many stories to tell. This is a long process but well worth all the effort. There are so many possibilities with this technique. I now LOVE my bedroom wall! Thank you Wendy and HomeTalk!
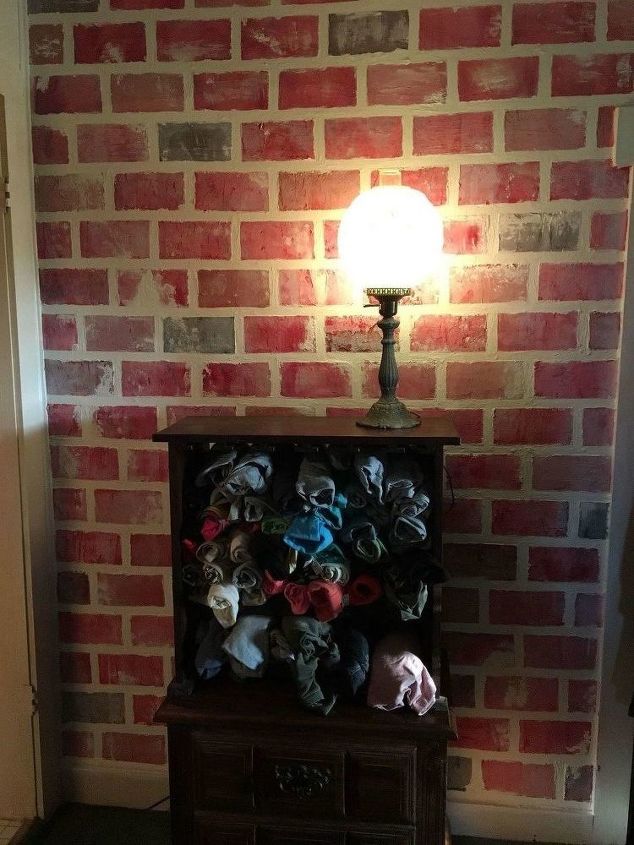
Finished product!
Comments
Join the conversation
3 of 9 comments
-
Thank you! It was so much fun.....and cheap!!!
-
I love it!!! You'very done a great job! I just went to get my 1st gallon of paint to start the project & most supplies. Will get the colors of paint later this wk. I love brick & am so excited to start! Thx for posting your project! !


Frequently asked questions
Have a question about this project?