


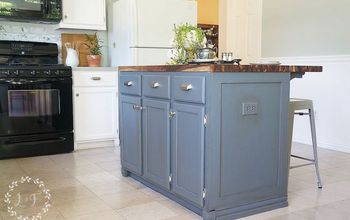
No Screw/ Nails-Kitchen Island
11 Materials
$50
2 Weeks
Medium
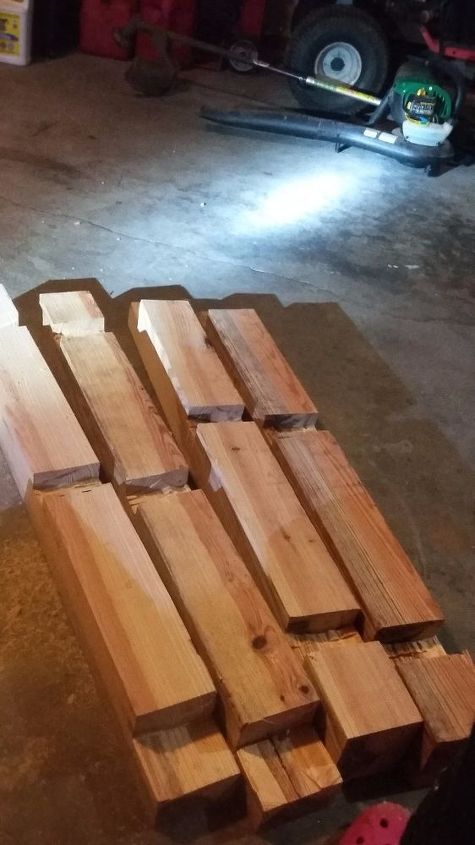
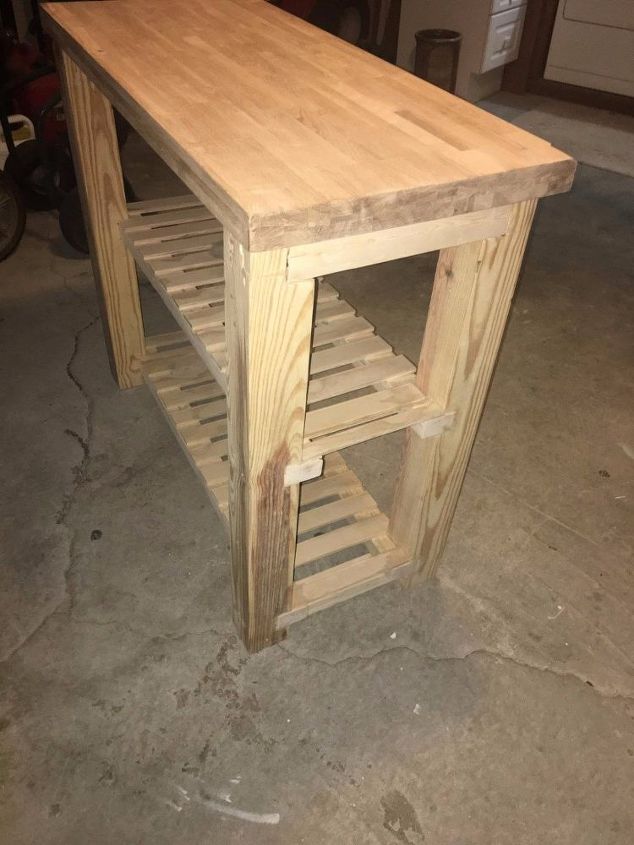
I purchased this 4"x 4" post from the local lumber yard at a whooping $ 5.00 a piece. And I wanted to build a kitchen island with these post but I wanted to do it a bit different than normal. Built this beauty without screws and/or nails.
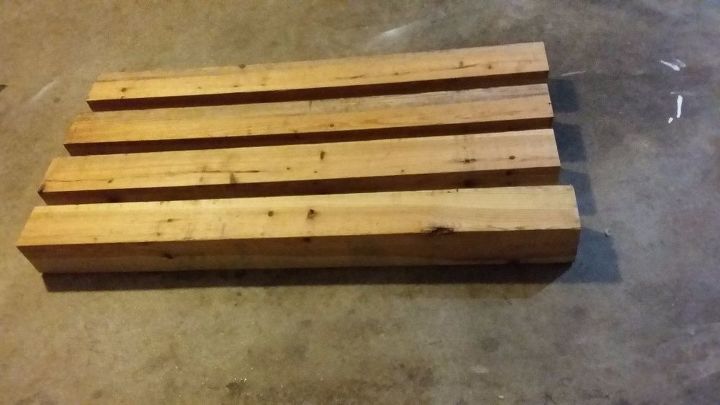
4"x4" cut into 6' pieces
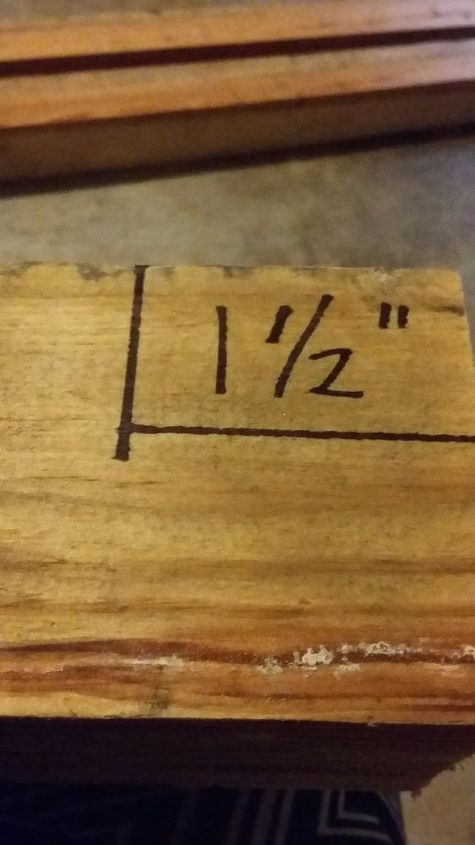
1. On the top of the 4” x 4”(it actually measures 3 ½” x 3 ½”) Measure down 1 ½” deep and mark.
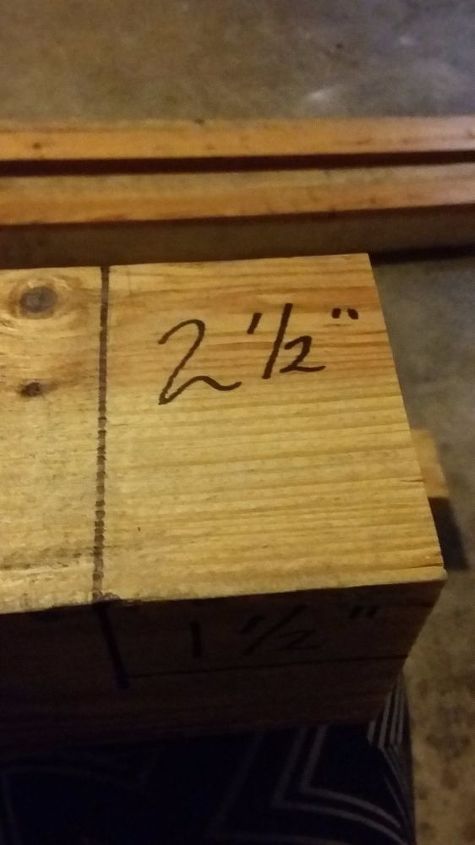
2 1/2" Down from the top
2. Pick one side because all your cuts should be on the same side of the post. On the side of the 4” x 4”post measure down 2 ½” down and mark. Then, mark all the way across the width of the board @ 2 ½”.
Remember: Go back and re-check all of your marks to make sure that they are the correct measurements before making a cut. (Measure twice cut once.)
1 1/2" Into the Side
3. You will have to make your cuts using your circular saw.**Do not go all the way thru the wood** Now you will have only two cuts. You must score the wood (meaning: many small cuts in between the 1st and 2nd measurements/cuts). Don’t cut down lower than 1 ½” and don’t go any further pass 2 ½” wide. If so, your inset will be too wide for your piece of wood.
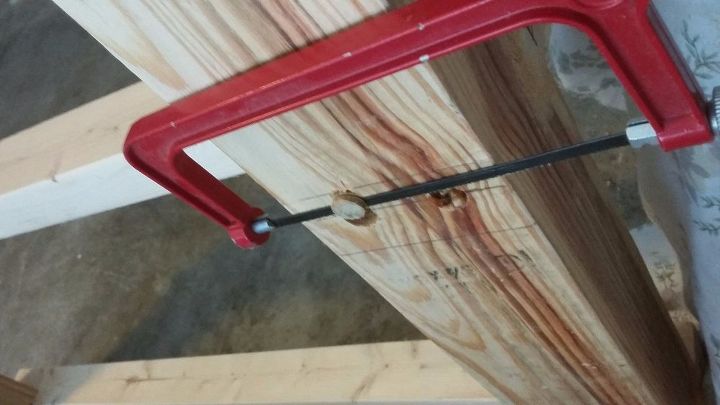
3. You will have to make your cuts using your circular saw.**Do not go all the way thru the wood** Now you will have only two cuts. You must score the wood (meaning: many small cuts in between the 1st and 2nd measurements/cuts). Don’t cut down lower than 1 ½” and don’t go any further pass 2 ½” wide. If so, your inset will be too wide for your piece of wood.
Notched out Top & 2 Insets for Shelving
4. The bottom of your inset of the 4” x 4” post should measure @ 31 ½” to the floor.
5. Measure from the bottom of the inset to 12 ½” (mark) and mark @ 14”. The inset should measure @ 1 ½” wide. This is the section for the support for the 1st shelf.
6. Measure from the bottom of the inset to 28” (mark) and @ 29 ½” mark. This is the section for the support for the 2nd shelf.
7. Cut into the post @ 12 ½” and to 14”. The measurement that your cutting should be the width of 1 ½” wide.
8. After notching out the (2) sections on the 4” x 4” post for the shelving. Repeat (Step on the reminding 3 post. Score (little cuts) so you can take a chisel and hammer to notch out the area that will make your inset.
**Your insets should measure 1 ½” deep x 1 ½” wide on all (4) post. These measurements are for a (2” x 3”). If you are using a (2” x 4”) your measurements would still be 1 ½” deep x 1 ½”wide. Make sure that you check all of your insets measure correctly before going to the next step. Dry fit all of your pieces before moving on.
Clamping & Gluing w/Wooden Dowels
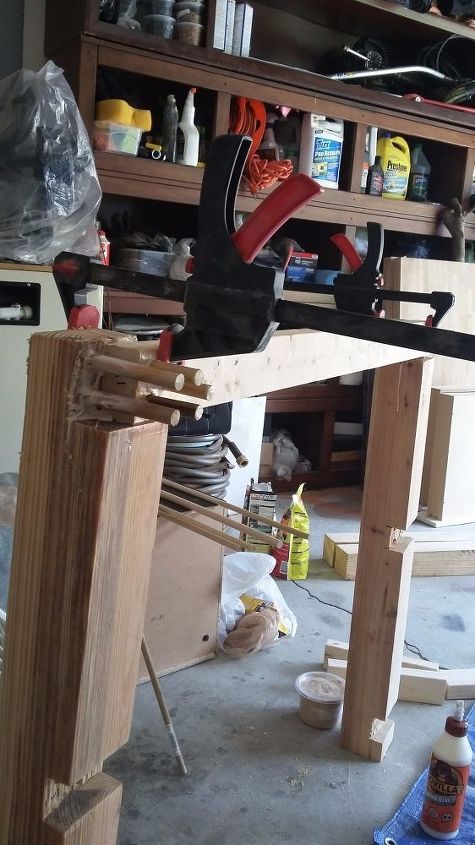
9. Clamp the 4” x 4” post (in the notched out area) and the (2” x 3”) cut 39” board (on its side) together and mark on the 2” x 3” and/or the 4” x 4”post to drill your holes at one time. Don’t use the spade bit-it will split your wood. Use the spiral ½” bit and be very careful. I split 3 different boards doing this. I LEARNED THE HARD WAY!!
10. Take the (2”x3”) cut @ 13 ¾” and stand it up in the notched out area at the top of the post. Mark where the 2”x3” ends. While holding the 2”x3” on the post mark at 1” from the top and 2” down. These measurements need to be on the post and the 2”x3” standing on its side inside the notched area. Clamp the (2”x 3”) cut @ 36” face up and lay it in the notched out area at the top of the board where the other 2”x3” ends. Mark out 3 equal spaces to attach the 2”x3” to the post and drill the ½” holes.
11. Go down to the bottom of the post and place the 2”x3” cut @ 10 ½” and measure 1 ½” from the inside edge. And use the drill bit ½” to attach the 10 ½” piece to the post.
12. To assemble: Clamp the 2”x3” cut @ 36”face up on the post. Then get the ½” (12) dowels cut @ 4” with wood glue (make sure you coat the entire length of the dowel) and hammer them into the post then into the 2”x3”. Make sure all of your connections are level and plum. Let dry for 24-48 hours before removing the clamps.
13. Beside the clamped 36” piece of wood; Apply wood glue to (8) wooden dowels cut @ 5 ¼” and hammer them from the outside of the post. You will know when to stop from the outside because the dowel will be all the way thru the post. Let dry 48 hours untouched.
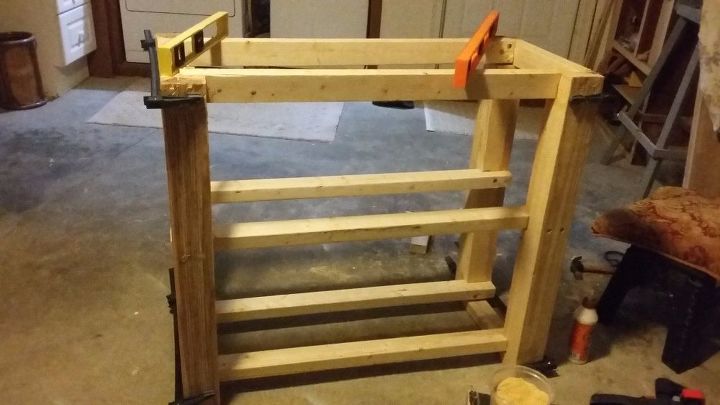
Clamping the Frame Todgether
14. Next day: Clamp the 2”x3” cut at 39” to the section of the post @ 12 ½”- 14”and 28”-29 ½”. Take the (16) dowels cut @5 ¼” lather up on wooden glue and pour glue into the ½” holes. Hammer the dowels into the post then into the 2”x3”. Make sure all of your connections are level and plum. Let dry for 24-48 hours untouched.
15. I labeled the post A, A1 the top notched area, A2 (1st inset), & A3 (2nd inset) for B, C, & D. Attach by the 36” board A & C are attached. B & D are attached to each other. On 1 post- Line up the 2”x3” to the dowels already attached to the post using wood glue and a hammer on the piece of wood cut @ 13 ¾”. Clamp down to set/dry for 24 hours. Repeat on the other post that are joined together. Make sure all of your connections are level and plum.
16. Attaching the post together with the wood cut @ 13 ¾” (both tops) and the opposite post across with the dowels already set. Next, apply glue to the (4) 3” dowels and hammer them into the 2”x3” cut @ 10 ½” then into the bottom pre-drill holes. Attaching both sets of post together becoming one structure. Clamp & let dry/set for
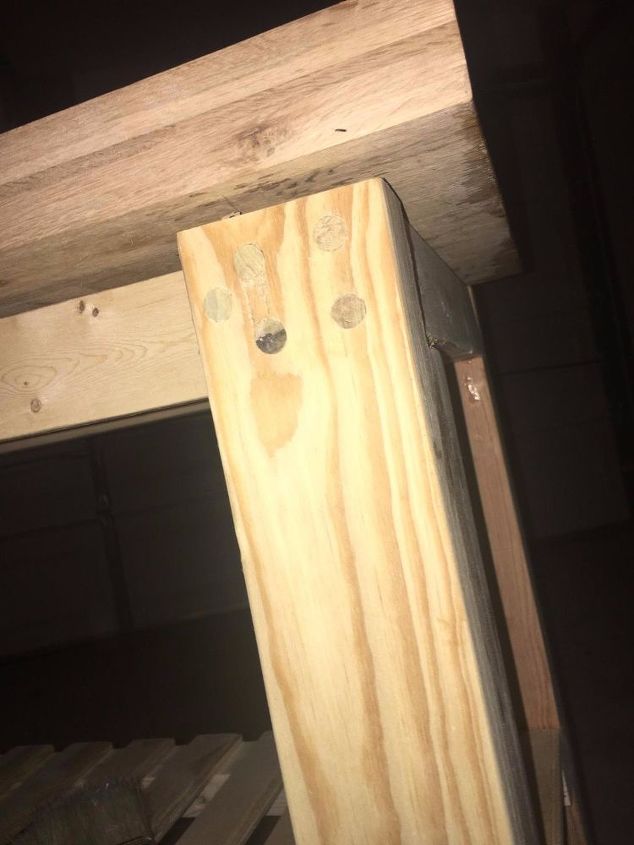
View of Wooden Dowels from the Front
1. Measure down 1 ¾” on the boards measuring (2)13 ¾”; measure @ 4” and 8” on both boards. Then (2) 36”measure 12” and 24” on both boards. Drill down 1 ¾” into the board and drill down 1 ¼” into the butcher block at the corresponding measurements. This is to attach the butcher block to the frame. Using the dowels cut @ 3” (8) lather up and hammer into the butcher block 1st then into the frame.
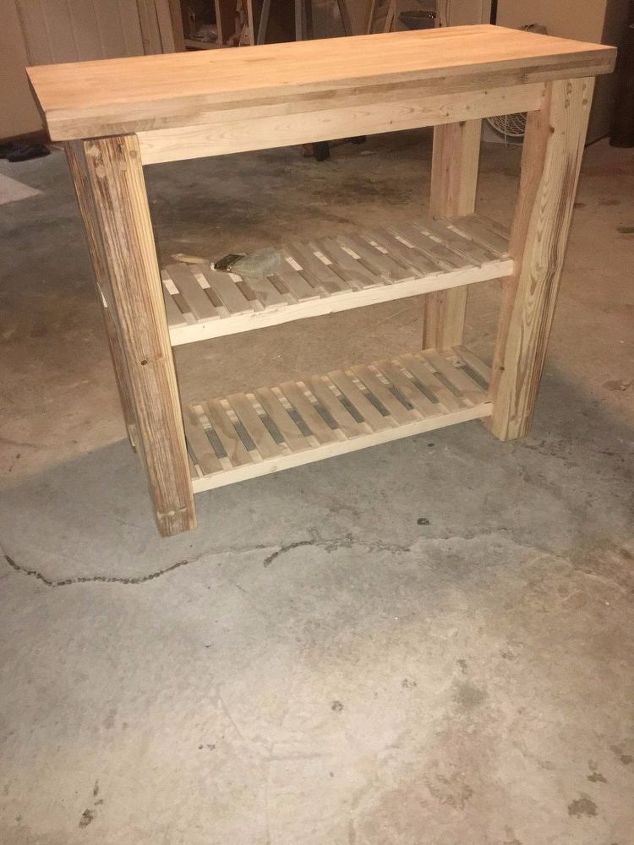
Side View w/Slates
18. Measure down 1 ¾” on the boards measuring (2)13 ¾”; measure @ 4” and 8” on both boards. Then (2) 36”measure 12” and 24” on both boards. Drill down 1 ¾” into the board and drill down 1 ¼” into the butcher block at the corresponding measurements. This is to attach the butcher block to the frame. Using the dowels cut @ 3” (8) lather up and hammer into the butcher block 1st then into the frame.
Little "D" Brought me a Helper-Monkey
19. I used wood in the garage for the slates. It was a piece of plywood.
My son is 230 lbs and 6' 3 1/2". I'm sure that this Island would be able to hold anything that you can throw at it.
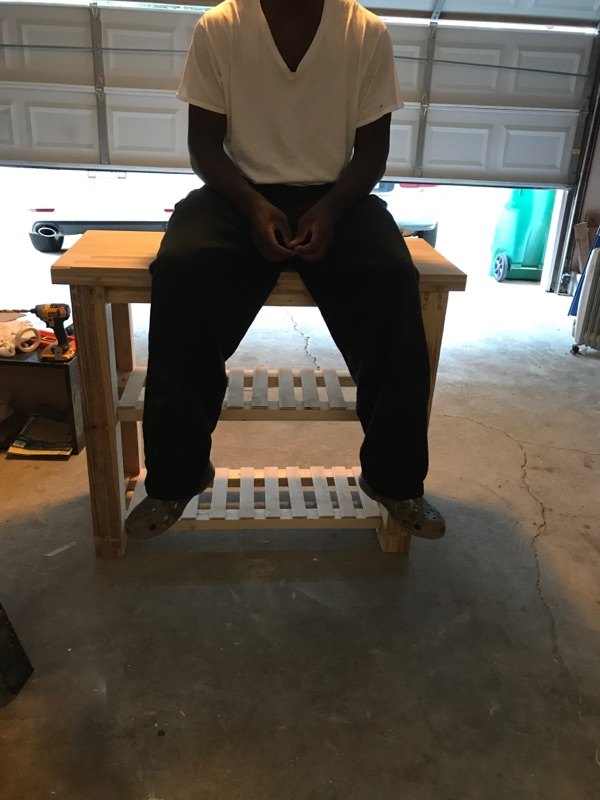
My son is 230 lbs and 6' 3 1/2". I'm sure that this Island would be able to hold anything that you can throw at it.
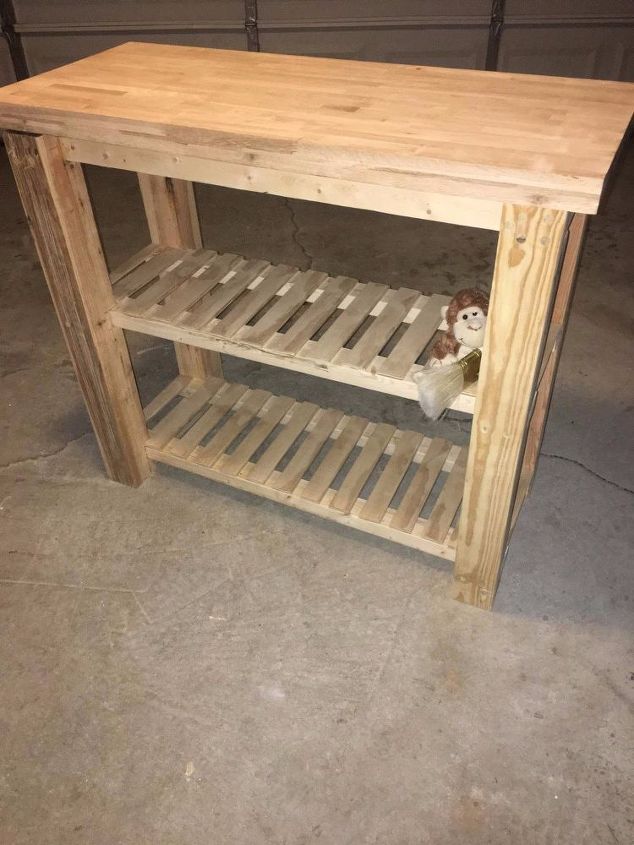
Front View of Island-Seamless
All of this is without screws and nails. This method was used before screws/nails was used to build. I wanted to think outside of the modern world that we live it but make something that is useful. I haven't stained it yet because I'm not sure which one to use but for sure I'm using Teak Oil on the butcherblock without stain. Thank you. Have a good D.I.Ying!!
Comments
Join the conversation
2 of 11 comments
-
Wow, you really know your way with carpentry! Gorgeous island! I love how your son sat atop to show its sturdiness- smart & cute of you :-)
-
Greetings!! I really appreciate your positive end encouraging comments. Thank you for your time.
Kimberly


Frequently asked questions
Have a question about this project?